Photoshop's Brush Tool is a cornerstone for digital artists, illustrators, and designers, offering a vast spectrum of creative possibilities. This guide delves into the intricacies of this fundamental tool, moving from basic usage of presets to the advanced creation and manipulation of custom brushes. Whether you are a beginner looking to grasp the essentials or an intermediate user aiming to deepen your understanding, this tutorial will illuminate the power and versatility of Photoshop's painting capabilities. We will explore how to effectively utilize existing brush presets, embark on the journey of crafting your own brushes from scratch, fine-tune their properties, and leverage blending modes and pressure controls for nuanced artistic expression, alongside several insightful tips and tricks.
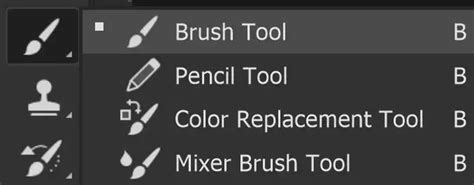
The Fundamentals of the Brush Tool
The Brush Tool in Photoshop functions much like a traditional drawing instrument, applying color to your canvas through strokes. At its core, it operates by depositing a shaped mark onto a selected layer. As you maintain pressure with your mouse or stylus on a tablet, multiple marks are laid down consecutively, forming a continuous stroke until the pressure is released. Understanding the essential options available for the Brush Tool is crucial for effective manipulation. These primary settings include Brush Tip Shape, Blending Mode, Opacity, and Flow.
Brush Tip Shape: Defining Your Mark
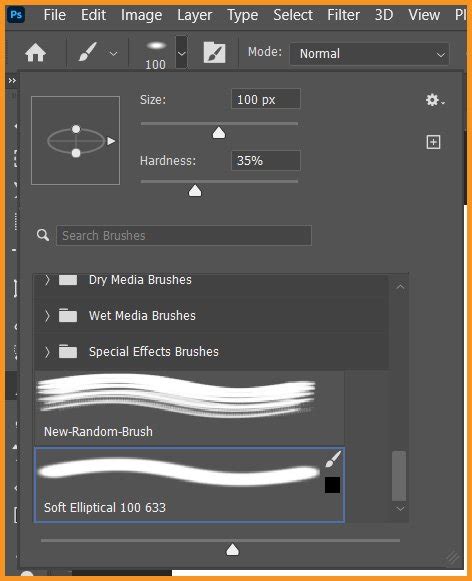
The Brush Tip settings are fundamental to controlling how color is applied to your Photoshop document. Within the Options Panel, you'll find the Brush Preset Picker, which houses a variety of built-in brush presets.
- Size: This slider or the
[and]keys allows you to increase or decrease the diameter of your brush tip. - Hardness: This setting dictates the strength of the brush tip's border. A higher hardness value results in a sharp, defined edge, while a lower value creates a softer, feathered edge.
- Foreground Color: The color applied by the brush tip is determined by the Foreground Color swatch, located at the bottom of the Tools toolbar.
The Preset Picker offers different display options for visualizing the available brushes. Furthermore, you can efficiently manage your brush collection by loading, saving, replacing, or appending existing brush sets.
Blending Modes: Integrating Color with Existing Pixels
Each time you paint a stroke, you have the option to select a Blending Mode. These modes function identically to layer blending modes, dictating how the applied color interacts with the underlying pixels. Some modes are particularly useful for darkening or adding depth to objects (such as Darken, Multiply, and Overlay), while others excel at introducing light and vibrancy (like Lighten, Color Dodge, and Linear Dodge). Experimentation with these modes can yield a wide array of creative effects.
Opacity and Flow: Controlling Color Application
- Opacity: This setting controls the transparency of the color you apply. With each pass of the brush over the same area, the opacity will not exceed the set level until the mouse button is released. Subsequent strokes over the same area will build up color incrementally. A quick way to adjust opacity is by pressing number keys on your keyboard: a single number key sets opacity in 10% increments (1 for 10%, 0 for 100%), while two number keys allow for precise settings.
- Flow: The Flow setting governs the rate at which paint is laid down. Similar to opacity, each pass over the same spot will build more paint. However, Flow offers a more nuanced control, mimicking traditional painting techniques where successive light passes create a build-up of color. This is particularly useful for achieving subtle gradients and textures. With Opacity set to a lower percentage and Flow also set low, layering strokes creates a distinctive pattern of overlapping streaks, a hallmark of digital art.
Blending Modes - Photoshop for Beginners | Lesson 5
The Brush Settings Panel: Deep Dive into Brush Behavior
The Brush Settings panel is your command center for creating, editing, saving, and loading specific brush behaviors and presets. Access it by navigating to Window > Brushes.
Creating Custom Brushes from Scratch
One of Photoshop's most powerful features is the ability to create custom brushes from any image. To begin, find an image that you wish to transform into a brush tip. For instance, an image of birds on a transparent background is ideal. Mask or erase all but the desired elements of the image. Once you have isolated the shape, it will appear in the Brush Settings Panel and the Brush Preset Picker.
To create a brush from this selection:
- Ensure the desired shape is isolated on its own layer or selection.
- Go to
Edit > Define Brush Preset.... - A dialog box will appear asking you to name your new brush.
- Click
OK. Your custom brush will now be available in the Brush Preset Picker and the Brushes panel.
Advanced Brush Tip Shape Options
Within the Brush Settings panel, under Brush Tip Shape, you can fine-tune the characteristics of your brush tip:
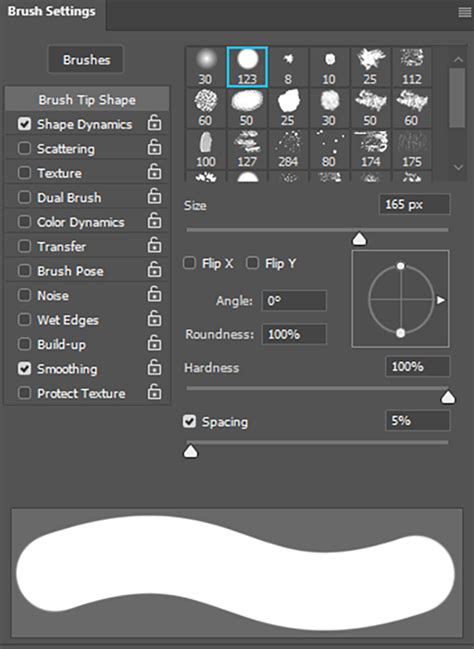
- Spacing: This setting determines the distance between individual stamps of the brush tip as you create a stroke. Increasing spacing creates a dotted line, while decreasing it results in a smoother, more continuous stroke. For a smooth brush stroke, the default spacing is often too high, and lowering it to around 13% is a common practice.
- Hardness: As mentioned earlier, this controls the edge definition of the brush tip.
- Diameter: This directly adjusts the size of the brush tip.
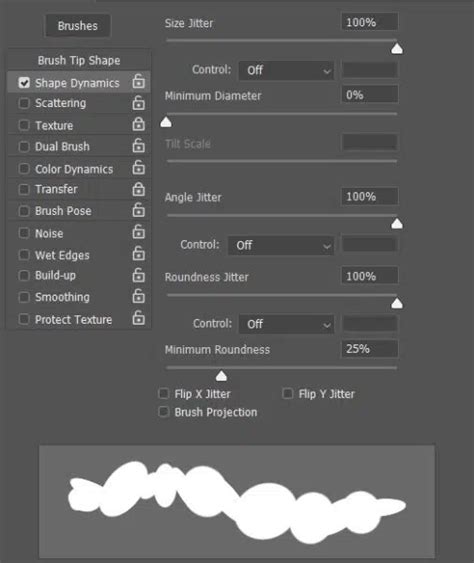
Shape Dynamics: Adding Randomness and Control
The Shape Dynamics section offers a wealth of options for controlling the randomness and variation of your brush strokes:
- Size Jitter: Introduces variation in the size of individual brush marks within a stroke.
- Angle Jitter: Varies the angle of the brush tip.
- Roundness Jitter: Alters the roundness of the brush tip.
- Control Options: Crucially, you can link these jitter settings to various inputs.
Pen Pressureis ideal for drawing tablets, allowing stroke characteristics to vary with how hard you press.Pen TiltandStylus Wheeloffer similar control based on hardware input.Directionis particularly useful for ensuring the brush tip follows the direction of your stroke, making it appear more natural. - Flip X/Y Jitter: Randomly flips the brush tip horizontally or vertically.
Scattering: Distributing Brush Marks
The Scattering option controls the distribution of brush marks along a stroke.
- Scatter: Determines the degree to which the brush marks are spread out from the stroke path.
- Both Axes: When checked, scattering occurs along both the X and Y axes.
- Count Jitter: Adds randomness to the number of marks within a stroke.
Color Dynamics: Introducing Color Variation
This section allows for variation in the color applied by the brush across a single stroke.
- Foreground/Background Jitter: Controls the degree of variation between the foreground and background colors.
- Hue Jitter: Introduces randomness in the hue of the applied color.
- Saturation Jitter: Varies the saturation of the color.
- Brightness Jitter: Alters the brightness of the color.
Dual Brush: Combining Brush Tips
The Dual Brush feature allows you to combine two brush tips to create a unique mixed mark. The texture of the second brush is applied within the stroke of the primary brush, with only the intersecting areas being painted. This can create complex and interesting textures.
Texture: Adding Surface Detail
Textured brushes use a pattern to simulate painting on a textured surface, such as canvas or art paper.
- Pattern: Select a pattern from the pop-up panel.
- Pattern Scale: Adjust the scale of the applied texture.
- Texture Each Tip: If selected, a new instance of the texture is applied with each brush stamp.
- Protect Texture: Ensures that the same pattern and scale are applied to all brush presets that have texture, regardless of their individual settings.
Other Important Brush Settings
- Build Up: This setting simulates traditional airbrushing, where sustained pressure leads to a larger and more opaque mark.
- Smoothing: Essential for creating fluid, smooth curves, especially when drawing with a mouse. A higher percentage results in smoother strokes. Photoshop's smoothing engine uses a "pulled string" concept, where the length of the string increases with the percentage. You can make this "string" visible by checking
Show Brush LeashinEdit > Preferences > Cursors. - Transfer: This panel offers further control, including
Opacity JitterandFlow Jitter, which can be linked toPen Pressurefor dynamic control. TheBuild Upoption here also simulates airbrushing. - Noise: Adds a random speckle effect to the brush stroke.
- Wet Edges: Simulates the effect of watercolor brushes, where the edges appear more saturated.
- Build Up: Similar to the airbrush effect, this allows paint to build up with sustained pressure.
- Dual Brush: As mentioned earlier, this allows for the combination of two brush tips.
- Color Dynamics: Provides control over color variations within a stroke.
- Texture: Applies a pattern to the brush stroke.
- Smoothing: Ensures smoother brush strokes, particularly useful for mouse users.
- Protect Texture: Applies the same texture settings to all brushes that utilize texture.
When creating or modifying brushes, ensure Include Tool Settings is checked if you want to save options like opacity and flow with your brush preset.
Managing Your Brush Library
The Brush panel is not only for editing but also for organizing your brushes. You can delete individual brushes or entire groups by right-clicking and selecting Delete Brush. This is crucial for maintaining a clean and efficient workspace.
Beyond the Basics: Practical Applications and Resources
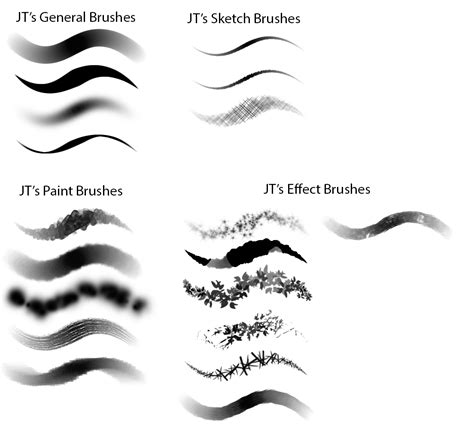
The Brush Tool's capabilities extend far beyond simple mark-making. It's instrumental in creating realistic effects like rain, snow, and smoke, painting natural hair detail, and performing intricate selections.
Realistic Effects with Custom Brushes
- Rain and Snow: Custom brushes can be designed to simulate various intensities of rainfall or snowfall, from light drizzles to heavy downpours.
- Smoke and Fog: Brushes created from photographic elements of smoke or fog can add atmospheric depth and mood to images.
- Clouds: A custom cloud brush, derived from a photograph of real clouds, can quickly enhance sky elements in landscape images.
- Light Rays and Mist: Brushes can be used to paint in ethereal light rays or morning mist, adding subtle environmental details and restoring lost shadow detail.
Hair and Selections
Creating realistic hair detail when cutting subjects out from backgrounds is a common challenge. Custom brushes, designed to mimic the texture and flow of specific hair types, can significantly improve the accuracy and naturalness of these selections and composites. This is particularly useful when dealing with fine or wispy hair against complex backgrounds. The Pen Tool is often used in conjunction with custom brushes for precise hair rendering.
Simulating Traditional Media
Photoshop brushes can effectively replicate the look and feel of traditional art media. A custom watercolor brush, for instance, can impart a hand-painted aesthetic to digital artwork.
Exploring Brush Resources
While creating your own brushes offers ultimate control, there are numerous sources for high-quality pre-made brush packs. Platforms like Envato Elements offer a wide variety of brushes, including:
- Shader Brushes: For adding grungy and brutal textures to illustrations.
- Realistic Paint Brushes: To achieve authentic painted effects.
- Spray Paint Splatters: Ideal for posters, collages, and graphic design.
- Abstract Brushes: For adding movement and dynamism to illustrations and photos.
- Smoke Brushes: For dramatic visual effects.
- Halftone Gradient Brushes: Useful for comic book styles, photo overlays, and decorative elements.
- Network Turbulence Brushes: For futuristic and edgy designs, suitable for CD covers and book covers.
When importing and using downloaded brushes, ensure you follow the installation instructions for your specific version of Photoshop.
Advanced Techniques and Considerations
Pen Pressure and Tablet Input
For users with pressure-sensitive drawing tablets, pen pressure, tilt, and stylus wheel offer unparalleled control over brush behavior. This allows for dynamic changes in size, opacity, and flow based on how you physically interact with the stylus, leading to more organic and expressive artwork.
Brush Cursor Display
You can customize how the brush cursor is displayed in Photoshop. Under Edit > Preferences > Cursors, you can choose to show the brush tip as a crosshair, the brush tip itself, or a combination. Show Brush Leash can also be enabled to visualize the smoothing "string."
Third-Party Stabilizers
For users of older Photoshop versions that lack robust smoothing features, third-party stabilizers like Lazy Nezumi Pro can be beneficial. While these are paid tools, they offer advanced stroke smoothing that can work across multiple applications.
The Brush Tool in Photoshop is a universe of possibilities waiting to be explored. By understanding its fundamental settings, mastering the Brush Settings panel, and experimenting with custom brush creation, you can elevate your digital art to new heights. This foundational knowledge is the first step in a journey that promises endless creative exploration.