Curved text in a presentation can immediately grab attention and lend a more creative appearance to your slides. While Google Slides, by design, prioritizes lightweight online collaboration and quick editing, it doesn't offer a built-in tool to curve or warp text directly. This absence can be a hurdle for professionals aiming for a sophisticated, polished look that rivals top-tier consulting firms and creative agencies. However, the good news is that with a few smart workarounds, you can still create curved text that looks clean and professional, effectively breaking the monotony of horizontal lines and enhancing visual hierarchy.
The Need for Visual Flair in Presentations
In the competitive world of high-stakes presentations, visual hierarchy is your silent partner. You have likely experienced that moment where a slide feels functional but lacks a certain professional polish. Often, the difference lies in the details - specifically, how you break the monotony of horizontal lines. Curved text is a classic design element used by top-tier consulting firms and creative agencies to anchor titles, create sophisticated emblems, and draw the eye toward central focal points. However, users quickly run into a technical wall: Google Slides, by design, favors collaborative efficiency over complex graphic manipulation. It does not possess a native button to bend or warp text. This is a deliberate choice by Google to keep the application lightweight, but for a professional aiming for a McKinsey-level aesthetic, it can be a frustrating roadblock. The good news is that creative constraints fuel innovation.
Method 1: The Precision Method - PowerPoint Vector Integration
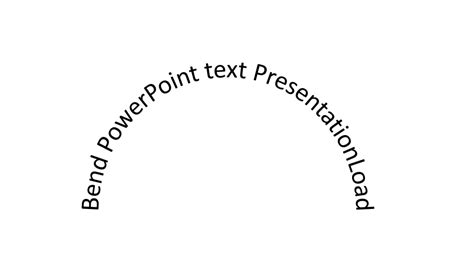
If your priority is geometric perfection - such as creating a circular logo or a perfectly arched headline - the PowerPoint import method remains the gold standard. This approach leverages the powerful WordArt Transform engine found in desktop applications and brings that visual authority into your cloud-based presentation.
The Workflow
- Create the Master Object: Open a PowerPoint slide and insert a Text Box.
- Apply the Transform: Navigate to the Shape Format tab, select Text Effects, and choose Transform. Here, you can select specific arcs, circles, or paths.
- Optimize for Import: Adjust the pink handle to change the intensity of the curve. Ensure the font size and color match your Google Slides theme perfectly before moving it.
- The Transfer: Copy the object (CTRL+C) and paste it into Google Slides. It will typically import as a high-quality vector-like object or a crisp metafile.
The Professional Trade-off: While this offers the most precise control over the arc, the text becomes a static image once it is in Google Slides. If you need to change a typo, you must return to the source file. For high-stakes title slides, this extra effort is often worth the polished result. This method works best if you already use PowerPoint or need precise curved text effects. PowerPoint offers native text-warping tools, making it ideal for making logos or title slides.
Method 2: The Native Workaround - Multi-Box Rotation
For those who need to stay within the Google ecosystem and maintain the ability to edit text on the fly, the manual rotation method is surprisingly effective. This is best suited for short phrases or decorative branding.
The Strategy
- Segment the Text: Instead of one long text box, break your phrase into individual words or small clusters of 2-3 characters.
- Duplicate and Arrange: Create multiple copies of these boxes (CTRL+D).
- The Curve Manual: Click the rotation handle (the small dot above the box) and tilt each segment by 5-10 degrees relative to the previous one.
- Alignment Guides: Use the red snapping guides in Google Slides to ensure the baseline of each word follows a consistent imaginary circle.
Why It Works: This method keeps your presentation entirely native. You can change colors, fonts, and the text itself without leaving the browser. Text box rotation works inside Google Slides. It is simple and quick, without the need for extra tools. The trade-off is the precision, as the curve won’t be perfect. Insert a text box and type your text. Duplicate the text box by pressing CTRL + D several times. Click on the text box. Text box rotation is simple, and you can adjust the curve, position, and text at any time. While it lacks the fluid smoothness of a generated vector, it adds a handcrafted, organic feel that works exceptionally well for creative pitches.
Method 3: The Creative Suite Synergy - Canva and Third-Party Tools
When logic dictates that speed is more important than native editability, professional designers often turn to specialized design platforms like Canva or Figma. These tools feature advanced typography algorithms that handle character spacing (kerning) automatically as text bends. Using a third-party tool is often the easiest way to create smooth, polished curved text.
The Steps
- Design in Canva: Open a new project and use the Effects menu on any text element to select Curve. You can use a slider to achieve everything from a gentle wave to a full 360-degree circle.
- The Export Secret: Do not download as a JPG. To avoid the dreaded white box around your text, you must export as a PNG with a transparent background.
- The DPI Factor: If your text looks blurry, ensure you are exporting at at least 2x resolution. Google Slides tends to compress images upon upload, so starting with a high-resolution file is crucial for maintaining a sharp, professional look.
Maintaining Brand Integrity: To make the curved text look like it belongs in the presentation, ensure you are using the exact HEX color codes and font families from your Google Slides theme within the third-party tool before exporting. We will show you how to make curved text in Google Slides using Canva. Open Canva and go to New > Create a design. Select the text box, and then click Effects in the top menu to see the curved text effect. Step 3: Download your design.
Method 4: The Technical Path - Google Apps Script
For the power user or the developer who needs to create multiple curved elements across a large organization, Google Apps Script offers a way to automate the process. This doesn’t warp the letters; instead, it uses code to calculate the X and Y coordinates for every character, placing them along a mathematical arc.
The Concept
By going to Extensions > Apps Script, you can write a script that takes a string of text and generates a series of text boxes arranged in a semicircle. The App script does not truly curve the text visually. Instead, it lets you place individual characters along a path. Paste the code /HTML files to add a new curved text menu to the Google Slides. The Script places each letter in a separate text box along an arc. You have added curved text to a Google Slide.
Why Use This?
This is the only way to achieve a curved effect that is technically “native” and repeatable. However, because it creates a separate text box for every single letter, it can make the slide difficult to manage manually afterward. It is a brilliant solution for those who prioritize technical consistency over manual design.
How To Curve Text in Google Docs (Step By Step)
Troubleshooting: Avoiding Common Design Pitfalls
A curved title can either elevate a slide or make it look amateurish. To ensure your presentation maintains an authoritative tone, avoid these three common mistakes:
The Blur Effect
If your imported text looks fuzzy, it is likely a resolution issue. Always prioritize PNG over JPG. If the text is still blurry, try enlarging the image in the source tool (like Canva) before downloading, then shrinking it down within Google Slides. Curved text looks blurry in Google Slides. This usually happens when the image is downloaded at low resolution. Re-download the curved text from Canva as a PNG, using the largest possible file size. Avoid JPG files, which can lose sharpness.
The Visual Clutter
Curved text is a high-impact element. If you use it alongside complex charts and busy backgrounds, it creates cognitive overload. Use curved text only when you have significant white space. Curved text does not match your slide theme. Once imported to Google Slides, the text cannot be edited. Match the font, color, and style in Canva before downloading. You can save brand colors and fonts in Canva for easy reuse.
Inconsistent Kerning
When text curves, the space between letters at the top (the cap height) often spreads while the bottom pinches. If you are doing this manually (Method 2), pay close attention to the visual rhythm of the letters to ensure they remain legible. The text feels awkwardly placed on the slide. Curved Text can look unbalanced when dropped randomly onto the slide. To fix it, use the alignment guides in Google Slides.
Beyond the Manual Hack: How Professional Tools Redefine Slide Design
While these workarounds are useful, they underscore a larger problem: professional slide design is often bogged down by technical friction. You should be spending your time on high-level strategy and logical storytelling, not fighting with text box rotation handles. This is exactly why advanced AI-powered presentation tools are emerging. These platforms can automate sophisticated design elements, including curved text, by applying advanced layout logic that incorporates high-end typography and balanced visual hierarchies automatically.
Why AI-Powered Tools are the Choice for High-Stakes Reporting:
- Strategic Logic: These tools don’t just make slides pretty; they ensure they follow the structural rigor of top consulting firms.
- AI-Powered Layouts: The system understands visual weight. It can place text, data, and imagery in a way that guides the audience’s eye, often achieving sophisticated effects that would take hours to do manually.
- Seamless Export: Move from raw data to a fully editable, professional deck in minutes, bypassing the need for third-party workarounds.
Rapid Tips to Bend Text in Google Slides
Even though Google Slides doesn’t have a native text bending tool, there are plenty of easy workarounds to make your text curve beautifully.
- Use Word Art: Insert “Word Art” and manually adjust its shape. Word Art lets you add text with a bit more flexibility than regular text boxes.
- Use Curve Text Generator: Use online tools to create curved text and insert it as an image.
- Use Google Drawings: Design curved text in Google Drawings and import it into your slide. Use the Size & Rotation settings to rotate the text slightly.
- Use a Third-Party Add-on: Add-ons like “Text Curver” can help bend text easily. Google Slides has add-ons that can help with bending text.
- Use Canva: Create a New Design in Canva, select the text option, and then apply the curved text effect. Download as a transparent PNG.
Frequently Asked Questions
Q: Will curved text affect the accessibility of my presentation?
A: Potentially. Screen readers struggle with text that is split into individual boxes or saved as an image. To maintain E-E-A-T standards and accessibility, always include the curved text content in the Alt Text or the Speaker Notes.
Q: Can I curve text on the Google Slides mobile app?
A: Currently, no. You must use a desktop browser to implement these workarounds.
Q: What is the best font for curved text?
A: Sans-serif fonts (like Inter, Montserrat, or Roboto) tend to handle bending much better than Serifs. You can curve text in Google Slides by using text box rotation, Word Art styling, or external design tools to mimic a curved text effect. The easiest method is usually creating curved text with external tools and inserting it into Google Slides. There are several ways to add curved text to your Google Slides, even without a built-in feature. Formatting limitations: Keep in mind that the pasted text might not be fully editable in Google Slides.
Curved text may not be built into Google Slides, but as you have seen, that doesn’t affect your creativity. Whether you choose a quick third-party tool or another method covered in this guide to bend text in Google Slides, the key is choosing what fits your project. Still have questions? You are not alone. No, Google Slides on a Chromebook does not support text wrapping or curved text. Add your text and apply a curved text effect. Yes! Even though Google Slides doesn’t have a built-in text bending tool, there are plenty of easy workarounds to make your text curve beautifully.
Curving text in Google Slides is a small design choice that signals a large commitment to quality. Whether you use the precision of a PowerPoint import or the speed of a third-party design tool, the goal is to break the audience’s expectations and command their attention. However, remember that design is the servant of logic. A beautiful slide with a weak argument will still fail. Use these tips to enhance your visual authority, but let the strength of your ideas lead the way. Stop struggling with basic tools. Start projecting professional authority.