Removing a background by selecting the subject cleanly is one of those skills every photo editor ends up using sooner or later. Whether you’re preparing product photos, retouching portraits, or building graphics for a campaign, being able to separate the subject from the rest of the image makes your work look polished and intentional. Once the subject is isolated, you can drop it onto a new background, build a composite, or simply keep things looking sharp and distraction-free. Photoshop has become incredibly good at this over the years. What used to take a lot of careful manual tracing can now be done with a mix of smart tools and precise controls. Beginners get something quick and easy to work with, while experienced editors still have all the fine-tuning options they need.
In this guide, we will cover the main ways to select a subject and remove a background in Photoshop. You’ll see five different approaches-from fast, one-click methods to techniques that give you full control-along with practical tips to avoid common issues and keep your workflow efficient. By the end, you’ll have a reliable set of tools you can use for almost any kind of image.
Understanding Subject Selection Basics in Photoshop
Selecting the subject is the foundation of any background removal step in Photoshop. Before you erase, replace, or redesign anything behind your subject, you need a clean, accurate outline of the person or object you want to keep. If that first step isn’t solid, the rest of your edit will never look convincing.
A good selection protects the edges and fine details-things like hair, fabric texture, or thin shapes that easily get lost. Photoshop offers a wide mix of tools for this, from quick automatic options to precise hands-on methods. Which one you choose usually depends on how complicated the image is, how busy the background looks, and how much contrast you’re working with.
Some of the trickiest situations involve wispy hair, fur, transparent materials, or subjects sitting in front of messy, patterned backgrounds. Getting these right takes a bit of extra care, but learning how to manage these details makes a huge difference in the realism of the final edit.
Key Factors to Remember
- The goal is to isolate the main person or object so it can be edited separately from everything behind it.
- Clean selections prevent the common problems: jagged edges, halos, leftover background bits, or that obvious “cut-out” look.
- Photoshop gives you a spectrum of tools-quick automatic options like Select Subject, as well as manual tools like the Pen Tool when you need full control.
- Complicated edges (hair, fur, smoke, transparent materials) usually need extra refinement in Select and Mask.
- High contrast between the subject and the background usually makes automatic tools perform better.
- Using layer masks instead of deleting pixels keeps your edit flexible and non-destructive.
- Typical mistakes include hard edges, missed areas, or color fringing. These can be fixed with edge refinement and cleanup after the main selection is done.
How to Perform Subject Selection and Background Removal in Photoshop (5 Tested Methods)
There are plenty of ways to pull a subject out of its background in Photoshop, and each method has its own personality. Some tools get the job done fast with hardly any effort, while others give you the chance to really shape the edges and control every pixel.
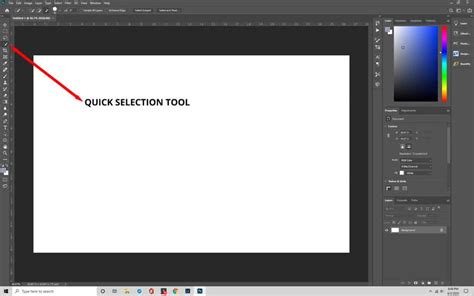
Method 1: Quick Selection Tool
The Quick Selection Tool is one of those features most Photoshop users reach for when they need to grab a subject quickly. It works a lot like painting: you drag the brush over the area you want, and Photoshop tries to snap to the edges on its own. When the subject clearly stands apart from the background, this tool can lock onto the shapes surprisingly fast, giving you a usable selection in just a few strokes. That said, it isn’t magic. If the edges are soft, the background is busy, or there are transparent sections-like lace, glass, or loose hair-the tool can struggle and grab too much or too little. In those cases, people usually take the rough selection into Select and Mask for cleanup. A bit of extra refining there smooths out the mistakes and helps turn a quick draft into a clean, professional result.
Steps to Know:
- Open your image and select the Quick Selection Tool from the toolbar.
- Brush over the parts of the subject you want to select.
- Allow the tool to detect edges and expand the selection automatically.
- Use “Add to selection” mode to include missed areas.
- Switch to “Subtract from selection” mode to remove unwanted background.
- Refine edges using the Select and Mask feature if necessary.
- Apply a layer mask or delete the background based on your needs.
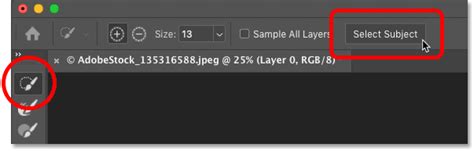
Method 2: Select Subject Command
Select Subject is Photoshop’s quick way of figuring out what you’re trying to isolate. You hit the button, and it makes its best guess at outlining the main person or object in the shot. When the subject is clear and well-lit, it usually does a decent job and saves you from having to drag a selection tool around every edge.
Of course, it’s not perfect. Complicated hair, weird shadows, or anything blending into the background can throw it off. That’s why most people take the initial selection straight into Select and Mask. There, you can tighten up the outline, smooth the rough patches, and fix anything the automatic pass didn’t catch. After a bit of cleanup, the selection is usually solid enough for a clean background removal.
Steps to Know:
- Open your image in Photoshop.
- Go to Select > Subject to activate automatic selection.
- The subject is detected and outlined automatically.
- Review the selection and fine-tune edges in the Select and Mask workspace.
- Use the Refine Edge Brush to handle tricky parts (e.g., hair).
- Output the selection as a mask or directly delete the background.
Method 3: Object Selection Tool
The Object Selection Tool sits somewhere between full automation and hands-on control. Instead of selecting everything for you, it lets you roughly mark the area where your subject is, and Photoshop tries to figure out the edges inside that region. All you have to do is drag a box or a loose lasso around the object, and the program does the detailed outlining for you. It’s a great choice when the scene is cluttered or when there are several objects close together, and you only want one of them. Most people use this tool when they want to work quickly but still keep a bit of control. It’s also handy for step-by-step editing-make a rough selection, adjust a few areas by hand, and refine it before you move on to masking or removing the background.
Steps to Know:
- Select the Object Selection Tool from the toolbar.
- Draw a rectangle or lasso roughly around the subject.
- Photoshop automatically creates a selection inside the defined area.
- Use the add or subtract selection brushes to adjust the selection if necessary.
- Refine edges and details using Select and Mask.
- Apply a layer mask or remove the background as needed.
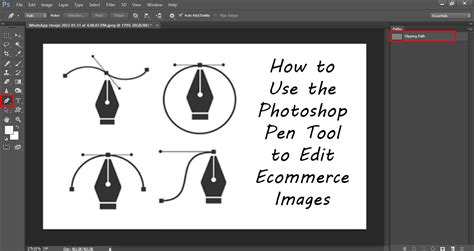
Method 4: Pen Tool for Advanced Selection
The Pen Tool is a traditional method for making selections in Photoshop on the image. Instead of relying on the software to guess the edges, you can select the outline yourself. It’s slower than the automatic tools, but nothing else gives you this level of control when the edges need to be exact.
Designers often use it for products, logos, and anything with clean, defined shapes-especially when the colors or textures blend too much for Photoshop’s automatic options to understand. If you take the time to learn it, the Pen Tool lets you create paths that you can save, tweak later, and convert into selections whenever you need them.
Steps to Know:
- Choose the Pen Tool from the toolbar.
- Click to place anchor points along the edge of the subject, dragging to curve lines as needed.
- Complete the path by connecting back to the first anchor point.
- Right-click the path and choose “Make Selection.”
- Adjust feathering if desired and click OK to confirm the selection.
- Use the selection to add a layer mask or remove the background.
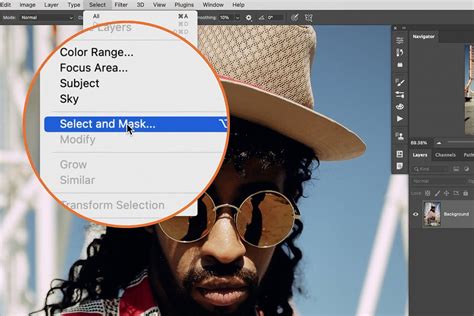
Method 5: Select and Mask Workspace
Select and Mask is needed in Photoshop when a regular selection is not enough for removing the background, along with selecting the subject. It’s built for fine-tuning tricky edges-things like hair, fur, or semi-transparent areas that often give other tools trouble. Inside this workspace, you get brushes, sliders, and edge-refining options that let you smooth, feather, and adjust your selection with precision. The workspace is especially helpful for turning rough selections into clean, professional-looking masks. You can switch between different background views to see exactly how your subject will look once it’s separated. Mastering Select and Mask is what allows editors to take a good selection and make it look seamless, even in situations where automatic tools leave rough or uneven edges.
Steps to Know:
- Make an initial selection using any preferred tool.
- Click “Select and Mask” in the options bar to enter the workspace.
- Use the Refine Edge Brush to paint over soft or hairy edges.
- Adjust Smooth, Feather, Contrast, and Shift Edge sliders to hone the selection’s boundary.
- Change the background view to check the selection against multiple contrasts.
- Output the refined selection to a layer mask or a new layer with a mask.
- Continue fine-tuning with brush tools if necessary.
How to Select a Subject and Remove the Background in Photoshop CC
Start by picking the subject in your image. If it’s obvious and stands out from the background, you can try Select Subject. One click and Photoshop highlights the object for you-it’s quick and saves a lot of time compared to tracing by hand.
Once the selection is made, switch to Select and Mask to clean it up. Hair, fur, or soft edges often need a little extra attention. You can smooth, feather, or tweak the edges until they look natural. Switching to the background helps you see if anything doesn’t look good in the image. Instead of deleting the background, use a layer mask. You can replace the background, adjust the selection, or fix the mistakes easily.
Select subject in one click background change/remove | Photoshop cc 2019 tutorial in Hindi
Steps to Know:
- Open your image in Photoshop CC.
- Go to Select > Subject; Photoshop will automatically detect and select the main subject.
- Click “Select and Mask” on the toolbar to enter the refinement workspace.
- Use the Refine Edge Brush to clean up complex edges such as hair or fur.
- Adjust sliders like Smooth, Feather, and Shift Edge to enhance edge transitions.
- Output the refined selection as a layer mask.
- Use the mask to remove the background without deleting pixels, allowing flexible future edits.
How to Select a Subject and Remove the Background in Photoshop 7.0 (Bonus Tip)
Photoshop 7.0 doesn’t have any automatic tools to pick out your subject, so everything has to be done manually. To select a subject, most people use the Lasso Tool or the Polygonal Lasso Tool. You carefully trace around the edges, point by point or freehand, which takes patience but gives you full control. If you’re willing to work slowly, you can get very clean selections. Once the subject is selected, removing the background is a hands-on process. You’ll often use a layer mask, along with tools like the Clone Stamp or Healing Brush, to clean up edges and fill in any gaps left by the selection. It’s slower than modern versions, but doing it carefully allows for professional-looking results. In Photoshop 7.0, precision and attention to detail are more important than speed.
Steps to Know:
- Open your image in Photoshop 7.0.
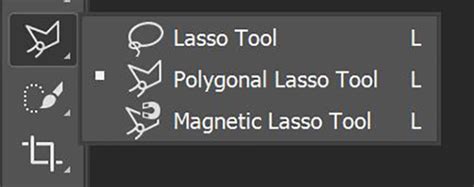
- Select the Lasso Tool or Polygonal Lasso Tool from the toolbar.
- Carefully trace the outline of your subject, connecting back to your starting point to close the selection.
- Refine the selection manually by adding or subtracting areas if needed.
- Apply a layer mask based on this selection for non-destructive editing, or delete the background if preferred.
- Use the Clone Stamp Tool to fill in any irregular gaps or background remnants.
- Apply the Healing Brush to smooth edges and blend background textures naturally.
- Zoom in to make fine adjustments, ensuring seamless separation of the subject.
1. Using Channels for Difficult Selections
Sometimes you can’t clearly see the subject against the background. That’s when channels can help. Open the Red, Green, and Blue channels one by one and look for the one where your subject stands out the most. It might be a little brighter or darker than the rest of the image. Once you find it, you can use that channel to make a selection. It’s a bit messy sometimes, but it works better than guessing with the normal selection tools.
2. Combining Tools for Stubborn Images
Some images are stubborn. One tool alone won’t cut it. I usually start with the Quick Selection Tool to get the rough shape, then go over tricky areas with the Pen Tool to fix sharp edges. If there’s still background left in hard spots, I use Color Range or the right channel to grab it. Put it all together with a layer mask, and you can clean things up without destroying anything. It takes patience, but you end up with a clean cutout, even on difficult backgrounds.
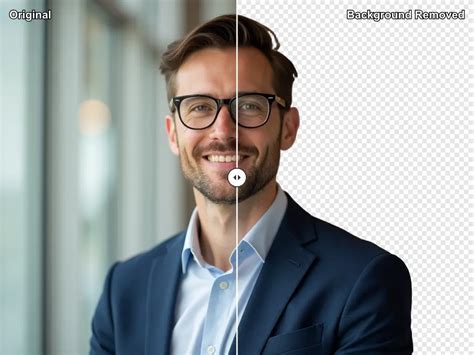
Best Photoshop AI Alternative for Selecting a Subject and Removing the Background: Pixelbin's AI Image Background Remover
If you just want to get rid of a background by selecting a subject without performing tough steps with layers and masks in Photoshop, Pixelbin is a really simple option. It works online, handles both images and videos, and doesn’t need much setup at all. The best part is how easy it is to use-no complicated steps, just upload and go.
With the premium plans, you can remove white backgrounds in batches, which is a huge time-saver if you’ve got hundreds of photos to deal with. Everything runs automatically, but the quality stays solid.
Why you might like it:
- Automatically removes backgrounds using AI.
- Supports multiple image formats (PNG, JPG, and WEBP).
- Maintains high resolution and image quality.
- Allows bulk processing of many images at once.
- User-friendly; no software install or Photoshop skills needed.
- Free to use with professional-quality output.
- Ideal for e-commerce, social media, marketing, and photography.
- Bulk background removal with accurate results.
- Supports automation with API integration.
- Works smoothly with large, high-resolution files.
Advanced Techniques and AI Enhancements
Photoshop has continuously evolved, with recent updates significantly enhancing its AI capabilities for image manipulation. New to Photoshop in 2023 are several enhancements thanks to AI.
The Remove Tool
The Remove Tool is a remarkably powerful AI-driven feature that allows for background removal with just one click. For example, you can “paint” the background in one stroke without letting go, and the tool intelligently removes it. This tool is also handy for removing unwanted objects from an image, not just backgrounds.
Object Selection Tool Enhancements
The Object Selection tool, introduced in Photoshop 2022, has become even more sophisticated. By hovering over a subject, it can often auto-select it. Holding the Shift key while using this tool can auto-select multiple objects within a defined area, making it efficient for complex scenes. To ensure a transparent background, it’s often necessary to unlock the background layer, transforming it into a standard layer.
Select Subject and Remove Background Commands
Photoshop CC 2020 introduced two powerful AI-driven commands: Select Subject and Remove Background.
- Select Subject: This command analyzes your image and automatically selects the main subject. It then leaves the selection for you to refine or use as needed. While it does the heavy lifting of selection, the actual background removal is a subsequent step, often achieved by converting the selection into a layer mask.
- Remove Background: This command builds upon Select Subject. It not only identifies and selects the subject but also automatically removes the background, creating a layer mask in the process. It's faster but can sometimes lead to less accessible refinements compared to Select Subject followed by manual masking.
When using these AI tools, it's crucial to remember that while they are incredibly fast and accurate, complex edges like fine hair or fur might still require manual refinement. The Select and Mask workspace remains an indispensable tool for fine-tuning these areas, allowing you to add missing parts to selections or adjust mask visibility.
Quick Actions and Background Eraser Tool
For those seeking speed over absolute perfection, Photoshop offers Quick Actions for background removal. While fast, these might not always yield professional results depending on the image's complexity. The Background Eraser tool offers more control than Quick Actions but still requires user input. It works by sampling colors and erasing them, with options to adjust sampling methods (Continuous, Once, Discontiguous) and tolerance levels to precisely target background elements without affecting the subject.
The Pen Tool: The Gold Standard for Precision
Despite the advancements in AI, the Pen Tool remains the most trusted method for achieving precise selections, especially for subjects with well-defined edges or when intricate control is paramount. It is a more time-consuming process, involving the creation of anchor points and paths. Once a path is meticulously crafted, it can be converted into a selection, saved, and later refined. For logos or graphics with sharp, clean lines, the Pen Tool offers unparalleled accuracy.
Magic Wand and Lasso Tools: For Simpler Backgrounds
For images with high contrast and simple backgrounds, the Magic Wand and Lasso tools can still be effective. The Magic Wand selects pixels of similar color with a single click, making it ideal for solid-colored backgrounds. The Lasso Tool allows for freehand drawing around a subject, offering basic manual selection capabilities. However, these tools often require significant refinement in the Select and Mask workspace for professional results.
Final Thoughts on Background Removal
Picking out a subject and removing the background can be done in different ways depending on the image. If the subject is easy to see, you can use Select Subject or the Quick Selection Tool to grab it fast. For harder images, the Pen Tool lets you trace edges carefully. After that, Select and Mask helps clean up things like hair, fur, or soft edges. Always use a layer mask instead of deleting parts of the image. The best way to get good at this is to practice on different kinds of images. Try simple portraits first, then move to products or detailed shots on different AI tools like Pixelbin background remover.
With many advances to Photoshop over the last several years, removing the background from an image has never been easier or quicker. The key is to understand the strengths of each tool and apply them strategically. Whether you opt for the speed of AI-powered features or the meticulous control of manual methods, a clean subject selection is the bedrock of a professional-looking edit.
tags: #photoshop #select #subject #remove #background