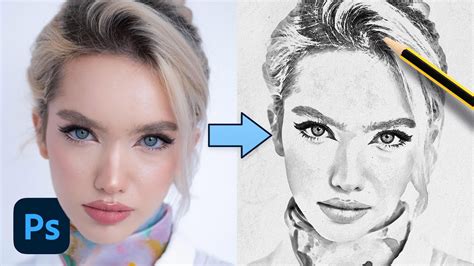
Photoshop offers a versatile toolkit for artists and designers, enabling a wide array of creative transformations. One of the most popular and enduring effects is the conversion of a photograph into a realistic pencil sketch. This tutorial will guide you through the essential steps to achieve this artistic metamorphosis, compatible with Photoshop CC 2019 and earlier versions, all the way back to Photoshop CS6. Whether you're aiming for a delicate, hand-drawn aesthetic or a more photo-realistic interpretation, this process provides the flexibility to achieve your desired outcome.
Duplicating the Foundation Layer
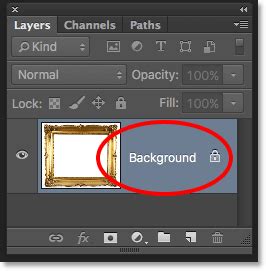
Every creative journey in Photoshop begins with a solid foundation. For this sketch effect, we'll start with your chosen image. Upon opening your photo, the Layers panel will typically display a single layer named "Background." This layer serves as our starting point.
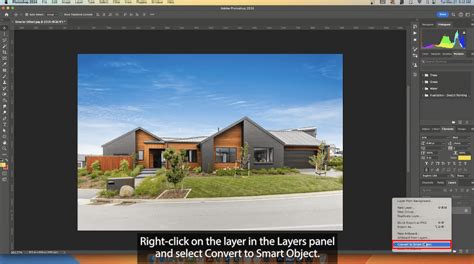
To ensure we don't alter the original image and to provide a working canvas for our effects, the first crucial step is to duplicate this background layer. Right-click on the "Background" layer in the Layers panel. From the contextual menu that appears, select "Duplicate Layer." Alternatively, you can achieve the same result by dragging the "Background" layer down onto the "New Layer" icon at the bottom of the Layers panel, or by using the keyboard shortcut Ctrl+J (Windows) or Command+J (Mac).
Photoshop will instantly create an exact replica of your background layer, naming it "Background copy," and position it directly above the original. This duplicated layer is what we will manipulate to build our sketch effect, leaving the original untouched.
Removing Color: The Desaturation Process
A fundamental characteristic of pencil sketches is their absence of color. To begin stripping away the chromatic information from our duplicated layer, we need to desaturate it. With the "Background copy" layer selected in the Layers panel, navigate to the "Image" menu at the top of the screen. From there, select "Adjustments," and then choose "Desaturate." A quicker method is to use the keyboard shortcut Shift+Ctrl+U (Windows) or Shift+Command+U (Mac). This action will instantly render the layer in grayscale, effectively removing all color.
After this step, your "Background copy" layer will appear in grayscale, setting the stage for the subsequent transformations that will define the sketch's form.
Doubling Down: Duplicating the Desaturated Layer
To further refine the sketch effect and introduce more depth, we'll create another copy of our desaturated layer. This duplicate will be crucial for establishing the core pencil stroke elements. Select the now-desaturated "Background copy" layer in the Layers panel. Once again, drag this layer down onto the "New Layer" icon.
Photoshop will generate a new layer, typically named "Background copy 2," positioned above the previous one. This fresh duplicate provides us with a clean slate to apply further adjustments that will contribute to the pencil sketch appearance.
Inverting the Image: Creating a Film Negative Effect
The next step involves inverting the brightness levels of the uppermost layer. This technique is key to generating the reversed tonal values that, when combined with other effects, will form the sketch. With the "Background copy 2" layer selected, go to the "Image" menu, then "Adjustments," and choose "Invert." The shortcut for this command is Ctrl+I (Windows) or Command+I (Mac).
This inversion process flips the light and dark areas, effectively creating a film negative effect. What were once light areas in the grayscale image now appear dark, and vice versa. This inverted layer is essential for the subsequent blending modes that will reveal the sketch.
The Magic of Color Dodge
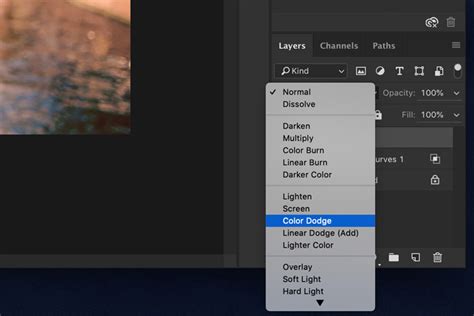
Now, we introduce a transformative blend mode that will dramatically alter the appearance of our layers. In the Layers panel, locate the "Blend Mode" option, which is usually set to "Normal" by default. Click on the word "Normal" to reveal a dropdown menu of various blend modes. From this list, select "Color Dodge."
Upon applying the Color Dodge blend mode to the inverted layer, your document will appear to turn almost entirely white. This is an expected and desired outcome. The Color Dodge mode brightens the underlying layers based on the luminosity of the active layer. In this state, the inverted layer essentially acts as a mask, revealing the underlying details in a unique way that will form the basis of our sketch.
Embracing Smart Objects for Flexibility
To achieve the core blurring effect that defines the sketch's linework, we will use the Gaussian Blur filter. However, instead of applying it as a standard filter, we will leverage Photoshop's "Smart Filters" for non-destructive editing. This means we can adjust the blur at any point without degrading image quality. To enable this, we first need to convert our active layer into a "Smart Object."
Look for the small menu icon (three horizontal lines) in the top-right corner of the Layers panel. Click this icon to open a contextual menu. From the options presented, select "Convert to Smart Object."
You might not see an immediate visual change on your canvas, but a closer inspection of the Layers panel will reveal a small "Smart Object" icon within the layer's thumbnail preview. This icon signifies that the layer is now a Smart Object, ready to accept editable Smart Filters.
Applying Gaussian Blur for Sketch Definition
With our layer converted to a Smart Object, we can now apply the Gaussian Blur filter. Go to the "Filter" menu, select "Blur," and then choose "Gaussian Blur." This action will open the Gaussian Blur dialog box.
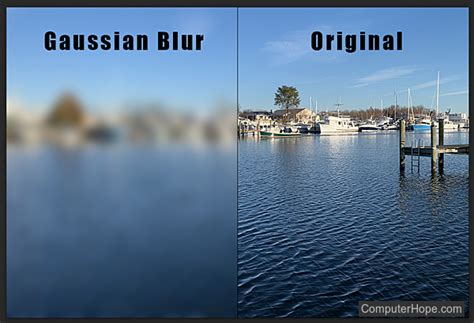
Within the Gaussian Blur dialog box, you'll find a "Radius" slider. This slider is our primary control for shaping the sketch effect. Dragging the slider to the right increases the radius, intensifying the blur. The amount of blur applied directly influences the character of the sketch:
- Lower Radius Values: Result in finer, more delicate lines, creating a refined, hand-drawn appearance.
- Higher Radius Values: Produce thicker, softer lines, leading to a more photo-realistic outcome, closer to the original image's tonal range.
Experiment with the Radius slider. As you adjust it, observe the changes in your image. The optimal value will depend on your specific photograph and the artistic style you wish to achieve. Once you are satisfied with the blur's effect, click "OK" to apply it.
The Power of Smart Filters and Levels Adjustment
After applying Gaussian Blur to a Smart Object, it will appear in the Layers panel listed as a "Smart Filter" beneath the layer. This is the beauty of Smart Filters: they remain fully editable. If you decide later that the blur needs adjustment, simply double-click on "Gaussian Blur" in the Layers panel to reopen the dialog box and fine-tune the Radius slider.

Often, the blur effect can make the sketch appear too light. To address this and add depth, we'll introduce a "Levels" adjustment layer. Click the "New Fill or Adjustment Layer" icon at the bottom of the Layers panel (it looks like a half-black, half-white circle). From the dropdown menu, select "Levels."
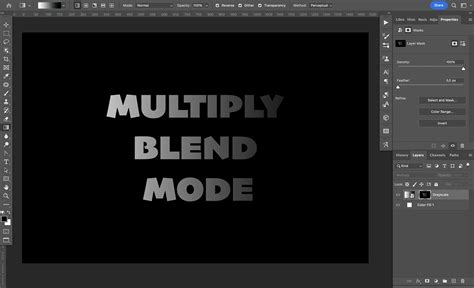
Photoshop will automatically create a "Levels 1" adjustment layer, positioned at the top of the layer stack. While the Properties panel for Levels offers many controls, for this specific effect, we will primarily utilize its blend mode. Change the blend mode of this Levels adjustment layer from "Normal" to "Multiply."
The Multiply blend mode darkens the image by multiplying the color information of the active layer with the underlying layers. This will intensify the sketch lines and add a richer, deeper tone to your artwork.
If the Multiply blend mode makes your sketch too dark, you can easily control the intensity. Locate the "Opacity" option in the Layers panel, usually situated next to the blend mode. Lowering the opacity of the Levels adjustment layer will allow more of the underlying layers to show through, effectively brightening the sketch and achieving a better balance.
Advanced Techniques for Enhanced Realism and Texture
While the core steps above create a convincing sketch effect, further enhancements can elevate the realism and artistic quality. One common approach involves creating a more pronounced pencil texture. This can be achieved by adding noise to a layer, simulating the subtle grain of paper.
Another advanced technique involves creating multiple layers with different filter applications and blend modes to build up the sketch's complexity. For instance, one layer might focus on fine linework using filters like "Graphic Pen" or "Stroke Direction," while another layer could introduce thicker outlines using "Angled Strokes."
Creating Pencil Strokes with Filter Gallery:
To generate distinct pencil strokes, duplicate your original layer again. Desaturate this new layer and convert it to a Smart Object. Navigate to "Filter" > "Filter Gallery." Within the "Sketch" tab, explore options like "Graphic Pen." Experiment with settings such as "Stroke Length," "Light/Dark Balance," and "Stroke Direction" to achieve the desired stroke style.
Following this, apply a "Motion Blur" filter ("Filter" > "Blur" > "Motion Blur") with a specific angle and distance to stylize the strokes further. Finally, adjust the "Levels" ("Image" > "Adjustments" > "Levels") to fine-tune the darkness of the strokes, changing the black output level to a dark grey (e.g., 70) for a more natural pencil appearance. Change the blend mode of this layer to "Multiply" to integrate the strokes effectively.
Adding Detail and Refining Lines:
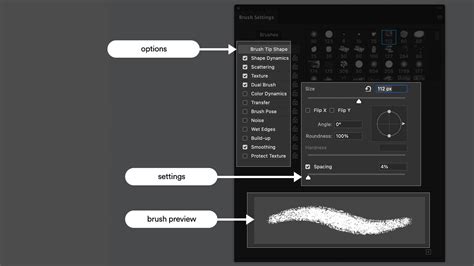
For more intricate details and to correct areas that might appear too light or lack definition, creating a new layer above your sketch layers is beneficial. Select a suitable "Pencil" brush from Photoshop's brush presets. You may need to load the "Legacy Brushes" if they are not readily available. Adjust the brush's opacity and flow to mimic the look of real pencil strokes.
Use this brush to paint over areas that require more shading or stronger lines, such as the edges of features, hair, or facial contours. This manual touch-up allows for precise control and adds a personalized, hand-drawn quality.
Optional: Colorizing Your Sketch
The sketch effect can be further enhanced by introducing color. There are several methods to achieve this:
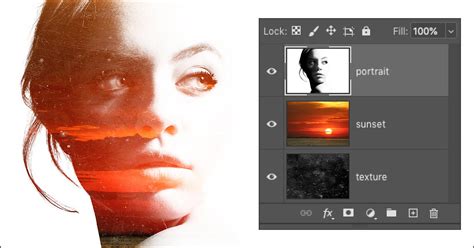
Using Original Image Colors: Duplicate your original background layer and place it at the very top of the layer stack. Change its blend mode to "Color." This will apply the original photo's colors to your sketch, creating a vibrant, colored pencil look. You can adjust the opacity of this color layer to control the intensity.
Applying a Solid Color: Add a "Solid Color" fill adjustment layer above your sketch layers. Choose your desired color from the Color Picker. Then, create a clipping mask for this fill layer by holding down the Alt (Windows) or Option (Mac) key and clicking between the fill layer and the sketch layer in the Layers panel. This will confine the color to the sketch's strokes.
Using a Gradient: Introduce a "Gradient" fill layer above your sketch layers. Select a preset gradient or create your own to add a more complex color scheme to your sketch. Similar to the solid color, a clipping mask can be used to apply the gradient specifically to the sketch.
By combining these steps and experimenting with different filter settings, blend modes, and adjustment layers, you can transform any photograph into a compelling and artistic pencil sketch, offering a unique visual appeal to your images.