Selling property is hard enough, but a stylish trifold flyer design will help your real estate offering to stand out from the crowd. A well-designed brochure is a powerful tool in the real estate industry, serving as a tangible representation of a property and the services of an agent. It goes beyond mere information delivery; it's about creating an emotional connection and leaving a lasting impression. This article delves into the intricacies of designing effective trifold brochures for real estate using Adobe InDesign, from understanding the fundamental principles to practical application with template customization.
The Power of a Physical Presence in a Digital Age
In an era dominated by digital listings and virtual tours, the physical real estate brochure retains its significance. It offers a tactile experience that digital media cannot replicate. A well-designed trifold brochure provides potential buyers with a curated selection of the property's most compelling features, presented in a structured and visually appealing manner. This allows them to engage with the information at their own pace, away from the distractions of online browsing. For real estate professionals, it's an opportunity to present their brand and listings with a level of polish and professionalism that can significantly influence a buyer's perception. The ability to hold a beautifully designed brochure can evoke a sense of value and exclusivity, mirroring the aspirations often associated with property ownership.
Understanding the Trifold Brochure Structure
A trifold brochure, also known as a Z-fold or 3-panel brochure, is a versatile format that divides a single page into three equal panels. When designing, it's crucial to visualize the brochure flattened out, understanding how each panel will appear when folded. This is particularly important for the front and back of the brochure, where the order of panels dictates the flow of information.
To lay out a Z-fold (3 Panel) brochure piece in your design or layout program, use one page for the front and one page for the back, and measure out where the folds will be with guides. This meticulous planning ensures that text and images are not awkwardly bisected by folds and that the overall narrative unfolds logically for the reader. The "front" of the brochure, typically the first panel that is seen when folded, needs to be the most captivating, immediately drawing the reader in. The inner panels then reveal more detailed information, and the back panel often serves as a call to action or contact information hub.
Leveraging InDesign Templates for Real Estate Listings
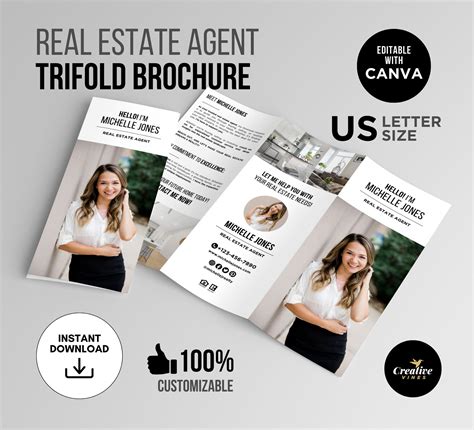
Looking for an inspiring concept for your real estate brochure? You’re in luck! This InDesign template includes a ready-prepared layout; simply insert your own text and images. Utilizing pre-designed InDesign templates can dramatically streamline the design process, especially for real estate agents who may not have extensive graphic design experience. These templates offer a professional foundation, ensuring that fundamental design principles like hierarchy, balance, and visual flow are already established.
Our InDesign templates are packaged and saved as ZIP files. Upon unzipping, you'll find the core InDesign file, often in .indd format. If you’re running InDesign CS6 or a later version, open the INDD version of the file. Many templates are also provided in .idml format, which is compatible with older versions of InDesign.
Customizing Your InDesign Template: A Step-by-Step Guide
Once you have your chosen template open in InDesign, the customization process begins. This is where you transform a generic layout into a unique marketing tool that reflects the specific property and your personal brand.
1. Navigating Layers for Efficient Editing:Our InDesign templates are organized into layers, which group similar elements together. This organizational structure is a hallmark of professional design software and significantly enhances workflow. Layers allow you to isolate and edit specific components without affecting others. For instance, you might find layers dedicated to text, images, backgrounds, and graphic elements.
Pro tip: Try locking the "YOUR IMAGES HERE" layer to save time when editing text. Locking a layer prevents accidental modifications, allowing you to focus solely on text adjustments without the risk of moving or deleting image frames.
2. Editing Text Content:The text across this design can easily be replaced with your own copy. Simple use the Type Tool (T) to select the text box you wish to edit. You can then add your own fonts and formatting. When editing text, consider the tone and style appropriate for the property. Is it a luxury penthouse, a family home, or a commercial space? The language and font choice should align with the property's characteristics and target audience.
- Font Selection: While templates often come with specific fonts, you can easily change them. Choose fonts that are legible and complement the overall aesthetic. Sans-serif fonts often convey a modern feel, while serif fonts can lend a more traditional or elegant touch.
- Paragraph and Character Styles: For consistent formatting, especially in longer brochures, leverage InDesign's Paragraph and Character Styles. You'll notice when you first open the template that all the image frames have a placeholder image. The fonts in most templates are not set as InDesign styles. However, it’s easy to create a Character or Paragraph Style using existing text formatting, and then edit this from the Styles panels (Window > Styles). This ensures that all headings, body text, and captions maintain a uniform appearance throughout the brochure.
3. Incorporating Your Images:You can insert your own images by selecting the image frame and using File > Place to select a replacement image. This is a critical step in bringing the property to life. High-quality photography is paramount in real estate marketing.
Pro tip: Do your images look blurry? Make sure your display is set to high-quality (View > Display Performance > High-Quality Display). This setting affects how images appear within InDesign's workspace, not the final output resolution. Ensure your placed images are also of sufficient resolution for print.
- Image Placement: Drag and drop or use the File > Place command to insert your photos. Resize and reposition image frames as needed to ensure they fit seamlessly within the template's design.
- Image Quality: Always use high-resolution images. Low-resolution images will appear pixelated and unprofessional in print. Aim for images that are at least 300 DPI (dots per inch) at the intended print size.
4. Adjusting Dimensions and Layout:It’s simple to change the width of the spine in your template by using the Page Tool (Shift+P). Select the tool and then click onto the spine to select it. You can drag the sides of the page to preview your desired new size. Hold down Alt or Option while you drag to resize the page. This feature is incredibly useful if you need to accommodate more or less content, or if you have specific printing requirements regarding brochure dimensions.
Preparing Your Brochure for Print
Once you’ve completed work on your template and you’re ready to print it, you can head to File > Export. To create a print-ready file, choose Adobe PDF (Print) from the Format drop-down menu in the Export window. This is the industry standard for professional printing.
- PDF Export Settings: Make sure to include the bleed in your export options by checking "Use Document Bleed Settings" in the Export Adobe PDF window. Bleed is the area of your document that extends beyond the trim edge. It ensures that colors and images extend all the way to the edge of the finished piece, preventing white borders after trimming. A standard bleed is typically 0.125 inches (3mm).
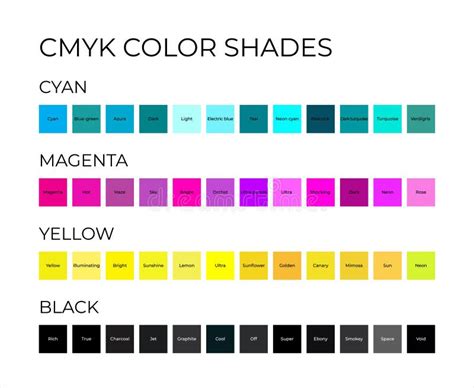
- Color Space: Ensure you have designed your folded brochure in CMYK, not RGB color space, for accurate color reproduction. RGB is for digital displays, while CMYK (Cyan, Magenta, Yellow, Key/Black) is for printing. Using CMYK from the start prevents color shifts during the printing process. If requested, we can print using Pantone (Spot) colors for precise color matching.
Trifold brochure design in coreldraw tutorial in tamil @PKGraphics054 | Real estate brochure
The Pre-Press and Printing Process
The journey from design to a finished printed brochure involves several key stages, ensuring a high-quality final product.
1. Proofing:The perfect folded brochure starts with preparation. Once we receive your brochure artwork, we double-check alignment as well as complete our standard prepress checks for resolution, color, fonts, and more. This crucial step identifies potential issues before printing, saving time and resources. Attention is paid to ensure all elements are correctly positioned, fonts are embedded, and colors are within the printable gamut.
2. Printing:Depending on order quantity and design requirements (PMS colors, foil, varnishes, etc.), your folded brochure will either be printed on our HP Indigo or UV Offset presses. Different printing technologies are suited for different needs. Digital presses like the HP Indigo are excellent for shorter runs and variable data printing, while offset printing is ideal for larger quantities and specific finishes like spot colors or varnishes.
3. Cutting & Folding:Once printed, your folded brochure will be trimmed and cut to final size. This is followed by precise folding to create the trifold format. We’ve printed millions of folded brochures over the years. If you have problems or want advice, you can always reach out to us. Experienced printers can handle complex folds and ensure crisp, accurate creases.
Beyond the Template: Design Considerations for Impact
While templates provide a solid framework, truly impactful real estate brochures require thoughtful design choices.
Cut, Bleed, & Die? The Scary Details of Folded Brochures:When designing, visualize your folded brochure flattened out. Understanding terms like "cut," "bleed," and "die-cut" is essential for professional printing. "Cut" refers to the final trim size, "bleed" ensures content extends to the edge, and "die-cut" involves custom shapes or perforations. For a standard trifold, focusing on the cut and bleed is usually sufficient.
Colors That POP! Getting the Ink to Match the Screen:As mentioned, using CMYK color mode is vital. Additionally, consider the psychological impact of color. Blues can evoke trust and stability, greens suggest nature and tranquility, and warmer colors like reds or oranges can convey energy and excitement. Choose a color palette that aligns with the property's ambiance and the brand's identity.
Exploring a Universe of Brochure Templates
The world of InDesign brochure templates is vast, catering to every conceivable need and style. Whether you're looking for something minimalist or flamboyant, professional or artistic, there's a template out there. This post is all about stunning brochures that are super easy to customize. I've dedicated hours going through a sea of templates to find the top 100 InDesign brochure templates for you. Free templates included! These templates come from different reputable sources (all listed in the best InDesign templates post I wrote some time ago). To save you more time, I've also checked them one-by-one and divided these best brochure examples based on their purpose and type. Let's dive right in.
No time to scroll? Use this search bar to find the brochure styles you prefer:
InDesign Brochure Templates - The Complete List
Without further ado, here are all the chosen brochure templates, categorized for easier navigation:
Free InDesign Brochure Templates
- Free Bifold Template: A simple, versatile option for straightforward presentations.
- InDesign Trifold Template Free: Offers a starting point for multi-panel designs without initial investment.
- Brand Guidelines Template InDesign: Essential for maintaining brand consistency across all marketing materials.
Businesses: Elegant and Professional
- The Dominance of the Geometric Elements: Sophisticated designs with subtle creativity, often utilizing blues.
- Multipurpose Landscape Brochure with Teal Elements: High-class and suitable for corporations, featuring a landscape orientation.
- Multipurpose Simplicity: Easy to edit, with versatile statistical elements and a modern layout.
- The Minimal Paradise: A clean, white background with strategic red and black details to draw attention.
- The Corporate Brochure: Uncluttered, easily customizable, and uses a simple three-color palette.
- The Teal Accents: Clever, uncluttered design with professional teal accents.
- Dark Blue Clean Design: Serious and professional, with a white background and dark blue elements.
- Blue and Grey Simplicity: Subtle color palette and a professional, formal appeal.
- The Stylish Elegance: Unique blend of colors, organized pages, and grey with subtle teal accents.
- Modern and Clean: A simple, neat layout that can be customized for various corporate needs.
- Clean and Professional: Clean lines, a neat look, and a tasteful feel to strategically highlight information.
Businesses: Creative and Colorful
- Business Proposal Brochure Layout: A perfect balance between polished and creative, ideal for showcasing ideas.
- Bifold Corporate Brochure: Elegant yet artistic with geometric elements and a chosen color palette.
- The Artistic Wavy Design: Innovative, well-organized, and packed with helpful elements to tell a unique story.
- The Bold Shapes Brochure: Features bold shapes, interesting color combinations, and a professional aesthetic.
- Blue and Yellow Combo: Polished yet straightforward, with interesting elements and an intriguing layout.
- Landscape Brochure Layout with Red Accents: Engaging pages and flashy red details in a landscape orientation.
- Charming Creativity: Subtle colors with interesting yellow hues, versatile pages for various information types.
- Bifold Brochure Layout with Orange Accents: Bold combination of black and orange, with geometric elements.
- The Incredible Details: Detailed with versatile elements, a creative front page, and soothing colors.
- Minimalist yet Imaginative: Balances elegance and innovation with subtle colors and typography.
- Futuristic and Modern: Stunning design, engaging layout, and useful features for all brochure needs.
- Yellow Proposal Brochure Layout with Black Accents: Exceptional design with a white background and eye-catching yellow and black elements.
- Creativity and Colors: Bursts with colors, creativity, and exceptional uniqueness to stand out.
- Blue and Yellow Combo (Creative): Delicate template with a creative blend of colors and strategic use of yellow and blue elements.
Creative InDesign Brochure Templates
- Pink and Blue Pastel Elements: Portfolio-style inspiration with stunning elements and colorful creativity.
- A Blend of Nature and People: Features illustrations of people and nature, ideal for telling a company's story.
- Soft Pink and Green Accents: Neat lines, soft colors, exceptional outline, and customizable infographics.
- Grey Originality: Impressive simplicity, choice of colors, elegance, and uniqueness in a photography portfolio style.
- Design and Furniture Portfolio with Neutral Elements: One-of-a-kind appearance with stunning pages and subtle colors.
- Fashion Related Template: Customizable for presenting products, ideas, or services, even if fashion-related.
Food and Travel Brochure Templates
- Elegant Brochure Layout with Beige Accents: Compelling, stylish, creative, and well-organized, perfect for showcasing destinations or culinary experiences.
These examples represent just a fraction of the available templates, illustrating the diversity of styles and purposes they can serve. The key is to select a template that not only looks appealing but also aligns with the specific property being marketed and the overall brand strategy. Remember, the goal is to create a brochure that is both informative and persuasive, ultimately driving interest and facilitating property sales.