The allure of vintage art lies in its unique character, often born from the limitations and specific tools of its era. For digital artists using Procreate, recreating this aesthetic is not just about applying filters; it's about understanding and manipulating the very tools that shape their digital strokes. This tutorial delves into the intricate world of Procreate brushes, exploring their fundamental properties and how they can be customized to achieve that coveted vintage feel. Whether you're a seasoned Procreate user or just beginning your digital art journey, mastering these brush settings can unlock a universe of creative possibilities and push your work into new, exciting territories.
The Foundation of Customization: Understanding Brush Properties
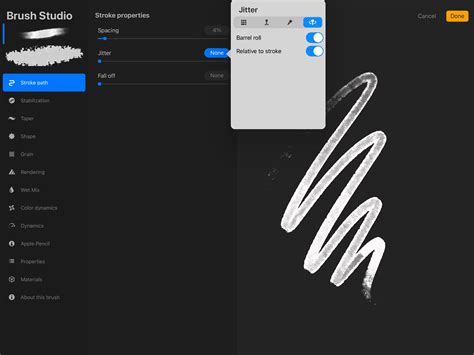
Procreate's Brush Studio is the heart of brush customization. Within this powerful environment, artists can tweak a multitude of settings to precisely control how a brush behaves. Before diving into specific vintage effects, it's crucial to grasp the core properties that govern any Procreate brush.
One of the most fundamental adjustments is brush size. While seemingly simple, the ability to adjust the size limits of a brush is critical. For instance, a texture brush might behave differently at a larger scale compared to a fine detail brush. To access these settings, navigate to the Brush Studio, select the "Properties" category, and then adjust the "Maximum" and "Minimum" size ranges. It's always a good practice to create a backup of your brush before making significant changes. To do this, open the brush panel, swipe left on the brush thumbnail, and select "Duplicate."
Refining Your Strokes: Streamline and Stabilization
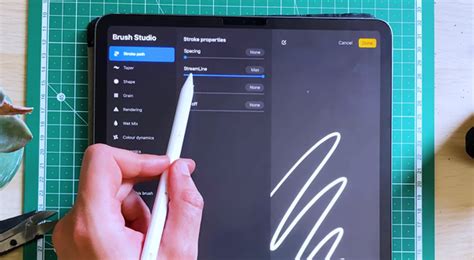
Achieving clean, precise lines is essential for many vintage styles, particularly those with a graphic or illustrative quality. Procreate's StreamLine settings are designed to correct curves and reduce any wobble in your strokes, making them invaluable for precision drawing. These settings are found within the "Stabilization" menu in the Brush Studio. By increasing the StreamLine value, you'll notice your strokes becoming smoother. Conversely, reducing or removing StreamLine altogether can give you a more raw, hand-drawn feel, which can also be desirable for certain vintage looks.
The Heart of Texture: Shape and Grain
The Shape and Grain settings are arguably the most influential in defining a brush's character and, consequently, its vintage potential. The Shape acts as the container for the Grain, essentially defining the brush tip's silhouette. Think of it like the physical tip of a pen or a rubber stamp. The Grain, on the other hand, is the texture that is stamped repeatedly within that shape. The Procreate Handbook describes the Grain source as akin to a paint roller, imparting its texture onto the canvas.
You can access and edit these images under the "Shape" and "Grain" tabs in the Brush Studio. A key principle to remember is that in Procreate's brush engine, 100% black in a shape or grain image translates to transparency, while 100% white signifies solidity. This allows for intricate textures and nuanced brush forms. For example, using a grainy, irregular shape and a textured grain image can instantly evoke the feel of old printing presses or worn paper. If you experiment and find you don't like the result, you can always reset the brush, especially if you remembered to create a backup beforehand.
Responding to Touch: Pressure and Tilt Dynamics
The way a brush responds to pressure and tilt adds a layer of realism and expressiveness, crucial for emulating traditional media. The Pressure Curve allows you to dictate how changes in pressure affect properties like opacity or size. You can edit these settings on a per-brush basis or globally for your Apple Pencil.
To access the Pressure Curve, open the Actions Panel (wrench icon), go to "Preferences," and tap "Pressure & Smoothing." By making light and dark strokes, you can gauge how responsive the brush is. If you find you need to press very hard to achieve a darker stroke, you can increase the start of the curve to create a sharper upward angle, making the brush more sensitive to lighter touches.
What Is Pressure Sensitivity In Digital Art Brushes? - The Virtual Art Desk
Similarly, Tilt settings, found under the "Apple Pencil" tab, allow for nuanced control. The "Angle" slider determines when tilt begins to affect the stroke, and you can adjust how tilt influences opacity, bleed, and size. The "Size Compression" toggle can further refine how tilt affects the brush's perceived size. Experimenting with these settings can mimic the varied strokes of a calligraphy pen or a soft brush.
The Art of the Fade: Brush Taper
Brush Taper refers to the gradual reduction in a brush's size at the beginning or end of a stroke. This is particularly effective for creating natural-looking lines, similar to those made with a fine liner or a brush pen. The Taper settings are located under the "Taper" tab in the Brush Studio and offer separate controls for "Pressure Taper" (using a stylus) and "Touch Taper" (using a finger).
Within Pressure Taper, you'll find sliders that control the taper at the start and end of a stroke. To see these effects, you'll need to have some percentage assigned to the "Size" slider. The "Opacity" slider adjusts the opacity changes during the taper, while the "Tip" slider dictates the shape of the tapered end. A "Sharp" setting will create a very pointed end. When "Tip Animation" is off, the taper is applied as you lift your pencil. While not suitable for every brush, judicious use of taper can significantly enhance the realism and vintage feel of your digital artwork.
Mimicking Traditional Media: Wet Mix Brushes
For artists aiming to replicate the feel of traditional painting, Blend brushes are indispensable. Unlike standard brushes that simply lay down new color, blend brushes interact with existing colors on the canvas, mixing and dragging them to create realistic blending effects. While the Smudge Tool offers a similar function, blend brushes provide far greater variety and control.
These brushes are accessed via the "Wet Mix" tab in the Brush Studio. The "Dilution" slider is a primary control, dictating the amount of paint the brush will pick up and mix. For a strong blending effect, Dilution should be set to maximum. The "Charge" value influences the amount of paint applied to the brush itself, while "Attack" is designed for Apple Pencil responsiveness. The "Pull" slider works in conjunction with Dilution, affecting how colors are dragged and mixed. Experimenting with these settings is key to achieving a wide range of wet media effects, from subtle washes to impasto textures.
Curating Your Vintage Toolkit: Brush Sets and Libraries
Procreate's organization system, integrated with the iPad's Files app, allows for efficient management of your brushes. Brush libraries, brush sets, and individual brushes are now treated as files and folders. This means you can import, rename, duplicate, and delete them directly within the Files app.
Brush libraries are stored either in "On My iPad → Procreate → Brushes" or "iCloud Drive → Procreate Brushes." Importing a new brush or brush set is as simple as locating the .brush, .brushset, or .brushlibrary file in the Files app and tapping on it. A new set called "Imported" will be created for single brush imports.
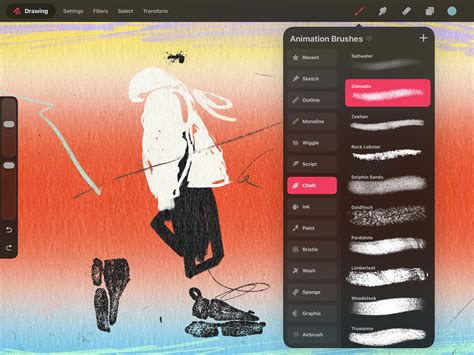
Navigating your brush libraries is straightforward. You can scroll through brush sets, and tapping on a set reveals the brushes within it. Each brush displays its name and a preview of its stroke. For quick access, Procreate offers a "Recent" brushes section, which can be found by tapping "Paint," "Smudge," or "Erase," and then selecting "Recent." You can even "Pin" frequently used brushes to the top of your Recent list for immediate access.
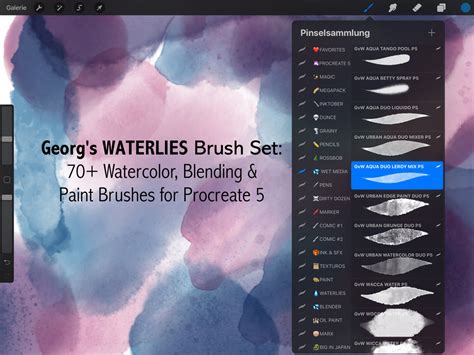
When curating a collection of vintage brushes, consider the variety offered by different brush sets. Procreate's default library includes sets designed for various purposes, such as clean, rounded brushes; comic and manga inks; technical drawing; rendering; and realistic painting effects. For those specifically seeking a vintage aesthetic, look for sets that emulate traditional textures, such as those sourced from real vintage papers, or brushes that offer hatch and crosshatch marks. Many third-party creators offer specialized vintage brush packs that can significantly speed up the process of achieving authentic-looking results. These often include elements like authentic parchments, time-saving pattern brushes, and specific texture effects.
The Power of Experimentation: Pushing Creative Boundaries
The true magic of Procreate's brush engine lies in its endless combinatory potential. By understanding the interplay of Shape, Grain, StreamLine, Pressure Curve, Tilt, Taper, and Wet Mix settings, artists can create custom brushes that perfectly capture a specific vintage era or style.
For instance, to achieve a mid-century illustration look, you might combine a slightly irregular, textured brush shape with a grain that mimics newsprint. Adjusting the Pressure Curve to be sensitive to lighter touches could then allow for varied line weights, reminiscent of hand-drawn lettering from that period.
The "Complete Collection for Procreate" mentioned in the provided information exemplifies the breadth of possibilities, offering realistic wet and dry media brushes, paper textures, and print effects. As Procreate continues to evolve, so too does the potential for brush creation and editing. Embrace the Brush Studio, experiment with the settings, and don't be afraid to deviate from defaults. The journey to a perfect vintage Procreate brush is one of continuous discovery and creative exploration.
Remember, before embarking on extensive customization, always create a backup of your original brushes. This safety net ensures that you can always revert to the original settings if your modifications don't yield the desired outcome. By diligently exploring and applying these brush properties, you can effectively bend Procreate's digital tools to your will, breathing authentic vintage life into your digital artwork.