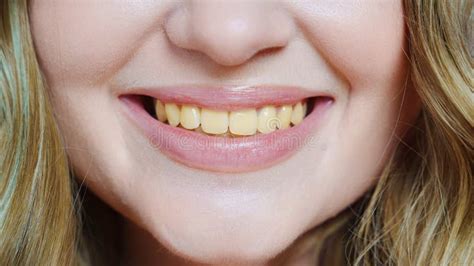
Ever taken a photo you absolutely adore, only to realize that your teeth are looking anything but pearly white? We've all been there. In this tutorial, we'll show you how to whiten teeth in Photoshop, so you can confidently show off your brightest smile in every photo. Whitening teeth in photographs is a common editing task that can greatly enhance the appearance of your subjects. Fortunately, Photoshop makes this easy to do! Photographers and retouchers are often asked if they can help teeth appear whiter, whether it be for wedding photos, professional headshots, or commercial work. In order to make adjustments to the color and appearance of teeth without affecting the entire image, we’ll need to make a selection.
Understanding the Need for Teeth Whitening in Photography
In this section, we'll introduce three effective methods for teeth whitening using Adobe Photoshop. Making a good first impression with a professional headshot or popping the brightness of an athlete’s smile in commercial photography by learning how to adjust for white teeth in Photoshop is a skill that can help you combat years of subjects’ teeth-staining habits. Retouching is the art of removing common distractions from photos while helping subjects look like their best, natural selves. There are a lot of things that go into professional retouching, from working with skin and eyes to hair and even clothing.
Method 1: Hue/Saturation Adjustment Layer
This is one of the most highly recommended methods for whitening teeth in Photoshop.
- Open your image in Photoshop.
- Create a selection of teeth. You can use the Lasso tool to make a selection that goes along the edges of the teeth. If you notice a harsh edge to your selection, fix it in the Properties panel by selecting Masks. Alternatively, we recommend using the Select Color Range. The Select Color Range dialog will open with a number of options to help you narrow down and dial in the colors you want to select. First, use the eyedropper tools to select values from within the subject’s teeth. As more of those areas are added to the selection, they will turn to white. Anything not selected will appear as black. As you add colors from the teeth to the selection, areas from the rest of the image will also be added. Don’t worry about this for now; we can remove unwanted elements from the selection once we’re finished. You can also adjust the Fuzziness to help refine the selection.
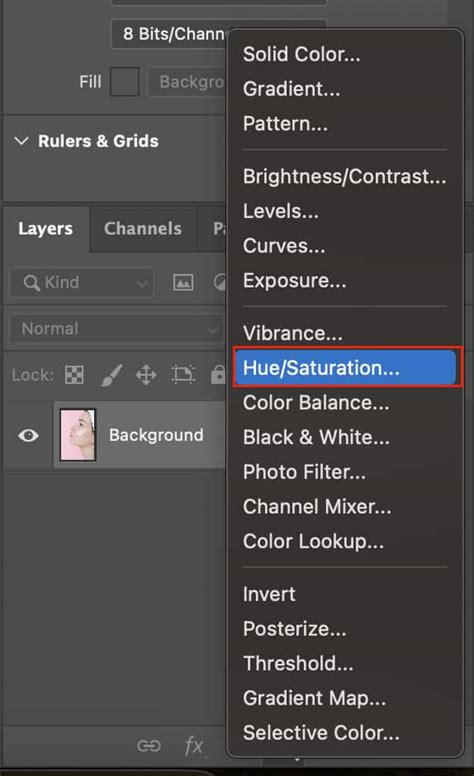
- Add a Hue/Saturation adjustment layer. In the adjustments drop-down menu, select the Hue/Saturation adjustment layer. With the selection we just made still active, add a Hue/Saturation Adjustment Layer to the Layer Stack.
- Adjust the settings. In the Properties panel for the Hue/Saturation adjustment layer, select the "Yellows" channel from the dropdown menu. Lower the Saturation slider until most of the unwanted color is gone. But notice that the adjustment is affecting the rest of the subject’s face. Let’s fix this by quickly adjusting the Layer Mask created from the selection we made previously. Hold ALT or OPTN and click on the Layer Mask of the Hue/Saturation Adjustment Layer. This will allow you to see and work with the Layer Mask directly. With that new selection of the mouth active, open the Select menu and choose the Inverse option. This will change the selection of the mouth into a selection of everything except the mouth. Fill the new selection with black. You should see the teeth surrounded by an area of pure black. Again, hold ALT or OPTN and click on the Layer Mask to go back to a normal view of the image.
- Increase the Lightness slider to brighten the teeth.
- Deselect and review your changes. Press Ctrl + D (Windows) or Cmd + D (Mac) to deselect the teeth.
Method 2: Using the Dodge Tool
If you find it difficult to follow the text instructions, we find a video tutorial on YouTube that provides step-by-step guidance and makes it easier to understand.
How To EASILY Whiten Teeth In Photoshop
- Open your image in Photoshop.
- Duplicate the background layer. Press Ctrl + J (Windows) or Cmd + J (Mac) to create a copy of the background layer. This ensures your original image remains untouched.
- Select the Dodge Tool. In the toolbar, choose the Dodge Tool (O).
- Paint over the teeth. Zoom in on the teeth and gently paint over them with the Dodge Tool. The teeth will gradually become lighter. Adjust the exposure of the Dodge Tool to control the intensity of the lightening effect.
- Review your changes. Toggle the visibility of the duplicated layer on and off to compare the original image with your edited version.
Method 3: Curves Adjustment Layer
- Open your image in Photoshop.
- Create a selection of teeth. As described in Method 1, use the Lasso tool or Select Color Range for an accurate selection.
- Add a Curves adjustment layer.
- Adjust the curve. In the Properties panel for the Curves adjustment layer, click and drag the curve upward to brighten the teeth.
- Create a clipping mask. Alt-click (Windows) or Option-click (Mac) on the line between the Curves adjustment layer and the layer below it to create a clipping mask. This ensures the adjustment only affects the layer directly beneath it.
- Deselect and review your changes. Press Ctrl + D (Windows) or Cmd + D (Mac) to deselect the teeth.

Perfect! We’ve removed the unwanted color from the teeth with a Hue/Saturation Adjustment Layer and made them a bit brighter using a Curves Adjustment Layer. You can go back and change the settings of either Adjustment Layer at any time. When working with people and faces, it’s always best to keep things as subtle as possible. Small changes can make a big difference while making sure your subject looks natural!
Advanced Techniques and Tips for Productivity
Experiment with these three methods to find the one that works best for your specific image and desired outcome. Whether you're editing photos, creating designs, or retouching images, Photoshop is a powerful tool that can help you achieve your creative vision. In this section, we'll share some tips and tricks to help you be more productive with Photoshop.
- Organize your files: Before you start editing, make sure your files are organized and easy to find. This saves valuable time searching for assets.
- Use shortcut keys: Photoshop has a lot of keyboard shortcuts that can save you time and make your workflow more efficient. Learning and implementing these shortcuts is crucial for speed.
- Customize your workspace: Photoshop allows you to customize your workspace to fit your needs. Arrange panels and toolbars in a way that makes sense for your typical editing tasks.
- Use batch processing: If you have a lot of images to edit, you can use batch processing to apply the same adjustments to multiple images at once. This is a significant time-saver for repetitive tasks.
- Consider a creative tool like TourBox: TourBox is a creative tool that's designed to help artists and designers work more efficiently in Photoshop and other creative applications. Such tools can streamline complex workflows.
Using the saturation adjustment layer and Lasso tools in Adobe Photoshop to improve the look of anyone’s smile in pictures, from pro headshots to commercial photos, is a fundamental skill. If you're wondering how to whiten teeth in Photoshop, it can effectively enhance your photos and create a brighter, more confident smile. However, it's important to remember that teeth whitening is just one aspect of photo editing. Using this same method, you can edit pet photography to brighten a dog’s eyes against its darker fur.