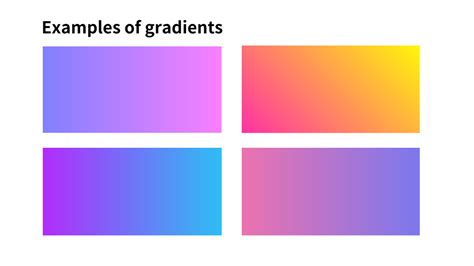
Photoshop offers a versatile array of tools and features for incorporating gradients into your designs. Whether you're aiming for subtle transitions or bold color blends, understanding how to effectively use gradients can significantly elevate your visual projects. This tutorial delves into the fundamental aspects of drawing gradients using Photoshop's Gradient Tool, exploring its various applications, preset options, and fundamental techniques. We'll cover how to draw gradients across layers and selections, fill text and shapes, and even touch upon using Gradient Maps and Layer Styles for more advanced effects.
The Gradient Tool: Your Gateway to Smooth Transitions
The Gradient Tool is a cornerstone of gradient creation in Photoshop. It allows for the direct application of color blends across a canvas, within selections, or even as part of layer masks to achieve seamless transitions between different elements. The power of the Gradient Tool lies in its simplicity and adaptability, making it an indispensable asset for both beginners and seasoned professionals.
Accessing and Understanding the Gradient Tool
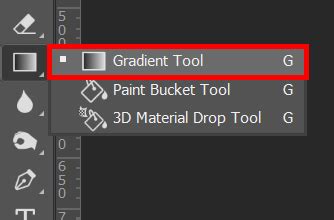
To begin, locate the Gradient Tool within Photoshop's Tools panel, typically situated on the left side of your screen. It often shares a space with the Paint Bucket Tool, so ensure you've selected the Gradient Tool icon. Once active, the Options Bar at the top of the screen will display the tool's specific settings.
Choosing Your Gradient: The Gradient Picker
With the Gradient Tool selected, your next crucial step is to choose the gradient you wish to apply. Photoshop provides several ways to do this. The most straightforward method is by using the Gradient Picker, which offers a selection of pre-designed, ready-to-use gradients.
To access the Gradient Picker, click on the small arrow located to the right of the gradient preview bar in the Options Bar. This action will reveal a panel populated with thumbnails of various preset gradients. Simply click on a thumbnail to select a gradient, and then press Enter (Windows) or Return (Mac), or click in any empty space within the Options Bar to close the picker.
By default, Photoshop presents a limited number of preset gradients. However, the software includes numerous additional gradient sets, categorized by themes such as color harmonies, metals, and pastels. To load these sets, look to the bottom half of the menu that appears when you click the arrow next to the gradient preview. Clicking on the name of a desired set will prompt Photoshop to ask if you wish to replace the current gradients or append the new ones. Choosing "Append" will add the new gradients below the existing ones, expanding your options without overwriting your current selections. For the purposes of this tutorial, we will focus on the default gradients.
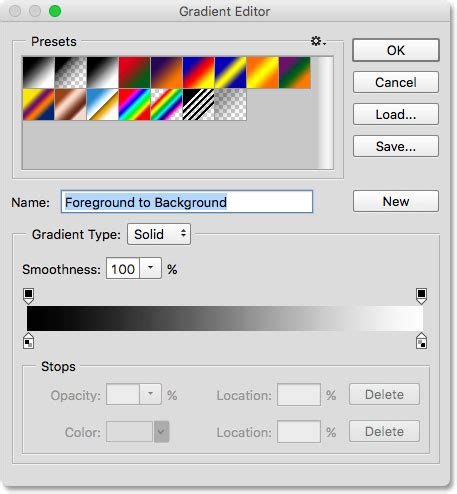
The Foreground to Background Gradient: A Customizable Core
A particularly useful and fundamental gradient is the "Foreground to Background" gradient. As its name suggests, this gradient derives its colors directly from your current Foreground and Background color swatches, which are visible near the bottom of the Tools panel. The swatch in the upper left corner represents the Foreground color, and the one in the lower right represents the Background color. Because it's dynamically linked to these color selections, the Foreground to Background gradient offers unparalleled ease of customization, making it a frequently used tool for many design tasks.
Drawing Gradients: The Click-and-Drag Technique
Applying a gradient with the Gradient Tool is as intuitive as clicking and dragging your mouse. The process involves defining a starting point and an ending point for your gradient.
- Set the Starting Point: Click anywhere within your document to establish the beginning of your gradient.
- Drag to the Ending Point: Keep your mouse button held down and drag away from the starting point to define where you want the gradient to conclude.
- Visualize the Direction: As you drag, a thin line will appear, indicating the direction and length of the gradient.
- Release to Apply: When you release the mouse button, Photoshop will render the gradient based on the path you've drawn.
Controlling Gradient Direction and Precision
- Horizontal Gradients: To draw a perfectly horizontal gradient, press and hold the Shift key as you drag. This constrains your movement to a 0-degree angle.
- Vertical Gradients: Similarly, holding Shift while dragging vertically will limit the angle to 90 degrees, ensuring a precise vertical blend. Remember to release your mouse button before releasing the Shift key.
- Diagonal Gradients: Gradients can be applied at any angle. Simply click and drag diagonally across your document to achieve this effect.
The "Reverse" Option
The "Reverse" checkbox in the Options Bar allows you to flip the direction of the gradient. If you draw a gradient with "Reverse" selected, the colors will appear in the opposite order compared to a standard gradient drawn with the same path.
Understanding Transition Area and Gradient Length
The distance you drag from your starting point to your ending point directly influences the size of the transition area between colors. A shorter drag creates a more abrupt, condensed transition, while a longer drag results in a more gradual, expansive blend.
For instance, if you draw a gradient from the left edge to the right edge of your document with a short drag, the transition will be quick. If you undo this and then drag across the entire document, the transition will be much smoother and spread out.

Working with Layers for Non-Destructive Editing
While drawing gradients directly on the Background layer might suffice for some quick tasks, best practice in Photoshop involves utilizing layers. Creating a new layer for your gradient ensures that you can edit or remove it later without affecting other elements of your design.
To add a new layer, click the "Create new layer" icon at the bottom of the Layers panel, or use the shortcut Alt (Windows) / Option (Mac) + click the New Layer icon to open the New Layer dialog box and name your layer (e.g., "Gradient"). You can then select this layer and apply your gradient.
Exploring Different Gradient Types
Beyond the fundamental Foreground to Background gradient, Photoshop offers other specialized gradients that serve unique purposes.
Foreground to Transparent Gradient
The "Foreground to Transparent" gradient is another highly useful option. It uses your Foreground color and transitions it to complete transparency. This is invaluable for creating effects like fading edges, darkening areas of an image, or softening skies.
When using this gradient, the "transparency" is actually the underlying content of the layer below becoming visible. If you apply it to a new layer above a white background, the white you see is the background showing through the transparent areas of the gradient. To truly see the effect, you would need to hide the background layer or apply the gradient to a layer with transparency.
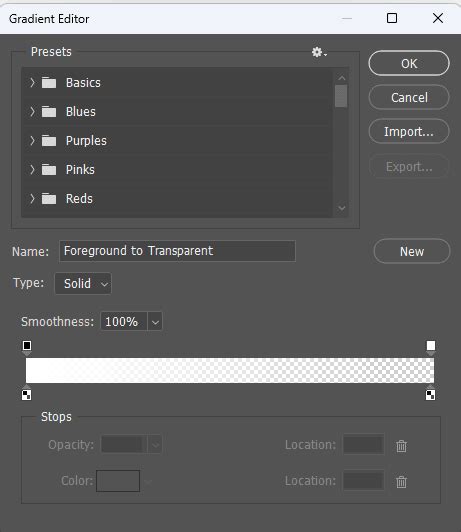
A key characteristic of the Foreground to Transparent gradient is that it does not overwrite previous instances of itself. Instead, new applications of this gradient add to the existing ones, allowing for cumulative effects.
Preset Gradients: Black, White and More
If you need a straightforward black-to-white gradient and your Foreground and Background colors are not set to these defaults, you can select the "Black, White" gradient directly from the Gradient Picker. It's typically the third thumbnail from the left in the top row.
Gradient Styles: Shaping Your Blend
The Options Bar provides five distinct Gradient Style icons that control the shape and direction of your gradient's transition:
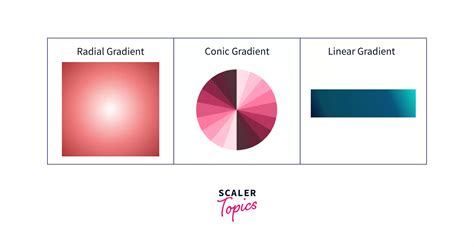
Linear Gradient: This is the most common style, creating a straight-line transition from the starting point to the ending point, based on the direction you drag. We've already explored this extensively.
Radial Gradient: This style creates a circular gradient that radiates outward from a central starting point. The distance you drag determines the size of the circle.
The 3 BEST Ways To Use Gradients In Photoshop
Angle Gradient: The Angle gradient sweeps around the starting point in a counterclockwise fashion, creating a conical or swept effect. It uses the starting and ending points to define the angle of the sweep.

Reflected Gradient: This style applies a linear gradient from the starting point to the ending point, and then mirrors that gradient symmetrically on the opposite side of the starting point. It's essentially two linear gradients reflecting off each other.
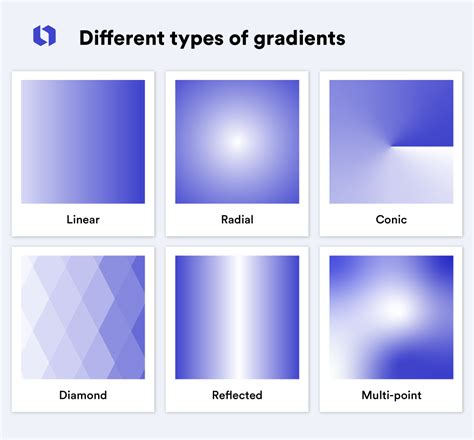
Diamond Gradient: Similar to the Radial gradient, the Diamond gradient emanates from a central point. However, instead of a circular spread, it forms a diamond shape.
Applying Gradient Styles
To apply any of these styles, select your desired gradient from the Gradient Picker, then choose the corresponding style icon from the Options Bar before you click and drag in your document. The starting and ending points of your drag will dictate the placement and scale of the gradient for all styles except the Angle gradient, which uses the points to define the sweep angle.
Advanced Gradient Options: Dither and Transparency
Two important checkboxes in the Options Bar offer further control over your gradients:
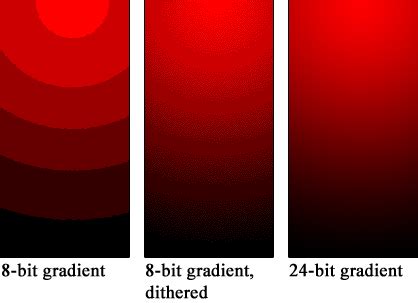
Dither: When checked, the Dither option introduces a small amount of noise into your gradient. This is a crucial technique for smoothing out transitions between colors and preventing "banding" â visible, stepped lines that can appear when color transitions are not gradual enough.
Transparency: If you are using the classic Gradient Tool and your gradient includes transparent areas, checking the "Transparency" checkbox ensures that these transparent areas are rendered correctly, allowing underlying layers to show through.
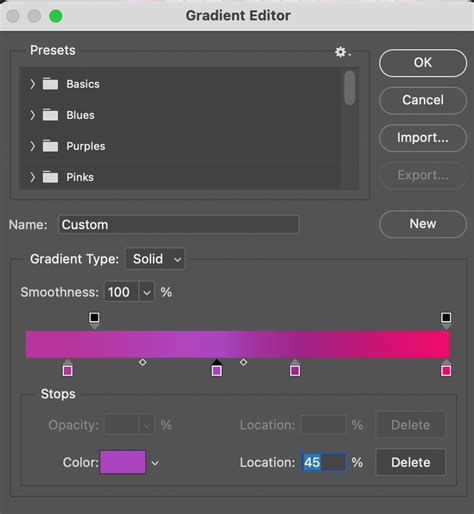
Gradient Editor: Crafting Custom Gradients
While the Gradient Picker offers a convenient selection of presets, the Gradient Editor is where you can truly unleash your creativity by designing and customizing your own gradients. Although this tutorial focuses on the basics of drawing with the Gradient Tool, understanding the Gradient Editor is the next logical step for advanced users. It allows you to precisely control colors, opacity, and color midpoints, saving your unique creations as custom presets for future use.
Beyond the Basics: Gradient Maps and Layer Styles
The Gradient Tool is not the only way to incorporate gradients into your Photoshop workflow.
- Gradient Map: This image adjustment allows you to remap the tonal range of an image using a gradient. It's a powerful tool for colorizing photos or creating dramatic artistic effects.
- Gradient Overlay Layer Style: Applying a gradient as a layer style allows you to overlay a gradient onto existing layer content, such as text or shapes, with adjustable blend modes and opacity.
Conclusion: Experimentation is Key
The core of mastering any Photoshop feature, including gradients, lies in experimentation. Don't hesitate to explore the different tools, presets, and styles. Try drawing gradients on various layer types, experiment with different drag distances and directions, and combine gradients with other Photoshop features like layer masks and blend modes. The wealth of information available, including numerous video tutorials and online resources, further supports this journey of discovery. By consistently practicing and exploring, you'll undoubtedly develop a deep understanding and proficient skill in utilizing Photoshop's gradient capabilities.