This tutorial guides you through the process of designing a visually appealing website template for a jewelry brand using Adobe Photoshop. We will meticulously cover each step, from initial setup and layer management to applying intricate blending options, font settings, and special effects, ensuring a clear and followable workflow for designers of all levels. The objective is to create a professional-looking, high-impact web design that effectively showcases jewelry collections.
Setting the Canvas and Initial Background
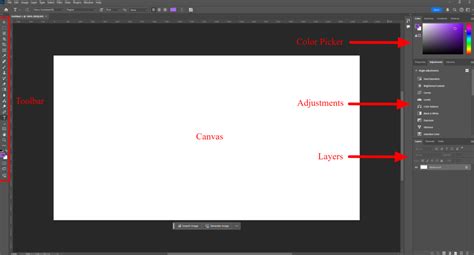
The first step in creating any design is to establish the working environment. Open Adobe Photoshop. For this tutorial, we will be using Photoshop CS3, but the principles apply to most versions. Navigate to the main menu bar and select File > New. This action will open the New document window. Within this window, set the parameters for your canvas. While specific dimensions can vary based on your project's needs, a common starting point for web templates is a width of 1920 pixels and a height of 1080 pixels, with a resolution of 72 pixels/inch and an RGB color mode. Once these parameters are set, click the "OK" button to create a new, blank Photoshop file.

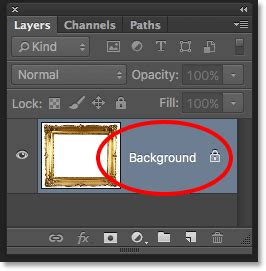
Upon opening your new Photoshop file, the next crucial step is to create a foundation for your design. Select the "Create a new layer" icon, typically found at the bottom of the Layers panel, and immediately rename this layer to "background." This organizational practice is vital for maintaining clarity as your design evolves. After renaming, open the background.jpg image file into your Photoshop document. This image will serve as the base visual for your website template. You can download the background.jpg image by clicking on the provided link. Once opened, this background image will be displayed within your Photoshop canvas, providing the initial visual context for your design.
Designing the Showcase for Jewelry: Bracelets
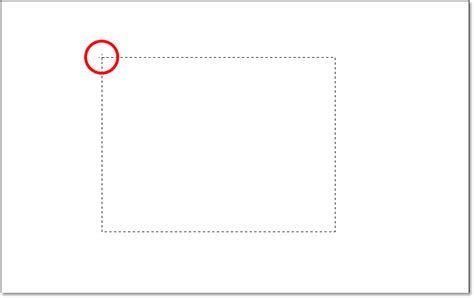
With the background in place, we begin to build the core elements of the jewelry display. Create another new layer and name it "jewel cuffed bracelet." This layer will house the visual representation of a bracelet. To start shaping this element, select the "Rectangular Marquee Tool" from the Photoshop toolbox. Use this tool to draw a vertical rectangular selection on your canvas. This selection will act as a guide for the subsequent gradient application.
Next, activate the "Gradient Tool" by selecting it from the toolbox or by pressing the shortcut key "G." In the gradient editor, you will define the colors for a radial gradient. Set the hex value for the right side gradient color node to #000000 (black) and the hex value for the left side gradient color node to #850900 (a deep red). Apply this radial gradient to the selection you previously created.
Following the gradient application, you will incorporate an HD image of a bracelet. This image should be placed within the gradient box you've just created. After placing the bracelet image, it's time to integrate it with the gradient. Select both the layer containing the gradient box and the layer containing the bracelet image. Press CTRL + e (or Cmd + e on a Mac) to merge these two layers together. This consolidation ensures that the bracelet is seamlessly incorporated into the gradient element. You can download the bracelet image by following the provided link.

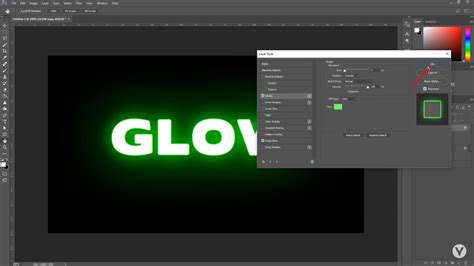
The merged ring image might appear to blend into the background layer due to similar color tones. To ensure the ring stands out prominently and has a distinct visual presence, we will apply an "Outer Glow" effect. This effect adds a subtle luminous halo around the object, enhancing its visibility. If you intend to import this template into Adobe Flash for further development, it is advisable to apply such effects directly within Flash for potentially superior quality and animation capabilities.
To apply the Outer Glow, double-click on the layer containing the merged ring image. This action will open the "Layer Style" window. Within this window, navigate to the "Outer Glow" parameter. Set the desired settings for the Outer Glow effect. Typically, you would adjust the color of the glow (often a white or light gold for jewelry), the opacity, the spread, and the size to achieve a subtle yet effective enhancement.
Expanding the Jewelry Showcase: Bangles and Rings
To create a rich and varied display of jewelry, we will add more items to the template. Following the same process as for the bracelet, add the images bangles.jpg, ravishing_rings.jpg, and earings.jpg to your Photoshop file. For each of these newly added images, apply the "Outer Glow" parameter with settings similar to those discussed in the previous step for the initial bracelet. This ensures a consistent visual style and enhances the appeal of each jewelry piece.
Once all four jewelry images (bracelet, bangles, ravishing rings, and earrings) are in place and have their respective Outer Glow effects applied, it's crucial to arrange them harmoniously. Use the "Move Tool" (V) to align these images on the canvas. The goal is to create a balanced and aesthetically pleasing composition that guides the viewer's eye effectively across the different jewelry items.
Adding Textual Elements: Labels and Branding
Text plays a vital role in any website design, providing context and information. We will now use the "Text Tool" to add descriptive labels to each of the jewelry images. For the images displayed from left to right, enter the following text: "RAVISHING RINGS," "CUTTING EDGE EARINGS," "JEWEL CUFFED BRACELETS," and "FASHION PULSE BRACELETS."
For these labels, set the font to "Aparajita," the type to "Regular," the size to "18pt," and the color to "White." To further enhance their visual impact and ensure they stand out against the background, apply an "Outer Glow" effect to each of these text layers, using the same method described earlier for the jewelry images.
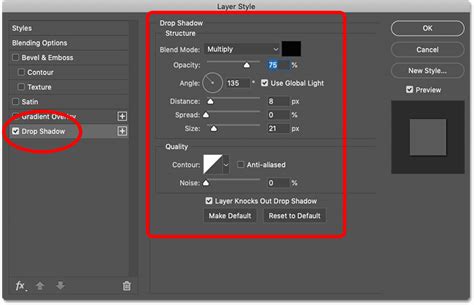
Next, we will introduce the brand's name, a key element for establishing brand identity. Use the "Text Tool" again to enter the company name: "ENTHEOS Jewels." For this prominent text, select the font "Rage Italic," keep the type as "Regular," set the size to a substantial "72pt," and choose "White" as the color. To give this brand name a professional and polished look, apply a "Drop Shadow" effect. Double-click the "ENTHEOS Jewels" layer to open the "Layer Style" window. Select the "Drop-Shadow" option from the list on the left and adjust the settings for distance, spread, and size to create a subtle depth. Click "OK" to apply the effect.

Following the brand name, we will add a tagline that complements the collection. Use the "Text Tool" to enter the text: "COLLECTION OF THE BEST KEPT SECRETS ON EARTH." For this tagline, set the font to "Trajan Pro," the type to "Regular," the size to "14pt," and the color to "White." Carefully align this tagline below the brand name or in a position that creates a cohesive typographic hierarchy.
Creating Navigation and Structural Elements
A well-structured website requires clear navigation. We will now implement a navigation bar with essential links. Use the "Text Tool" to enter the following text items, ensuring each is on a separate layer for maximum flexibility: "COLLECTIONS," "TIMEPIECES," "FRAGRANCES," "STORES," "EVENTS," "DOWNLOADS," and "CONTACT US." For all these navigation links, use the font "Orator Std," set the type to "Medium," the size to "18pt," and the color to "White." Arrange these text links horizontally across the template, typically near the top or bottom, to form a functional navigation menu.
To further enhance the visual appeal and add a focal point to the template, we will incorporate a hanging pendant element. Create a new layer and name it "hanging_pendant." Open the hanging_pendant.jpg image file into your Photoshop document and place it on this newly created layer. You have the option to add a "Drop Shadow" effect to this pendant for added depth, similar to how it was applied to the brand name. However, if your intention is to import this template into Flash for animation, it is recommended to avoid applying drop shadows or other layer styles in Photoshop. Instead, replicate these effects within Flash to ensure better compatibility and animation control. Align this pendant element strategically within the template, perhaps as a central decorative piece or as part of a featured section.

Finalizing the Web Template
With all the core elements in place â the background, showcased jewelry, brand identity, navigation, and decorative elements â your basic web template for a jewelry website is now ready. This template provides a strong foundation that can be further customized and expanded. You can easily add more images of jewelry, design additional sections for product details, incorporate interactive menus, or integrate other visual content that aligns with your brand's aesthetic. The layered structure of the Photoshop file allows for easy modification and iteration, enabling you to fine-tune the design until it perfectly meets your requirements.
