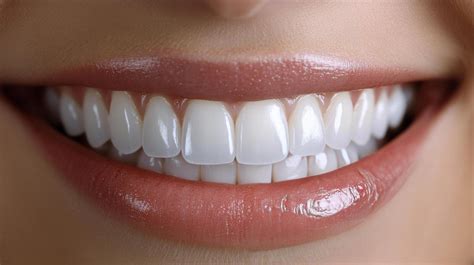
Whether it’s bad lighting or yellow stains caused by your coffee addiction, it’s inevitable to find photos of yourself smiling with not-so-white teeth. It’s not the worst thing in the world, but let’s face it, when it comes to close-up shots, wouldn’t it be better to have pearly whites instead? Fortunately, with the advent of powerful yet accessible photo editing tools, achieving a dazzling smile in your pictures is no longer a distant dream. This guide will delve into the specifics of teeth whitening within photos, primarily focusing on the capabilities of the Picsart app, and explore the underlying reasons why teeth might appear discolored in images, along with methods to prevent it.
Understanding the Causes of Yellowish Teeth in Photographs
Many times, teeth appear yellower in photos than they actually are. This phenomenon is often due to the light source. When there’s sufficient light, teeth typically don’t appear that yellow. However, when the light isn’t enough, or the surrounding light has a yellow tone, your teeth are likely to look yellower than they actually are. This can be exacerbated by the camera's white balance settings, which may misinterpret the ambient light and render white objects, including teeth, with a warmer, more yellow hue. Furthermore, the inherent properties of digital sensors and display technologies can sometimes contribute to a perception of yellowness, even if the actual tooth color is within the normal range. The type of flash used can also play a role; a flash with a warmer color temperature will naturally cast a yellowish light.
Strategies to Avoid Yellowish Teeth in Photos
It’s easy to guess the answers, as we already know what causes yellower teeth in photos. Simply avoid taking photos when the surrounding light source is yellow. Opt for environments with neutral or cooler lighting. Natural daylight is often the best choice for accurate color representation. If you are taking photos indoors, try to position yourself near a window or use lighting that has a cooler color temperature. Using a camera flash during the night can reduce the yellow tint in photos. Modern camera flashes often have adjustable color temperatures or can be diffused to provide a more even and neutral light. Experimenting with different flash settings and techniques can significantly improve the color rendition of your teeth. Additionally, be mindful of your background; brightly colored backgrounds, especially those with yellow or warm tones, can influence the perceived color of your teeth.
The Power of Photo Editing: Apps for Teeth Whitening
Yes, there are many apps that can help you whiten your teeth in photos. To whiten teeth in pics, we're going to use a free app. We are going to use PicsArt. It's a free app, and you can download it from the Apple App Store or Google Play. PicsArt is a comprehensive photo and video editor, collage maker, and sticker creator, recognized as the world’s largest creative platform with over 150 million monthly active creators and influencers. Its user-friendly interface and extensive range of tools make it an ideal choice for both novice and experienced editors. Beyond teeth whitening, Picsart offers a plethora of retouching tools designed to enhance your entire appearance in photos, from fixing blemishes and restoring skin tone to removing wrinkles and eye bags. The app’s Beautify tool, for instance, allows for a wide array of cosmetic adjustments, including altering the size and shape of facial features, smoothing skin, and even changing hair color.
Step-by-Step Guide: Free Teeth Whitening in Picsart
Let’s see before and after photos first. We have a tutorial on how to whiten teeth in a photo on YouTube. If you like to watch a video tutorial, go ahead and watch the video. If you’re like me and prefer to read, keep on reading. I’m going to show you a step-by-step tutorial on how to whiten teeth in photos in PicsArt for FREE.
WHITENING TEETH USING PICSART / @linuscreations269
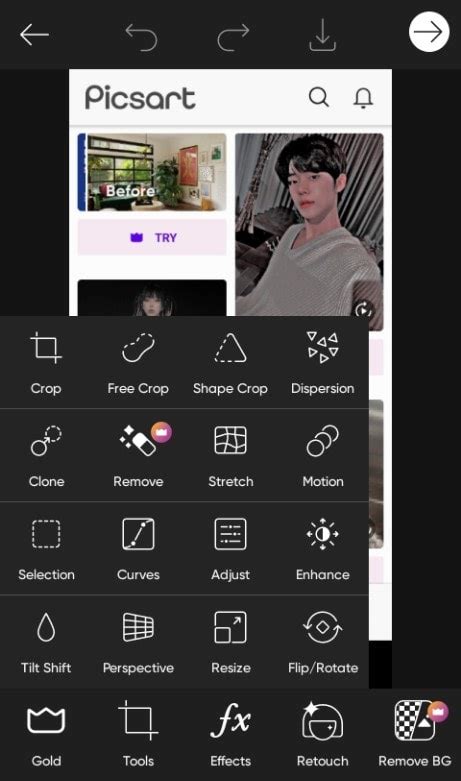
Step 1 - Open the Photo in PicsartBegin by opening the Picsart app. Tap on the purple plus (+) button at the bottom of your screen to open the Create menu. Select the photo you wish to edit. Once the photo is loaded into the editing interface, navigate to the "Tools" option in the bottom toolbar, and then select "Adjust."
Step 2 - Whiten the Teeth in a Photo on an App for FreeThis step involves making adjustments that will temporarily affect the entire photo, but our primary goal is to make the teeth look white. Apply the following adjustments:
- Saturation: -82
- Brightness: +4
- Highlight: +45
- Clarity: +14
- Contrast: +15
These settings are designed to significantly reduce the saturation, increase brightness and highlights, and subtly enhance clarity and contrast. This combination will make the teeth appear much brighter and whiter. While this will alter the overall tone of your image, we will correct this in the next step. Our immediate objective is to ensure the teeth achieve the desired white appearance.
Step 3 - Undoing the Brightening of Other PartsNow that our teeth look bright and white, we need to revert the changes made to the rest of the photo. Tap on the Eraser icon, typically found at the top of the editing screen. Once the eraser tool is active, tap on the "Invert" option. This action will undo the applied adjustments across the entire image. Immediately after inverting, you will see the eraser tool active again, but now it's set to restore the edits only where you brush. Select the brush icon (which should be active by default after inverting) and ensure the "Opacity" and "Hardness" are set to 100%. Now, carefully brush over the teeth area. As you brush, the adjustments (Saturation: -82, Brightness: +4, Highlight: +45, Clarity: +14, Contrast: +15) will be reapplied only to the teeth, restoring the rest of the image to its original state. This selective application ensures that only the teeth are whitened, while the rest of your photo remains as it was. You have successfully whitened the teeth in your photo. See the Before and After again.
If your teeth were not detected by an automatic tool, or if you need finer control, you can manually whiten them using the Manual tool. This involves lightly brushing over the teeth area with a whitening effect. The process is similar to using the eraser after inversion; you would use a brush with whitening adjustments applied only to the teeth.
Brightening Eye Whites: A Subtle Yet Impactful Enhancement
Brightening your eye whites is often a forgotten step in the usual photo editing routine. Although a tiny detail, it’s one that really rejuvenates your face and gives your photo that special finishing touch. The teeth whitening tool is a great hack for brightening your eye whites, too! You can easily use the Manual tool aforementioned and lightly brush over your eye whites for a similar whitening effect. This subtle enhancement can make your eyes appear more awake and vibrant, contributing to an overall more refreshed look.
Beyond Teeth: Exploring Picsart's Comprehensive Beautify Tools
Now that we’ve covered how to beautify your teeth and your eye whites, let’s discuss the rest of your gorgeous face! From fixing blemishes and restoring skin tone to removing wrinkles and eye bags, Beautify has all kinds of retouching tools for all your cosmetic needs.
- Auto Tool: The Auto tool is great for quick, on-the-go photo editing. Similar to an airbrush tool, Auto instantaneously brightens, smooths, and invigorates colors and features in your photo. It’s the quickest and easiest photo retouching tool, giving your photo an overall enhanced look by adjusting lighting, saturation, and many other components at the touch of a button.
- Beautify (Premium): This premium Beautify tool allows you to literally edit your entire face! Specifically, you can make adjustments to the actual size and shape of your face, nose, lips, eyes, and eyebrows. When clicking into each of these categories, you’ll see several variations of styles and a scale to control exactly how much you want to enhance that body part.
- Head: Adjust the overall size of your face.
- Jaw: Adjust your jaw size and jawline.
- Chin: Use this tool to adjust the size of your chin.
- Forehead: Enlarge or shrink your forehead.
- Nose: Enlarge or shrink the bottom half of your nose, lift or elongate your entire nose, or make your nose wider or narrower.
- Mouth/Lips: Adjust the size and shape of your mouth and lips. The lip plumper option can give you plump lips that still look natural.
- Eyes: Enlarge or shrink eye size, adjust vertical size to make eyes look more or less wide open, and reposition eyes up or down on your face. The "Plus Eye" icon allows adding extra eyes if the app didn't detect all individuals in a group photo.
- Eyebrows: Adjust the vertical position, thickness, symmetry, and horizontal position of your eyebrows. The "Shape and expression" tool can change the expression and emotion on your face.
- Wrinkle Tool (Premium): This is another premium tool that’s great for any wrinkles you want to smooth over. The app may automatically detect and smooth over any visible wrinkles in your photo.
- Smooth Tool: Similar to the Wrinkle tool’s smoothing effect, the Smooth tool gives your entire photo an overall glam vibe. It smooths over any hard edges and surfaces, adding a glow-like effect to your image.
- Face Fix Tool: Feeling a bit tired? Check out the Face Fix tool for an overly dramatic glow/blur effect that gives your photo a unique texture.
- Blemish Fix: If you have a pesky little blemish or pimple you want to blur out, the Blemish Fix is your go-to retouching tool. Simply tap on the blemish area on your face and watch the tool work its magic. You don’t need to download a separate blemish remover app; Picsart’s Blemish tool is your go-to retouching tool for any pimples you want to blur out. We suggest zooming in on the area with the blemish first. Then, simply highlight the blemish and you’ll immediately see it fade away.
- Hair Color Tool: Have you ever wanted to dye your hair pink or blue or red, but chickened out? This unique Hair Color tool allows you to explore a whole spectrum of colors you can digitally apply to your hair. Play around with the Amount and Saturation scales to adjust how deep you want the color.
- Detail Tool: Imagine making the title of your essay bold. The Detail tool is the photo editing version of that. Simply swipe over the desired area and see the colors pop in your eyes.
- Eye Color Tool: Want blue eyes to match your blue hair? That’s a whole vibe and it’s totally doable with this feature! The app may automatically detect your eyes, or you can manually place the tool directly on your pair of eyes.
- Red Eye Tool: Camera technology has undoubtedly advanced in the past decade, yet we still end up with red eyes from time to time. This tool is a necessity for such times.
- Makeup Tool: Whether it’s the intricate details of your face or the overall tone and effects of your image, Picsart’s cutting-edge photo editing tools meet any and every retouching need to give you a more flawless photo. Here, you can try on various lipstick shades, apply blush, contour, highlights, eyeliner, and eyeshadow.
Yellow teeth, eye bags, and blemishes are among the many minor details that can have a big impact on your photos. So don’t limit yourself to just the Auto or Face tool.
Enhancing Image Quality with Picsart's AI Tools
Ever taken a photo that captured a special moment, only to find it lacking in that certain je ne sais quoi? Perhaps it’s a touch blurry, the colors look dull, the facial expression is off, or the overall quality just feels a bit off. Don’t rush to discard the photo just yet! Picsart is here to save the day (and your photo). Whether you’re a seasoned photographer or just starting your editing journey, Picsart offers a variety of tools like AI Enhance and Retouch tools to help you transform your photos from good to great.
Meet the Picsart AI Enhance, a complex of industry-leading image upscaling tools that improve the overall quality of an image for printing or sharing online. It uses a generative AI model to add pixels, remove or blur pixelated effects, and sharpen and restore faces in any image. Just look for AI Enhance both in-app and on the web editor to try it on your photos. "Now we can apply our generative AI model to any image and increase the quality by up to 16x."
Image enhancement is a graphic design process in which you digitally adjust an image. This can include basic enhancements often found in your camera, like adjusting the brightness, contrast, clarity, and saturation of a photo. Other more advanced photo enhancement tools are found in photo editing platforms, spanning everything from photo filters and effects to noise reduction. Photo enhancement empowers you to unlock the full potential of your images. It’s more than just adding filters or effects; it’s about bringing out the clarity, detail, and vibrancy that might not have been fully captured in the camera.
- Sharpen Up Details: AI Enhance utilizes advanced AI technology to analyze and improve the clarity of your photos.
- Enhance Low-Light Photos: Photos taken in low-light conditions can often appear dark and grainy. AI Enhance can help to improve their quality.
- Make Colors Pop: Photo enhancement can also analyze and adjust color saturation and vibrancy, making your photos appear richer and more eye-catching.
- Refine Professional Photos: Enhancing photos can help you keep a consistently high-quality presentation across all platforms, whether digital or print.
- Digitize Old Photos: Ever had to snap a pic of an old photo? AI Enhance can help improve the quality of such images.
- Remove Blur: Enhancing photos can help save photos by removing visually unappealing blur and making everything look clear.
These are just a few examples of how enhancing a photo can help improve its overall look.
Using AI Enhance in Picsart
Ready to enhance your photos?
- Open the Picsart app and tap on the plus sign (+) at the bottom of your screen.
- Now you’ll see your image in the photo editing experience. Click on AI Enhance in the upper toolbar.
- Tap on HD Portrait and adjust the level of intensity.
- Make any other adjustments as needed.
- That’s it! You enhanced your image in just a few clicks. Now click on Export to download and save your image.
Other Photo Enhancement Techniques in Picsart
Beyond AI tools, Picsart offers a range of manual adjustments to elevate your images:
- Cropping: The quickest and easiest way to enhance an image’s focus and composition is with a simple image crop. Cropping out unwanted clutter in the background allows you to emphasize the focal point of your image.
- Blurring Backgrounds: Blurring the background of an image is another technique used to place focus on a specific element in your image. For example, if you have a city skyline photo with text overlay, you can enhance the photo by blurring the skyline to allow more emphasis on the text.
- Adding Text: Depending on your project, adding text can enhance your image. Select a complimentary font and font color and place the text in an appropriate spot on your image that does not interfere with the photo elements.
- Saturation: Saturation is a useful technique to enhance the depth of color in your image. Depending on how you use it, a saturation tool can either intensely deepen colors or fade them out. But, be wary of over-saturating your photo as it creates an unnatural and unappealing effect.
- Contrast: Similar to saturation, the use of contrast is a great way to elevate the intensity of your photo. Increasing the contrast intensifies the existing lighter and darker tones for a more dramatic effect. Reducing the contrast can flatten and even out the tone in your photo, which can be a great enhancement depending on your design goals.
- Brightness/Exposure: Lighting is a key component to good photography. If you can’t get the lighting right when you snap your photo, you can easily adjust it through brightness or exposure tools in photo editing apps. When it comes to using brightness tools, we suggest using the scale slowly as your photo could get too bright or too dark rather quickly.
- Photo Filters and Presets: Photo filters and presets have truly changed the photo editing world forever. With just a tap, a filter can transform your image in ways that would take significantly longer to manually achieve. If you’re going for a specific look, filters are a great way to speed up your photo editing process.
- Collages: An organized grid of images is a great way to showcase a moodboard or project that has multiple images. It provides a clean layout for your images to compliment rather than distract from one another. Most photo editing apps like Picsart have an array of diverse collage templates you can choose from.
- Upscaling Low-Resolution Images: If you’re working with a low-resolution image, the best way to enhance it is to first upscale your image. This will help remove any graininess and make it more crisp.
- Stickers: This is one of the more unique editing tools to enhance an image. But, with Picsart’s practically limitless library of diverse stickers to choose from, you can elevate your image in a really special way. You can also create your own stickers to add to photos.
Retouch tools are more complex and intricate editing tools that are used to target specific areas of the face and body. These tools are especially useful for enhancing portrait-style pictures where you can individually enhance facial features, like whitening teeth.
Other Apps for Teeth Whitening
If you don’t use Picsart, you can use these apps also. The steps will be the same. Only the UI will be different.
- Snapseed
- Photoshop Express
Professional Assistance for Photo Editing
I understand if you’re not getting a good result with complex tutorials. This is a complex tutorial for many of us. I’m here to help you. My team will whiten your teeth in your photos. We provide photo editing services. Use the saturation adjustment layer and Lasso tools in Adobe Photoshop to improve the look of anyone’s smile in pictures, from pro headshots to commercial photos. Make a good first impression with a professional headshot or pop the brightness of an athlete’s smile in commercial photography by learning how to adjust for white teeth in Photoshop - a skill that can help you combat years of subjects’ teeth-staining habits. The process typically involves:
- Creating a new adjustment layer over the original image for flexibility.
- Using the Lasso tool to make a selection that goes along the edges of the teeth.
- In the adjustments drop-down menu, selecting the Hue/Saturation adjustment layer.
- Adjusting the sliders to whiten the teeth.
- If you notice a harsh edge to your selection, fix it in the Properties panel by selecting Masks. Using this same method, you can edit pet photography to brighten a dog’s eyes against its darker fur.
Conclusion
PicsArt offers a comprehensive suite of tools to enhance your photos, from basic teeth whitening to intricate facial retouching. Whether you're looking to fix a minor imperfection or completely transform an image, Picsart's user-friendly interface and powerful features make it an indispensable tool for anyone looking to level up their photography. Download the app or start editing on the web today to enhance your photos and videos with thousands of quick and easy editing tools, trendy filters, fun stickers, and brilliant backgrounds. Picsart is a full ecosystem of free-to-use content, powerful tools, and creator inspiration. With a billion downloads and more than 150 million monthly active creators, Picsart is the world’s largest creative platform. Picsart has collaborated with major artists and brands like BLACKPINK, Taylor Swift, the Jonas Brothers, Lizzo, Ariana Grande, Jennifer Lopez, One Direction, Sanrio: Hello Kitty, Warner Bros. Entertainment, iHeartMedia, Condé Nast, and more.