Procreate, a powerful digital art application for iPad and iPhone, offers an expansive and customizable brush library that serves as the foundation for countless creative endeavors, from illustration and image manipulation to calligraphy and lettering. Understanding how to import, organize, and even create brushes is key to unlocking the full potential of this versatile app. This guide will delve into the intricacies of managing your Procreate brushes, ensuring you have the tools you need at your fingertips.
Importing Brushes into Procreate: Expanding Your Toolkit
The ability to import external brush files is crucial for artists looking to expand their creative palette beyond Procreate’s default offerings. Procreate supports several file formats, including .brush, .brushset, and .brushlibrary for its own formats, as well as the widely used .abr format from Adobe® Photoshop®.
Importing Individual Brush Files (.brush)
Individual brush files, denoted by the .brush extension, allow you to install single brushes into your Procreate library. This method is particularly useful if you have older versions of Procreate (4.0 or lower) or if you prefer to import brushes one at a time.
The process begins by locating your .brush file. These are often found within the Downloads folder in your iPad’s Files app, under the "On My iPad" location. Once found, tap the file to unzip it if it’s compressed. Subsequently, tapping the .brush file itself will automatically import it into Procreate. After a successful import, your new brush(es) will typically appear in a category named "Imported," situated near the bottom of your Brush Library.
Importing Brush Sets (.brushset)
Brush sets, identified by the .brushset extension, are designed to import multiple brushes simultaneously, creating a cohesive collection. This format is the preferred method for Procreate version 4.1 and higher. The import process is similar to that of individual brushes. Navigate to the .brushset file in your Files app, tap it to unzip if necessary, and then tap the file to initiate the import. If you import a brush set, it will conveniently appear at the top of your current brush library, making it easily accessible.
Importing Brush Libraries (.brushlibrary)
For Procreate 5.4 and later, the .brushlibrary format offers a streamlined way to manage larger collections of brushes. These libraries can be imported directly from the Files app. Similar to importing .brush and .brushset files, you tap the [] button in the top right of your brush library and select "Import from Files." Navigate to your .brushlibrary file and tap on it to import. These libraries are integrated with the iPad's Files app, meaning changes made within Procreate will reflect in Files, and vice versa.
Drag and Drop Import Method
An alternative and often quicker method for importing brushes, brush sets, and brush libraries is through drag and drop. Open the Files app and locate your desired brush file. Press and hold the file until it visually lifts up, indicating it's ready to be moved. With your other hand, open Procreate and navigate to your Brush Library. Drag the held file directly into the Procreate app window. This method is particularly efficient when importing multiple files; you can select a single file to pick up and then tap other files with your free hand to add them to a stack. This stack can then be dragged and dropped into Procreate all at once.
How to import brushes into Procreate ✿ FREE brush ✿ Quick tutorial
Navigating and Organizing Your Brush Library
Once brushes are imported, effective organization becomes paramount for a smooth and efficient creative workflow. Procreate’s Brush Library is designed to be highly manageable, allowing you to curate your brush collection according to your preferences and project needs.
Understanding the Brush Library Interface
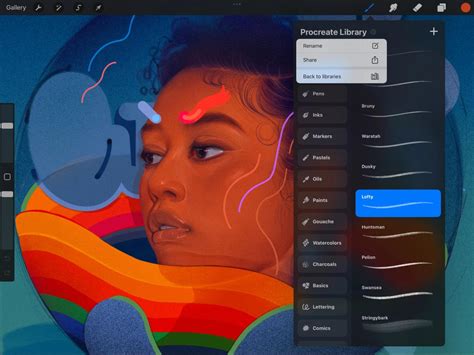
The Brush button, shaped like a paintbrush, is located in the top right menu bar of the Procreate interface. Tapping this button opens the Brush Library. You can also access it by selecting the Smudge or Erase tools. Within the library, brush sets are listed on the left, and tapping a set reveals the individual brushes it contains on the right. Each brush entry displays its name and a preview of the stroke it creates.
Creating and Managing Custom Brush Sets
While imported .brushset files come pre-grouped, you can create your own custom sets for individual brushes or to further categorize imported sets. To create a new set, ensure you are at the beginning of the brush list and tap the blue + button. This will create an "Untitled Set." You can then rename this set by tapping on it to open a pop-up menu. If you need to reposition a set, simply press and hold it, then gently drag it to your desired location. For more precise movements, using an Apple Pencil or stylus is recommended. The pop-up menu also offers options to Delete, Share, or Duplicate the set.
Moving Brushes into Custom Sets
To move brushes into your newly created sets, navigate to the set containing the brushes you wish to move (often the "Imported" set). Select a brush by pressing and holding it, then gently drag it up or down onto the desired new set. Again, an Apple Pencil or stylus can enhance precision. To move multiple brushes simultaneously, pick up the first brush and then tap other brushes with your free hand to add them to the selection. A number next to the green + icon will indicate how many brushes are in your stack.
Duplicating and Editing Brushes
Before making any modifications to existing brushes, it is highly recommended to duplicate them. This ensures you always have the original version as a backup. To duplicate an individual brush, swipe left on its thumbnail in the Brush Library and tap "Duplicate." This creates a copy, often indicated by a swoop icon and a number appended to the original name, which you can then safely modify. For brush sets, tap twice on the set you wish to duplicate, then select "Duplicate" from the options. Duplicated brush sets become custom sets, allowing you to rename, delete, or share them.
Renaming and Deleting Brush Sets and Brushes
Custom brush sets can be renamed by tapping on them twice to bring up the options menu. Similarly, to delete a custom brush set, select it by tapping, then tap again to open the options menu and choose "Delete." For individual brushes, you can also rename them from within the Brush Studio's "About this Brush" section. Deleting a brush or brush set is a permanent action that removes it from both Procreate and the Files app. Always ensure you have backups before proceeding with deletion. If a brush is accidentally deleted, it may be recoverable from the "Recently Deleted" folder within your iPad's Files app.
Sharing Brushes and Brush Sets
Sharing your custom brushes and sets is straightforward. To share an individual brush, swipe left on its thumbnail in the Brush Library and tap "Share." For custom brush sets, tap the set twice to open the options menu and select "Share." This allows you to distribute your creations to other Procreate users.
Exploring Procreate’s Built-in Brush Sets
Procreate comes equipped with a diverse range of 18 handcrafted brush sets designed to cater to a wide spectrum of artistic needs. These sets provide a solid foundation for various styles, from realistic rendering to fantastical creations.
Practical Drawing and Sketching
Sets like "Sketching" and "Technical Pen" are ideal for practical drawing, planning, and quick studies, offering clean lines and precise control.
Artistic and Rendering Brushes
For more artistic pursuits, "Painting," "Wet Acrylic," and "Dry Ink" offer a variety of rendering brushes that mimic traditional media, ideal for creating painterly effects and ink-centric artwork.
Textured and Special Effect Brushes
The "Texture" set focuses on imparting tactile qualities to your artwork, while sets like "Artistic" and "Creative" explore a broader range of digital painting effects, including acrylic, stucco, and oil mediums. The "Liquify" set, for instance, offers a fascinating array of watery to clumpy effects.
Lettering and Calligraphy
Brushes with "Streamline" enabled, such as those in the "Calligraphy" set, are essential for letterers, enabling the creation of smooth, consistent calligraphic forms.
Experimental and Unique Capabilities
Procreate also includes sets that showcase the app's unique capabilities. The "Luminance" set, for example, is designed to add realistic grunge textures, while the "Organic" set provides natural elements like grass, leaves, and bark. The "Pattern" set lays down large areas of texture rapidly, and the "Artistic" set demonstrates playful capabilities like color-changing brushes and chaotic shape generation.
Mastering the Brush Studio: Customization and Creation
The Brush Studio is the heart of Procreate’s brush customization, offering unparalleled control over every aspect of a brush’s behavior. You can access it by tapping the + button at the top right of the Brush Library to create a new brush, or by tapping on an existing brush and selecting "Edit."
Fundamental Brush Settings
Within the Brush Studio, you'll find numerous categories for adjustment. Under "Properties," you can define the maximum and minimum size of your brush. The "Stabilization" menu, featuring "StreamLine," is crucial for correcting wobble and achieving smoother strokes, especially for precise drawing and lettering.
Shape and Grain Sources
The "Shape" and "Grain" tabs are fundamental to a brush's appearance. The Shape acts as the brush tip, defining its basic form, while the Grain provides the texture. You can import custom shape and grain images, where 100% black in the image will be transparent in the brush, and 100% white will be solid.
Pressure, Tilt, and Taper
Procreate’s brushes can dynamically respond to your Apple Pencil input. The "Pressure Curve" in the "Preferences" tab allows you to dictate how pressure affects attributes like opacity and size. The "Apple Pencil" tab offers settings for "Tilt," controlling how the angle of your pencil affects stroke properties like opacity and size. "Brush Taper," found under the "Taper" tab, allows you to control the reduction in brush size at the start or end of a stroke, mimicking natural drawing or painting techniques. This includes "Pressure Taper" for Apple Pencil and "Touch Taper" for finger input.
Wet Mix and Blending
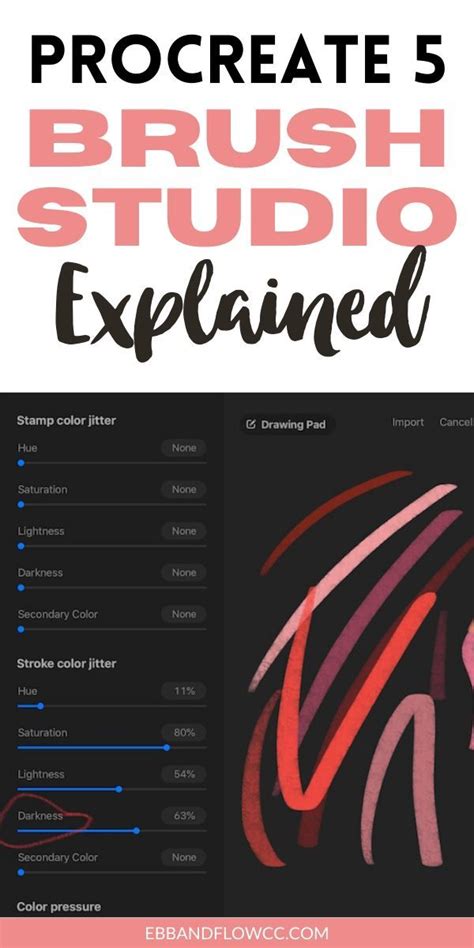
For advanced blending capabilities, the "Wet Mix" tab is essential. Unlike standard brushes that add new paint, blending brushes interact with and mix existing colors on the canvas. Settings like "Dilution" and "Charge" control how the brush interacts with the canvas paint, offering a level of control similar to, but more versatile than, Procreate's Smudge Tool.
Advanced Brush Management and Tips
As Procreate evolves, so too does its brush management system, integrating more deeply with the iPadOS Files app.
Brush Organization in Files App
Since Procreate 5.4, brush libraries are stored as files and folders within the Files app, typically in On My iPad → Procreate → Brushes or iCloud Drive → Procreate Brushes. This integration means that changes to brushes in Procreate are reflected in Files, and vice versa. When naming brush libraries, sets, or brushes, be mindful of operating system restrictions on certain characters.
Recent and Pinned Brushes
Procreate keeps track of your most recently used brushes at the top of the Brush Library under the "Recent" category. You can "Pin" frequently used brushes to keep them permanently at the top of this list, easily identifiable by a pin symbol. To remove a brush from "Recent" or unpin a brush, swipe left on it in the "Recent" set and tap "Clear" or "Unpin."
Backups and Troubleshooting
To safeguard your work, it's wise to back up your brushes and brush sets. This can be done by saving them to an external hard drive or a cloud service. If you encounter issues with imported brushes, such as .brushlibrary files not working, ensure your Procreate app is updated to the latest version (5.4 or higher) and that your iPad is compatible. Restarting your iPad and modem, and then re-downloading the brushes, can also resolve download or syncing problems.
By thoroughly understanding and utilizing Procreate's brush import, organization, and customization features, artists can significantly enhance their digital workflow and unlock new creative possibilities.