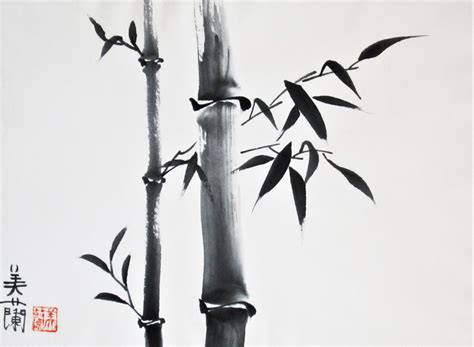
Sumi-e, which literally translates to "black ink painting" in Japanese, is an art form that transcends mere representation. It is a practice steeped in tradition, where each deliberate stroke on paper carries profound meaning and aesthetic beauty. Often poetically described as "poetry with a brush," Sumi-e does not aim for hyperrealism but rather seeks to capture the spirit, essence, and harmonious flow of nature. This meditative and relaxing process invites artists to connect with their subject on a deeper level, distilling its core characteristics into a few evocative lines and washes.
The allure of Sumi-e has inspired many to seek ways to replicate its distinctive aesthetic. While traditionally executed with a brush and ink on paper, the advent of digital art tools has opened new avenues for exploration. Recreating the nuanced textures, fluid strokes, and expressive qualities of Sumi-e with digital brushes has, until recently, presented a significant challenge. However, with the right tools and techniques, it is now possible to achieve remarkably authentic results within digital art applications like Procreate.
The Digital Sumi-e Workflow in Procreate
This tutorial outlines a method for creating a Sumi-e ink brush painting in Procreate, offering a step-by-step approach that can be followed by artists of varying skill levels. The process emphasizes simplicity, utilizing a limited set of brushes to achieve a rich and authentic look.
Step 1: Establishing the Foundation - The Wash
The initial step involves laying down a foundational wash that mimics the texture and subtle coloration of traditional Sumi-e paper. This wash provides depth and a sense of organic imperfection to the digital canvas.
- Brush Selection: For this, a brush with a discernible paper texture is recommended. If you have a custom brush like the "Ronin Wash" from the "Samurai Inks" pack, it's ideal. Alternatively, Procreate's built-in brushes, particularly those found in the "Painting" set with a textured feel, can be employed. For instance, the "Oriental Brush" can offer a comparable effect, though it may not yield the exact same nuanced results as specialized brushes.
- Color and Application: Select a light, earthy tone such as a pale ochre. Set your brush to a large size to efficiently cover the background. Apply the color with a loose, uneven hand. The goal is not uniformity; in fact, slight imperfections enhance the natural, handmade quality of the wash.
- Layer Manipulation: Once the wash is applied, set its layer's blend mode to "Multiply." This mode allows the underlying colors to show through while deepening the ink tones. Duplicate this wash layer.
Step 2: Adding Depth and Dimension
The duplicated wash layer is then manipulated to introduce subtle variations in tone and texture, contributing to the overall depth and atmospheric quality of the painting.
- Transformations: On the duplicated wash layer, apply transformations. Rotate and flip the layer either horizontally or vertically. This creates a slightly different textural pattern that will interact with the base wash.
- Blend Mode and Opacity: Change the blend mode of this transformed layer to "Color Burn." This mode further intensifies the colors and creates a richer, more blended effect. To control the intensity and prevent an overly dark result, reduce the opacity of this layer to approximately 40%.
Step 3: Preparing the Canvas for Painting
A new layer is introduced below the washes to serve as the primary painting surface, ensuring that the ink strokes appear distinctly against the textured background.
- Layer Order: Create a new, blank layer. Ensure this layer is positioned at the bottom of your layer stack, below the two wash layers you've already created. The correct layer order should be:
- The initial wash layer (set to Multiply).
- The transformed wash layer (set to Color Burn).
- The new blank layer.
- Active Painting Layer: Select this bottom-most blank layer. This is the layer where you will apply your ink strokes and begin to form the subject of your painting.
Step 4: Bringing the Subject to Life - The Ink Strokes
With the background prepared and the correct layer selected, you are now ready to begin the actual painting process, applying the characteristic ink strokes of Sumi-e.
- Brush Selection: Choose your primary Sumi-e ink brush. The "Samurai Sumi e" brush is specifically designed for this purpose and offers excellent control over stroke weight and texture. If you don't have this brush, Procreate's "Oriental Brush" can serve as a substitute.
- Painting: Begin to paint your chosen subject onto the blank layer. Think about the essence of what you are trying to capture. Sumi-e is about suggestion rather than meticulous detail. Allow the brush to guide you, embracing the spontaneity of the ink.
Essential Techniques for Authentic Sumi-e
Beyond the foundational steps, several techniques can elevate your digital Sumi-e paintings, bringing them closer to the expressive qualities of traditional ink work.
Brush Control and Variation
- Brush Size: Experiment with varying the size of your brush as you paint. Larger strokes can create bold forms, while smaller strokes allow for finer details or delicate lines. This variation is crucial for creating visual interest and a sense of dynamic movement.
- Drawing vs. Painting: Employ the brush for both drawing and painting actions. This means using it for outlining forms as well as filling areas with ink. Maintaining a consistent brush choice helps to preserve a cohesive aesthetic throughout the piece.
Utilizing the Eraser as a Brush
A clever technique to maintain stroke integrity when you need to correct or refine is to use your chosen Sumi-e brush as the eraser.
- Loading the Eraser: With the Sumi-e brush active, tap and hold the eraser icon. This action loads the currently selected brush into the eraser tool.
- Maintaining Stroke Integrity: Using the Sumi-e brush as an eraser ensures that any erased areas retain the characteristic texture and quality of your ink strokes, preventing harsh, unnatural edges.
The Expressive Power of Apple Pencil Tilt
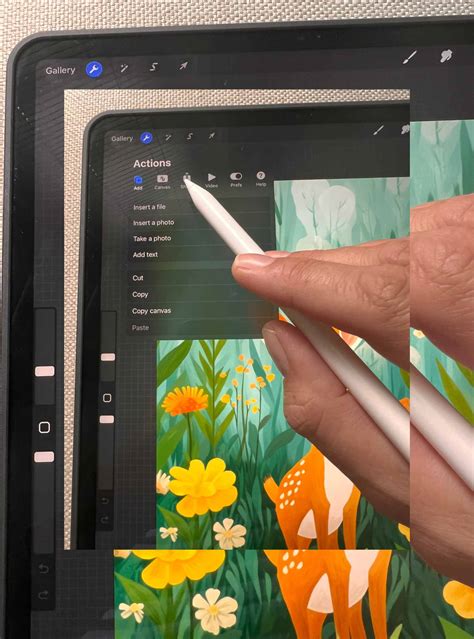
The Apple Pencil's tilt functionality offers a powerful way to introduce nuanced textures and effects, mimicking the varied pressure and angle of a traditional ink brush.
- Creating Textures: By tilting your Apple Pencil, you can achieve a range of effects, from broad, sweeping strokes that resemble wet ink washes to dry, scratchy textures that suggest the bristles of a brush. This is particularly effective for rendering natural elements like water, mist, or the texture of foliage.
- Emulating Traditional Brush Holding: Experiment with holding your Apple Pencil at different angles, much like you would hold a traditional brush. This can unlock new expressive possibilities and lead to more organic, less digitally rigid marks.
Procreate Tutorial: Unwind with an Easy Sumi e Painting
Embracing the Meditative Process
Sumi-e painting is as much about the journey as it is about the destination. The process itself is intended to be a form of mindful practice.
- Focus on Each Stroke: As the saying "poetry with a brush" suggests, each mark is significant. Take your time, be present, and appreciate the unique qualities of every stroke.
- Relaxation and Flow: The act of Sumi-e painting is often described as deeply relaxing and almost meditative. Allow yourself to enter this state of flow, where the focus is on the creative act itself.
- Efficiency: While embracing the process, you'll find that with practice, you can create beautiful and evocative Sumi-e paintings relatively quickly. It's not uncommon to complete two or more pieces in under half an hour once you become comfortable with the techniques.
Seeking Inspiration and Practice
If you find yourself in need of inspiration or wish to refine your skills, the vast resources of the internet are at your fingertips.
- Google Image Search: A simple Google search for "Sumi-e painting" will reveal a wealth of traditional and contemporary examples. Study the compositions, the brushwork, and the way artists capture the essence of their subjects.
- Recreating Techniques: Use these examples as a guide to practice recreating specific techniques or subjects. This hands-on approach is an invaluable way to learn and internalize the principles of Sumi-e.
Exploring Deeper Concepts in Ink Painting
Beyond the practical application in Procreate, understanding some of the underlying principles and historical styles of ink painting can enrich your artistic practice and appreciation.
Historical Styles and Terminology
The world of East Asian ink painting is rich with diverse styles, each with its own philosophy and aesthetic. Understanding these terms can provide context and inspiration.
- Gongbi (å·¥ç): Literally meaning "meticulous," this is the oldest style of Chinese painting and places a strong emphasis on detail and precision. It is characterized by fine, even lines and a careful rendering of form.
- Xieyi (寫æ): Translating to "freehand," this style originated during the Song Dynasty. Rather than focusing on minute details, Xieyi aims to capture the spirit or expression of the subject. It is characterized by spontaneous, expressive brushwork.
- Jiaohua (ç¦å¢¨): This term refers to "fine line" painting, emphasizing the art of linework as the primary element of the composition.
- Mogu (æ²éª¨): Meaning "boneless," this style refers to a technique where colors are applied directly without prior ink outlines. The ink sketch, or bone, is essentially omitted, with the base color laid down first.
The "Bone" in Chinese Painting
The concept of "bone" in Chinese painting is a fundamental principle, often discussed in relation to structure and line.
- Six Points to Consider: The influential art critic Xie He, in his "Six Points to Consider When Judging a Painting" (繪ç«å æ³) from circa 550 AD, implicitly or explicitly addresses the importance of structural integrity, which can be understood as the "bone" of a painting.
- Line as Structure: In Chinese painting, the line is often seen as the fundamental structure of an image. It's the skeleton upon which the rest of the painting is built. The stroke and line are considered the core of the painting, much like bones are essential to the human body.
- Mogu and the Absence of Bone: As mentioned, the Mogu (boneless) style deliberately departs from this principle by painting the base color directly, without a preliminary ink sketch or outline.
Brush Types and Their Characteristics
Different brushes are designed to produce distinct effects, mirroring the variety found in traditional ink painting tools.
- Kaze Fude (風ç): This brush is excellent for creating dry brush effects, where the ink appears to skip across the paper, creating a textured, wispy appearance.
- Sumi Damari Hitsu (墨ã ã¾ãç/Ink Brush): This brush is designed to mimic a "wet brush" effect, allowing for richer, more fluid ink pools and gradations. It can be challenging to master, much like its real-world counterpart.
- NÅtan Tekusuchaburashi (æ¿æ·¡ãã¯ã¹ãã£ãã©ã·/Shade Texture Brush): This brush is specifically for creating watery brush effects, allowing for soft, diffused tones and washes.
- Suisai mÄkÄ ââ²â to tekusuchÄsetto (水彩ãã¼ã«ã¼ââ²â ã¨ãã¯ã¹ãã£ã¼ã»ãã/Watercolor Marker and Texture Set): This comprehensive set often includes various brush tools, blending tools, and textures that are invaluable for exploring and achieving sophisticated ink wash effects.
Incorporating Texture Layers
To further enhance the authentic feel of digital Sumi-e, integrating texture layers is highly recommended.
- ð·ã¬ã¤ã¤ã¼ã»ãã/水彩ãã¯ã¹ãã£ã¼ð· (Layer Sets/Watercolor Textures): These pre-made texture sets, often included within broader asset packs like the "Watercolor Marker and Texture Set," can be placed behind your ink work to simulate the grain and absorbency of traditional paper.
The Intertwined Nature of Painting and Calligraphy
In Chinese culture, painting and calligraphy have historically been deeply intertwined. This connection influences the artistic approach to Sumi-e.
- Calligraphy as a Foundation: Calligraphy, with its emphasis on precise and expressive linework, forms a foundational element for many ink painters. The understanding of stroke order, pressure, and flow in calligraphy directly informs the brushwork in painting.
- Expressive Text: The inclusion of calligraphy, such as the example "å·´åæ°å¹´å¿«ä¹ (bÄ là xÄ«n nián kuà i lè)" meaning "Happy Balinese New Year," is a common practice. This can add a personal touch, cultural context, or a decorative element to the artwork. The red seal, bearing the characters for "rabbit" and "skewer," further illustrates the integration of personal symbolism and artistic expression.
Final Touches and Optional Elements
Just as in traditional Sumi-e, there are often final touches that can enhance the painting.
- White Highlights: A touch of white, perhaps applied with a brush like the "Kaze Fude" for a subtle texture, can be used to create highlights or subtle accents, adding a final layer of refinement.
- Red Seals: The incorporation of a red seal, often bearing the artist's name or a symbolic motif, is a traditional element that adds authenticity and a personal signature to the artwork.
By combining the intuitive interface of Procreate with an understanding of Sumi-e principles and techniques, artists can create digital ink paintings that are not only visually appealing but also deeply resonant with the spirit of this ancient art form. The process encourages mindfulness, artistic exploration, and the capture of nature's essence through the evocative power of black ink.