For digital artists utilizing Procreate, the ability to create custom brushes significantly enhances creative expression and workflow efficiency. Among the most versatile and sought-after brush types is the outline brush, a powerful tool that allows for the creation of distinct, bordered strokes. This tutorial will guide you through the process of constructing a functional outline brush within Procreate, focusing on the essential steps and settings required to achieve a professional-looking effect. We will delve into the intricacies of brush combination and blend modes to unlock the full potential of this technique.
Preparing Your Workspace: Duplicating the Foundation
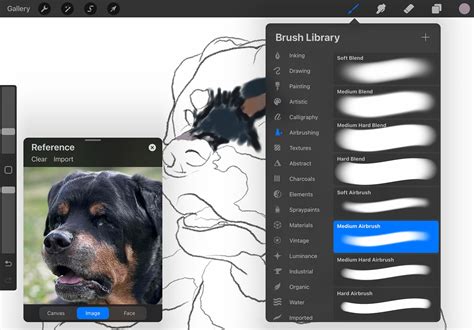
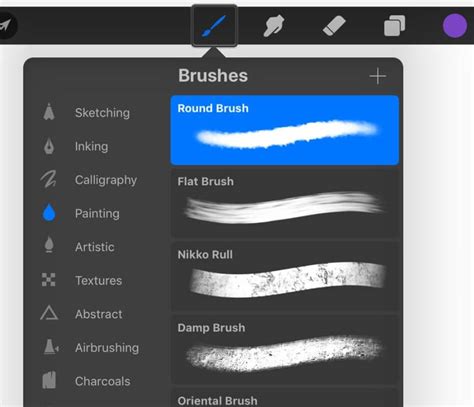
Before embarking on the creation of our custom outline brush, it is imperative to establish a solid foundation by properly preparing the base brush. The tutorial emphasizes working with a standard brush already provided within Procreate's extensive library. To begin, navigate to the "Brush Library," easily accessible via the brush icon located at the top right of your toolbar. Once you have identified a suitable standard brush - one that offers the characteristics you desire for your outline's core - the next crucial step involves duplication.
The process necessitates creating multiple copies of this chosen brush. Specifically, you will need to duplicate the original brush twice. This means you will end up with a total of three identical brushes: the original and its two copies. This duplication is not arbitrary; it forms the bedrock of the dual-brush technique that defines our outline brush. Having these identical copies ensures that when we later combine them and apply specific blend modes and settings, the underlying brush texture and behavior remain consistent, allowing us to isolate and manipulate the outline effect.
The Art of Combination: Merging for a Dual Effect
With our three identical brushes prepared, the next phase involves merging two of these copies to create the dual-brush effect essential for generating an outline. Select both of the duplicated brushes. You will observe a subtle but significant change in the "Brush Library" interface. Instead of the familiar "+" symbol, you will now see options for "Combine" and "Delete." Tap on the "Combine" option. Following this, tap on the newly formed combined brush. This action integrates the two selected brushes into a single, unified brush that can now be further customized within the Procreate Brush Studio.
The "Combine" function is a core feature that allows Procreate users to layer and blend different brush settings. This is where the magic of creating complex brush effects truly begins. By combining two instances of the same brush, we set the stage for manipulating their interaction to produce the desired outline. It’s important to note that the original brush, if you wish to preserve it for other purposes, remains untouched. This process is non-destructive, allowing for experimentation without losing your starting point.
Mastering Blend Modes: The Key to the Outline
Upon entering the Brush Studio for your newly combined brush, you will notice two distinct brush settings displayed: a primary brush and a secondary brush, positioned one below the other. While you possess the ability to edit each brush independently, for the purpose of creating a clean outline, our objective is to maintain the integrity of the primary brush and focus our adjustments solely on the secondary brush. This targeted approach ensures that the secondary brush's characteristics are specifically manipulated to create the outline effect around the primary brush's stroke.
Select the secondary brush by tapping on it. To access its blend mode options, tap on it once more. This action will reveal a panel where you can adjust various settings. Locate the "Normal >" indicator, which, when tapped, presents a comprehensive list of all available blend modes within Procreate. For the specific effect of an outline brush, the crucial blend mode to select is "Difference."
The "Difference" blend mode is instrumental here because it highlights the variations between the two layers (our primary and secondary brushes). When applied to the secondary brush, it effectively subtracts the pixels of the secondary brush from the pixels of the primary brush where they overlap. This subtraction, when combined with other settings, results in the visible outline. Understanding how blend modes interact is fundamental to advanced brush creation in Procreate, and "Difference" is a particularly powerful choice for this specific effect.
Fine-Tuning the Outline: Adjusting Maximum Size
At this juncture, you might observe that your brush strokes are no longer appearing on the drawing canvas. This is a common and expected outcome during the setup process, and it will be rectified in the subsequent steps. With the secondary brush still selected within the settings panel, navigate to the "Properties" section. Within "Properties," locate the "Brush behavior" subsection. Here, you will find a slider or numerical input for "Maximum Size."
The critical adjustment lies in lowering this "Maximum Size" value. As you begin to decrease the maximum size of the secondary brush, you will notice the primary brush stroke reappearing on the canvas, now rendered with a distinct outline. The extent to which you lower the "Maximum Size" directly influences the thickness of the outline. A significantly lower maximum size will result in a thicker, more pronounced outline, while a value closer to the original setting will produce a finer, more delicate border. Experiment with this setting until you achieve an outline thickness that aligns with your artistic vision. Once satisfied with the visual result, tap "Done" to apply all the configured settings and exit the Brush Studio.
The "Maximum Size" property, in conjunction with the "Difference" blend mode, is what creates the visual separation that defines an outline. By reducing the size of the secondary brush, we ensure it only affects the edges of the primary brush's stroke when it's applied at its maximum potential size. This creates a hollow effect, leaving the core of the primary brush visible and bordered by the manipulated secondary brush.
Testing Your Creation: Bringing the Outline Brush to Life
With the outline brush meticulously configured, it's time to put it to the test and witness its functionality firsthand. For optimal demonstration of the continuous outline effect, try writing your desired text in a script style without lifting your stylus from the screen. This method of continuous application allows the outline to flow seamlessly, creating a cohesive and unbroken border around your lettering.
If, during your testing, you find that lifting your stylus results in overlapping strokes, don't be discouraged. This is a characteristic of many outline brushes and can be managed. You can always employ an eraser tool to refine these overlapping areas, thereby achieving a cleaner, more continuous stroke effect. This iterative process of testing and refining is a vital part of the brush creation workflow in Procreate.
How to Make A Dual Color Outline Brush in Procreate That WORKS!
The success of this outline brush lies in its ability to provide a visually striking effect with relative ease of creation. The combination of a standard brush, the "Difference" blend mode, and the precise adjustment of "Maximum Size" in the "Properties" panel unlocks a powerful tool for adding definition and style to your digital artwork. This technique is not limited to text; it can be applied to shapes, illustrations, and any other element where a bordered stroke is desired, offering a versatile addition to any Procreate artist's toolkit.
Should you find yourself short on time or seeking pre-made solutions, exploring the diverse range of Procreate outline brushes available on platforms like Design Bundles can offer immediate access to professionally crafted options. However, understanding the underlying principles of their creation, as outlined in this tutorial, empowers you to not only use existing brushes more effectively but also to develop your own unique brush creations tailored to your specific artistic needs and preferences. This foundational knowledge is key to unlocking deeper levels of customization and artistic control within the Procreate ecosystem.
Further exploration into Procreate's brush engine can lead to even more sophisticated brush types. For instance, understanding how to import Procreate stamps can introduce new elements to your brush designs. Similarly, delving into tutorials on drawing ribbon lettering or creating illustrative elements like a butterfly in Procreate can reveal how different brush techniques can be combined and adapted for various artistic outcomes. The journey of brush creation in Procreate is one of continuous learning and experimentation, with each new technique opening up further avenues for creative exploration.