Procreate, a robust drawing and illustration application designed for the iPad, has emerged as an indispensable tool for fashion designers. Its intuitive interface and powerful features empower creatives to bring their visions to life, from initial concept sketches to polished final illustrations. This guide delves into the core benefits of Procreate for fashion design, offers secrets for maximizing its potential, and addresses its limitations with practical workarounds. While this article is not sponsored by Procreate, it stems from a genuine appreciation for the app and a desire to share insights gained from extensive personal use and frequent inquiries about its application in fashion.
The Natural and Intuitive Drawing Experience
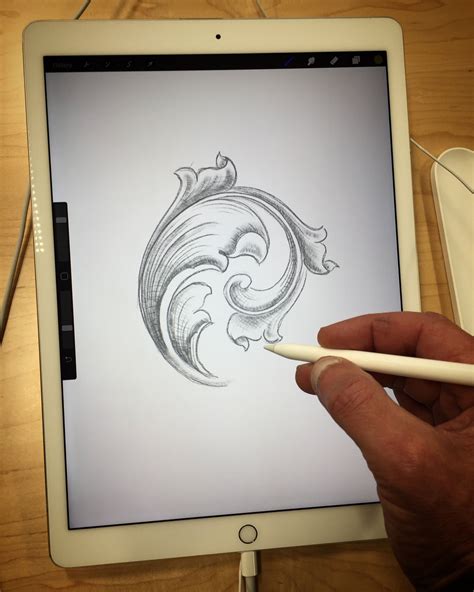
One of Procreate's most significant advantages for fashion designers is its remarkably natural and intuitive drawing experience, especially when paired with the Apple Pencil. Unlike the often rigid and precise nature of vector-based programs like Adobe Illustrator, where achieving smooth, organic lines can be a challenge, Procreate is engineered to emulate the tactile feel of traditional drawing tools. This mimicry of pen and pencil on paper makes it significantly easier to produce fluid, expressive lines, a crucial element for fashion designers aiming for a more organic and freehand aesthetic in their rough sketches and illustrations. The ability to adjust the Apple Pencil's pressure sensitivity further refines this natural feel, allowing for nuanced variations in line weight and stroke intensity that are essential for capturing the drape and flow of fabric.
The smooth surface of the iPad screen, while contributing to the sleek design of the device, can sometimes feel unnatural for those accustomed to the friction of pencil on paper, particularly when striving for detailed and expressive sketches. However, solutions exist to enhance this tactile feedback, making the drawing experience more comfortable and akin to traditional media.
Versatile Capabilities: From Concept to Polished Illustration
Procreate's versatility is a cornerstone of its appeal to fashion designers, catering to a wide spectrum of creative processes and end products. Whether one is in the nascent stages of brainstorming a new collection or meticulously crafting final illustrations, Procreate provides the necessary tools. Its capacity to support everything from rapid brainstorming sessions and rough concept sketches to detailed polished illustrations and technical flat drawings ensures that designers can maintain a consistent workflow within a single application.
The digital nature of Procreate offers unparalleled flexibility, allowing for the effortless iteration of ideas without the waste of physical resources. A design that isn't working can be swiftly deleted and replaced, a process that not only saves time and materials but also encourages bolder experimentation and exploration of new concepts.
Streamlining Design Adjustments with Selection and Transform Tools
Procreate's selection and transform tools are pivotal for efficient design modification. Tools like the Lasso or Magic Wand enable designers to isolate specific elements of their work for precise editing or manipulation. The Transform tool then allows for easy resizing and rotation of these selected elements. This is particularly beneficial when experimenting with variations in sleeve lengths, neckline designs, or other garment components, as well as for making subtle adjustments to the proportions of details like collars and pockets.
Leveraging Layers for Independent Element Editing
The organization of design elements within Procreate's layers panel is another key feature that enhances workflow efficiency. By working in layers, designers can edit individual components of their work independently, ensuring that changes to one element do not inadvertently affect others. This capability drastically reduces the need for redrawing or repainting sections, saving considerable time and effort.
Efficiency-Boosting Sketching Tools
Procreate incorporates several tools designed to accelerate the sketching process. The Symmetry tool is invaluable for fashion designers, enabling the real-time creation of mirror images of a sketch, which is crucial for visualizing the final, balanced appearance of a garment. The QuickShape tool is another game-changer; with a single stroke and a brief pause, it transforms freehand lines and shapes into perfect geometric forms. This is incredibly useful for rendering precise elements like buttons, zippers, and even creating clean curves for necklines and hemlines.
The undo and redo functionality in Procreate significantly alleviates the stress associated with making mistakes. A simple two-finger tap can undo the last action, while a three-finger tap redoes it. Furthermore, a tap-and-hold gesture allows for the undoing or redoing of a series of up to 250 actions, providing a robust safety net for creative exploration.
How to Use the Symmetry Tool in Procreate to Draw Easy Digital Doodles
Design Anytime, Anywhere: The Freedom of Mobility
Procreate's design for the iPad platform liberates designers from the constraints of a traditional studio setup, making remote work not just possible but highly practical. As a self-contained application, Procreate functions entirely offline, requiring no internet or Wi-Fi connection to access its full suite of features and tools. The only exceptions are for app updates, file sharing, or cloud backups, meaning that once the app is installed, designers can create and edit their work anywhere, from a bustling coffee shop to the comfort of their home, even without an internet connection.
The inherent portability of the iPad further enhances this freedom, allowing designers to sketch on the go, capture inspiration wherever it strikes, and work on their projects at any time. This mobility is a significant advantage for fashion professionals who often need to be adaptable and responsive. As one designer on Reddit shared, "The sheer freedom of Procreate rehydrated my desire to make stuff," a sentiment that highlights the app's ability to rekindle creative passion through its accessibility.
For those serious about mastering Procreate for fashion design, dedicated courses and resources are available to accelerate the learning curve and unlock the app's full potential.
Optimizing Your Procreate Workspace for Fashion Design
1. Custom Canvas Sizes for Superior Resolution and Clarity
A common pitfall for new Procreate users is the selection of a low-resolution canvas, which inevitably leads to pixelated designs. This is particularly problematic for fashion designers who require crisp lines to accurately depict silhouettes and intricate details. To circumvent this, it is crucial to establish a canvas with a sufficiently high resolution, at a minimum of 300 DPI, and dimensions appropriate for the intended final output. For instance, an illustration destined for print might necessitate dimensions of 8.5" x 11" (Letter Paper size). It's important to remember that larger canvases inherently demand higher resolutions to maintain design quality.
The aspect ratio of the canvas is another critical consideration. The aspect ratio dictates the proportion of width to height, and selecting one that aligns with the design's purpose is key. A portrait aspect ratio, for example, is often more suitable for a fashion illustration focusing on a full-figure silhouette, while a landscape orientation might be preferable for technical flat drawings that emphasize width. If unsure about the appropriate aspect ratio for a specific platform, a quick online search can provide the necessary specifications. For instance, searching "aspect ratio Instagram Reel" will yield precise dimensions for that social media format.
To create a custom canvas in Procreate:
- Open Procreate and tap the '+' icon in the upper right corner.
- Tap the rectangle icon with a '+' in its top right to access the Custom Canvas screen.
- Tap "Untitled Canvas" at the top to rename your canvas.
- Adjust the Width, Height, and DPI by tapping the respective values and entering your desired numerical input via the keypad that appears. Units of measurement can be changed on the left side of the keypad.
- Tap "Create" to finalize your new custom canvas.
Further guidance on canvas settings and the creation of reusable canvas templates can be found in dedicated resources.
2. Enhancing Drawing Comfort with Essential Accessories
The Apple Pencil is an integral tool for Procreate users, offering precise control and pressure sensitivity, which translates to detailed and expressive artwork. Its responsiveness ensures fluid lines and brushstrokes, making it ideal for fashion designers creating intricate illustrations and technical flats. However, it's worth noting that the USB-C version of the Apple Pencil and many third-party styluses may not support pressure sensitivity, a feature crucial for nuanced linework.
The inherent smoothness of the iPad screen can be a point of contention for those accustomed to the tactile feedback of traditional drawing. To mitigate this, textured screen protectors can significantly enhance the precision and the tactile feel of drawing with the Apple Pencil, bringing the digital experience closer to that of traditional media.
3. The Indispensable Fashion Croquis in Procreate
Utilizing a fashion croquisâa simplified outline of a human figureâis fundamental for creating proportional, symmetrical, and polished fashion sketches. A croquis serves as a consistent reference, ensuring that designs maintain realistic proportions and that sketches remain uniform. Designers can create their own custom croquis stamps within Procreate or opt for high-quality, pre-made croquis templates. These templates, often available in formats like .brushet stamp brush files, are designed to streamline the creation of professional-quality fashion illustrations.
Importing Croquis into Procreate:
- For
.brushetstamp brush files: Download and import the files to your iPad's Files app. Alternatively, download them to a computer and AirDrop them to your iPad. Clicking the.brushetfile will automatically import it into Procreate's Brush library. Another method is to open the Brush Library (paintbrush icon), tap the '+' button, and select "Import," then locate and select the.brushetfile. The brush will then appear at the top of your Brush library. - For other file types (e.g., JPG, PNG): Save the croquis image to your iPad's Photos or Files app. To import it into a new layer, tap the Actions button (wrench icon) in the toolbar, select "Add," then "Insert a Photo" or "Insert a File." The image will appear on a new layer, ready to be used as a guide.
Managing Your Croquis Layer:
To prevent accidental edits on the croquis layer, it's recommended to reduce its opacity and lock it.
- To reduce opacity: Open the Layers Panel (double rectangle symbol), tap the small letter next to the layer, and adjust the Opacity slider.
- To lock the layer: Swipe the layer to the left and tap "Lock." To unlock, swipe left again and tap "Unlock."
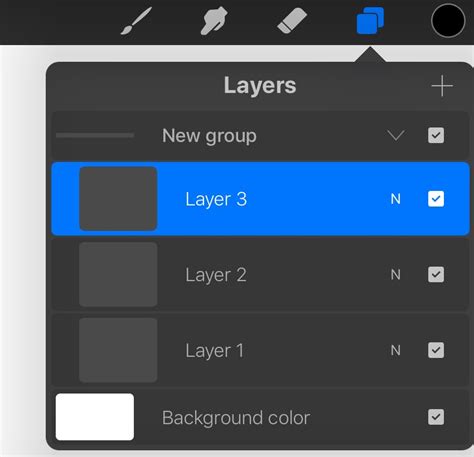
Creating a New Layer for Your Design:
To draw your design on top of the croquis, create a new layer by tapping the '+' button at the top right of the Layers Panel. This allows you to sketch your design independently while referencing the croquis structure. You can toggle the visibility of the croquis layer on and off by tapping the checkmark next to its name in the Layers Panel.
4. Achieving Symmetrical Garments with Ease
Procreate's vertical symmetry guide is a powerful feature that simplifies the creation of symmetrical garment designs. This guide automatically generates a mirror image of your sketch across the canvas's vertical axis, allowing designers to visualize the final, balanced appearance of the garment in real-time. This immediate feedback loop is invaluable for making necessary adjustments during the sketching process.
Setting Up and Adjusting the Symmetry Guide:
- Tap the Actions button (wrench icon) > select the Canvas tab > toggle on "Drawing Guide."
- Tap "Edit Drawing Guide." On the Drawing Guides screen, select "Symmetry" from the bottom options. Tap "Options," choose "Vertical," and enable "Assisted Drawing." The appearance of the guide (color, opacity, thickness) can be adjusted here.
- Tap "Done."
- To toggle the symmetry guide's drawing assist on and off for a specific layer, open the Layers Panel, double-tap the layer, and tap "Drawing Assist." Layers with this feature enabled will display "Assisted" below their name.
5. Perfecting Shapes with the QuickShape Tool
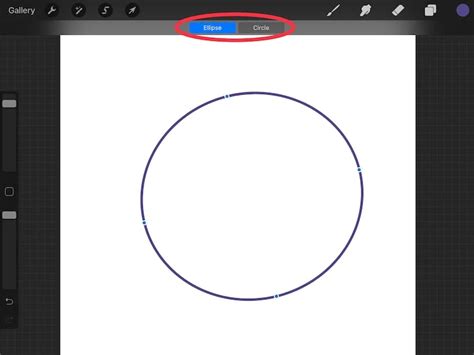
The QuickShape tool is a gesture-based feature that significantly enhances the precision of fashion illustrations. It allows for the rapid creation of perfect lines, circles, ellipses, triangles, and quadrilaterals. This is particularly useful for drawing elements like button plackets, zippers, buttons, beads, and smooth curves for necklines and hemlines.
How to Use the QuickShape Tool:
Draw a line or shape on the canvas and hold your pencil on the screen without lifting it. After a moment, Procreate's QuickShape tool will automatically activate, snapping your stroke into a precise shape. To scale or rotate the resulting shape, continue holding your pencil on the canvas and drag it.
Harnessing Procreate Fashion Brushes for Advanced Rendering
The integration of specialized Procreate fashion brushes has revolutionized the creation of fast, realistic concept sketches and presentations on the iPad. These brushes, often part of comprehensive kits, transform the iPad into a potent digital design studio. This section explores setting up and utilizing these brushes to efficiently produce stunning designs suitable for client presentations, focusing on rendering textiles, perfecting croquis, and optimizing workflows.
Setting Up Your Workspace for Brush Integration
Before diving into advanced brushwork, ensure your Procreate environment is optimized:
- Install Procreate: Always ensure you have the latest version of the app installed on your iPad.
- Organize Your Brush Library: Create dedicated folders within Procreate's Brush Library for different brush types, such as "Textile Brushes," "Fabric Rendering," and "Detailing Tools." This organization is key to quickly accessing the right tool.
- Set Up Canvas Dimensions: Configure your canvas dimensions in Procreate's settings to match your project's requirements, prioritizing high resolution (300 DPI or more) for clarity.
Understanding Brushes and Their Settings
Procreate offers a vast array of brushes, many of which are specifically tailored for fashion illustration.
- Procreate Fashion Brushes: These are designed for sketching clothing, accessories, and various garment details.
- Textile Brushes: These brushes are invaluable for realistically depicting the textures and nuances of different fabrics like denim, silk, cotton, and leather.
- Brush Customization: Procreate allows for deep customization of brush settings, including size, opacity, flow, and blending modes. Experimenting with these settings is crucial for achieving desired effects. Exploring resources on efficient textile illustration using Procreate brushes can provide deeper insights.
Creating a Base Sketch and Layering Textures
Your base sketch forms the foundation of any fashion illustration.
- Fashion Croquis Templates: Utilize pre-made croquis templates, such as those found in specialized fashion kits, or create your own.
- Sketch Basic Outlines: Employ pencil brushes to define the silhouette of the garment and establish its structure.
- Define Pose: Select a croquis template that reflects the desired pose, ensuring dynamic presentation.
- Fabric Rendering: Employ fabric-specific brushes to simulate the drape, texture, and volume of different materials. Layering these brushes with appropriate blending modes can create remarkably realistic effects.
- Detailing for Realism: Pay meticulous attention to small details such as buttons, zippers, stitching, and seams, using specialized brushes for precision.
- Skin Tone Palettes: If rendering figures, utilize curated skin tone palettes to accurately depict skin tones.
- Presentation Layout: Employ guides and grids within Procreate to maintain a clean, professional layout for client presentations.
- Incorporating Textures and 3D Models: For added dimensionality, consider incorporating texture overlays or even simple 3D model references.
Addressing Common Challenges and Misconceptions
A frequent hurdle for beginners in Procreate is navigating the sheer number of tools and gestures. Understanding how to effectively use gestures can unlock hidden functionalities and significantly speed up the workflow.
Q1: Can I use Procreate brushes for any type of fabric?A1: Absolutely. Procreate's extensive brush library includes a wide variety of textile brushes designed to simulate diverse fabrics such as denim, silk, cotton, wool, and leather. With customization and layering, almost any fabric texture can be convincingly rendered.
Q2: How do I render realistic fabrics in Procreate?A2: Realistic fabric rendering in Procreate involves using specialized fabric brushes, understanding texture application, and employing appropriate layer modes. Experiment with brushes designed for specific materials like denim or leather, and utilize layering techniques to build depth and subtle variations in surface texture.
Q3: Is Procreate suitable for professional fashion designs?A3: Indeed. Procreate, especially when augmented with professional fashion brush kits, is fully capable of producing high-quality, professional fashion sketches and illustrations suitable for client presentations and industry use.
Creating stunning fashion illustrations on your iPad with Procreate is more accessible than ever. By understanding the nuances of different brushes, mastering custom settings like opacity and flow, and employing effective fabric rendering techniques, designers can produce vivid sketches and compelling presentations. Resources like the "Pro Fashion Kit" offer a comprehensive, one-time purchase solution to equip designers with the necessary tools to get started, often including lifetime updates for continued support.
Customer support and tutorials are often included with comprehensive toolkits, ensuring that users can stay current with their software and creative assets, further solidifying Procreate's role as a powerful and indispensable tool in the modern fashion designer's arsenal. The efficiency gains and creative freedom afforded by Procreate not only improve workflow but also serve to significantly fuel artistic inspiration and innovation.