Wondershare Filmora is a popular video editing software that offers a robust set of features for creators of all levels. However, for users opting for the free version, a significant drawback is the prominent watermark that appears on all exported videos. This can render the footage unusable for professional or commercial purposes, prompting many to seek effective methods for its removal. This tutorial will explore various approaches to remove the Filmora watermark, ranging from official solutions to third-party tools, ensuring you can export your videos watermark-free.
Understanding the Filmora Watermark
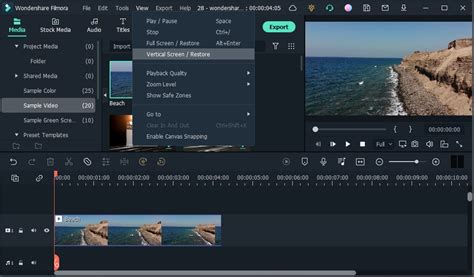
The watermark imposed by Filmora on videos exported from its free version is a deliberate limitation designed to encourage users to upgrade to a paid license. This watermark typically appears as "Created with Filmora Free Plan" and an overlaid Filmora logo. It's embedded directly into the video's pixel data during the export process, making it a permanent part of the file if not addressed through the correct channels. Attempting to remove it through simple post-export methods like cropping or blurring often proves unsatisfactory, leading to a loss of video quality or an unprofessional appearance.
Official and Recommended Methods for Watermark Removal
The most straightforward and legitimate way to remove the Filmora watermark is by obtaining an official license. This ensures the integrity of your video and supports the software developers.
1. Purchasing an Official License
This method is ideal for users who frequently utilize Filmora and require watermark-free exports for their projects.
- Benefit: Provides a seamless and legitimate way to remove the watermark, offering convenience and full access to premium features.
- Drawback: Involves a financial cost, which might be a consideration for budget-conscious users.
Steps to Purchase a License:
- Launch Filmora: Open the Filmora application on your desktop.
- Edit Your Video: Proceed with editing your video as desired.
- Export and Purchase: When you are ready to export, you will typically see an option to "Buy Now" or a prompt indicating the watermark. Clicking this will present you with various pricing plans.
- Select a Plan: Choose the plan that best suits your needs (e.g., Annual Plan, Lifetime Plan). The Annual Plan offers full features for a yearly subscription, while the Lifetime Plan provides perpetual access for a one-time fee.
- Complete the Purchase: Follow the on-screen instructions to log in with your Wondershare ID (WSID) and complete the payment process.
- Activate and Export: After purchasing, ensure your account is refreshed within Filmora. If you have a valid license, the watermark will be automatically removed upon export.
Important Note on Re-exporting: If you have already exported a video with a watermark, simply purchasing a license will not remove it from the previously exported file. You must re-open the original Filmora project file (.wfp) in the activated version of Filmora and export it again. The project file contains all editing information without the watermark embedded. If the .wfp file is lost, you will need to re-edit the video using the original source materials in the activated Filmora.
2. Utilizing Free Access Through Wondershare ID and Referrals
Wondershare sometimes offers opportunities for free watermark-free exports through specific promotions or by leveraging your Wondershare ID.
- Signing up for a Wondershare ID: In some Filmora versions (typically V10.5.5 and later), signing up for a free WSID and logging into the application can grant you eligibility for a watermark-free export. Look for a "Login" button in the upper right corner of the Filmora interface.
- Refer-a-Friend Program: Filmora may offer a "Refer a Friend" program. By inviting friends to use Filmora, they might receive a temporary license for a watermark-free export, and you could earn rewards. When your friend registers, they might instantly get a 3-day license for one watermark-free export.
Steps for Referral Program (if available):
- Install Latest Version: Ensure you have the latest version of Filmora installed.
- Log In: Log in to your Filmora account.
- Find "Refer a Friend": Navigate to the "Refer a Friend" section within your account settings.
- Share Your Link: Share your unique referral link with friends.
- Friend Registers: When your friend registers, they may receive a trial license.
Third-Party Tools for Watermark Removal
While purchasing a license is the most recommended approach, several third-party tools claim to remove watermarks from videos, including those from Filmora. However, it's crucial to approach these with caution due to potential risks.
1. iMyFone MarkGo
iMyFone MarkGo is presented as a dedicated tool for removing watermarks from both images and videos, utilizing an AI algorithm.
How to Use iMyFone MarkGo:
- Install and Launch: Download and install iMyFone MarkGo on your computer, then launch the application.
- Select Removal Type: Choose "Remove Video Watermark" for Filmora videos.
- Import Video: Click the "Add Video" icon to import your Filmora-exported video.
- Select Watermark Area: Use the selection tool to draw a box around the Filmora watermark.
- Remove Watermark: Click the "Remove Now" button to process the video.
- Save: Save the processed video to your computer.
How to remove the filmora watermark for free (2024)
2. Remove Logo Now
Remove Logo Now is another software designed to remove unwanted logos and watermarks from videos, offering a user-friendly interface.
How to Use Remove Logo Now:
- Install: Download and install the Remove Logo Now application.
- Open Video: Launch the application and open the video file you wish to edit.
- Select Section: Click the "Clear Section" button.
- Mark Watermark: Use the provided tools (pencil, rectangle, lasso) to precisely select the area containing the Filmora watermark. Zooming in and adjusting the brush size can help ensure accurate selection.
- Remove: Click the "Remove" button to initiate the watermark deletion process. The software will attempt to fill the erased areas intelligently.
- Save File: Save the resulting watermark-free video to your computer.
3. Online Watermark Removers
Various online tools claim to remove watermarks without requiring software installation. Examples mentioned include Apowersoft Online Watermark Remover and Online Video Cutter.
General Steps for Online Removers:
- Visit Website: Access the watermark remover website.
- Upload Video: Upload your Filmora-exported video.
- Select Watermark: Use the tool's interface to select the area of the watermark.
- Process and Download: Initiate the removal process and download the processed video.
Caution: While convenient, online watermark removers can pose significant risks:
- Security and Malware: Uploading your files to unknown third-party servers can expose you to security threats and malware.
- Privacy Invasion: You lose control over your creative work the moment you upload it to an external platform.
- Unprofessional Results: These tools may not always achieve clean removals, potentially resulting in blurry or unprofessional-looking output. They often don't truly "remove" the watermark but rather obscure or blur it.
4. Mobile Applications (iOS/Android)
For users who prefer editing on their mobile devices, several apps are available.
Remove Logo from Video (Android):
- Download and install the app.
- Open the app and tap the "Start" button to upload your video from your gallery.
- Tap on the watermark logo to select it.
- Click the "Preview" button to check the result and then remove/save the video.
Video Eraser - Remove Logo (iOS):
- Download and install the app.
- Open the app and tap the plus icon to import your video.
- Select the "Watermark Area" and tap "Start" to remove the logo.
- Preview and save the edited video.
Remove Logo (iOS):
- Download and install the app.
- Launch the application, tap "More," and select "Crop Video."
- Import your Filmora video.
- Place a rectangle over the Filmora watermark to crop it out.
- Save the cropped video.

Alternative Approaches and Considerations
While direct removal tools are common, some users explore alternative methods, though they are generally less effective.
1. Cropping the Video
This involves trimming the video's borders to exclude the watermark. However, this results in a reduced aspect ratio and loss of content, making it unsuitable for most professional uses.
2. Blurring or Overlaying
Applying a blur effect to the watermark area or overlaying a new, custom watermark can obscure the original. This is often a workaround rather than a true removal and can look unprofessional.
3. Using a Different Video Editor
If consistently struggling with watermarks, consider exploring alternative video editing software that offers a more generous free version or a pricing structure that better suits your budget. Many editors provide similar functionalities to Filmora without the restrictive watermark.
Why You Might Need to Remove the Filmora Watermark
Watermarks serve as identifiers, but when they appear on your edited content, they can be problematic for several reasons:
- Commercial Use: Videos exported with a watermark from Filmora's free version cannot be used for commercial purposes, as they clearly indicate the origin and licensing status.
- Professional Appearance: A prominent watermark detracts from the professionalism and aesthetic appeal of your video, especially for clients or audiences.
- Branding: If you aim to establish your own brand identity, a third-party watermark is counterproductive.
- Distribution: Many platforms have policies against content with unauthorized watermarks.
Frequently Asked Questions About Filmora Watermarks
Q1: Does Filmora have a watermark?Yes, if you use the free trial version of Filmora and export videos from it, your output will definitely have a Filmora watermark. The paid versions allow for watermark-free exports.
Q2: Is there a free version of Filmora without a watermark?Unfortunately, no. The free version of Filmora is designed to include a watermark on exported videos. To export without a watermark, you must upgrade to a paid plan (Annual or Lifetime).
Q3: How can I use Filmora without a watermark for free?While directly using the free version without a watermark is not possible for exports, you can explore options like signing up for a Wondershare ID to potentially gain temporary free access or participating in referral programs. However, for consistent watermark-free use, purchasing a license or using a dedicated watermark remover tool is necessary.
Q4: How are watermarks embedded in Filmora exports?Watermarks in Filmora are embedded into the video's pixel data during the export process from the free version. This makes them a permanent part of the video file itself. This is why re-exporting from the original project file (.wfp) in an activated version is the correct method for removing them if you have a license.
Q5: Can I remove the watermark from an already exported video with a watermark?While third-party tools attempt to do this, it's challenging and often results in compromised quality. The most effective way to get a watermark-free video is to re-open the original Filmora project file (.wfp) in an activated version of Filmora and export it again. If the project file is lost, you'll need to re-edit using the original source materials.