Photoshop, at its core, is a pixel-based application. This fundamental characteristic means that every brush stroke, every edit, directly manipulates and alters the underlying pixels. Once a pixel is changed, its original state is overwritten, making direct "undoing" of individual strokes as distinct objects impossible in the way one might expect from object-oriented software. This inherent nature of Photoshop presents a unique challenge when users desire the ability to precisely edit or remove specific brush strokes after they have been applied, a functionality often associated with object-based painting.
The Illusion of Object-Based Painting in Photoshop
The concept of object-based painting, where each brush stroke is treated as an independent, editable entity, is more aligned with vector graphics applications like Adobe Illustrator. In Illustrator, elements are defined by mathematical paths rather than discrete pixels. This allows for the manipulation of individual objects - including strokes - at any point in the creative process. Theoretically, one could envision a Photoshop workflow that mimics this by treating "clusters" of pixels as pseudo-objects. This would involve meticulously organizing brush strokes into separate layers, and then grouping those layers to represent distinct visual elements. However, this approach is inherently complex and does not fundamentally alter Photoshop's pixel-based operation.
While the idea of object-based painting in Photoshop is appealing for its editability, it's crucial to understand that Photoshop's strength lies in its pixel manipulation capabilities. Attempting to force an object-oriented workflow onto a pixel-based engine can lead to inefficiencies and a departure from Photoshop's intended use.
Embracing Photoshop's Strengths: Layers and Groups
Instead of striving for an object-based paradigm that Photoshop doesn't natively support, it's far more effective to leverage its powerful layer system. The key to managing "strokes" or any visual element in Photoshop is to think in terms of layers and groups.
Organizing with Layers:Rather than applying every brush stroke to a single layer, a more robust strategy involves collecting related brush strokes into their own dedicated layers. For instance, if you are painting a complex object, you might have separate layers for its base color, shading, highlights, and any specific textural elements. This granular approach to layering allows for greater control and easier modification of individual components without affecting others.
Grouping for Structure:Once individual elements are on their own layers, these layers can be grouped together. A group acts as a container for multiple layers, allowing you to manage them as a single unit. This is akin to creating a virtual "object" within your Photoshop document. For example, all the layers that constitute a character's arm could be placed within an "Arm" group. This provides a hierarchical structure to your artwork, making it easier to select, move, or adjust entire sections.
The advantage of this layered and grouped approach is that it allows for a high degree of flexibility. You can adjust the opacity of an entire group, apply layer masks to selectively reveal or conceal parts of the grouped elements, or even apply blend modes to change how the elements within the group interact with layers below.
Understanding Photoshop's Tools for Filling and Outlining
Beyond brush strokes, Photoshop offers several tools that deal with filling areas and creating outlines, which can be relevant when thinking about how to manage or "remove" unwanted visual elements.
The Paint Bucket Tool:The Paint Bucket tool is designed to fill contiguous areas of similar color values with a selected color. Its behavior is governed by several key settings:
- Tolerance: This setting defines how similar in color the pixels must be to the pixel you click. A lower tolerance will only fill pixels that are very close in color to the clicked pixel, while a higher tolerance will fill a broader range of colors.
- Anti-aliasing: When enabled, this setting smooths the edges of the filled area, preventing jagged or pixelated results.
- Contiguous: If checked, the Paint Bucket will only fill pixels that are touching the clicked pixel and are within the tolerance range. If unchecked, it will fill all pixels in the entire image that meet the tolerance criteria, regardless of whether they are touching.
- Opacity: This controls the transparency of the fill. A lower opacity allows pixels underneath the fill to show through.
The Paint Bucket tool can be useful for quickly filling large areas or for correcting unintentional color variations. However, its pixel-based nature means that the fill is permanent once applied, and subsequent edits would require careful masking or repainting.
Fill Layers:A more non-destructive approach to filling areas is by using Fill Layers. These are special types of layers that apply a solid color, gradient, or pattern to your image without directly altering the underlying pixels.
- Applying a Fill: You can select an area you wish to fill, and then choose to create a Fill Layer. This allows you to apply a fill or a pattern to your image.
- Color Selection: You can choose a color from the Color Picker or select an existing color from your image.
- Patterns: Photoshop allows you to use your own custom-made patterns, offering immense creative possibilities.
Fill layers are highly editable. You can double-click on the fill layer's thumbnail at any time to change the color, gradient, or pattern. You can also apply layer masks to these fill layers, allowing you to precisely control which parts of your image are affected by the fill.
Strokes (as Layer Styles):While not a direct brush stroke, the "Stroke" layer style in Photoshop allows you to apply a hard-edged outline to a layer. This is often used for outlining objects or text.
- Width: Specifies the width of the outline.
- Color: Sets the color of the outline.
- Opacity: Controls the transparency of the stroke.
- Position: Determines whether the stroke is applied inside, outside, or centered on the edge of the layer's content.
- Blending Mode: How the stroke interacts with the pixels beneath it.
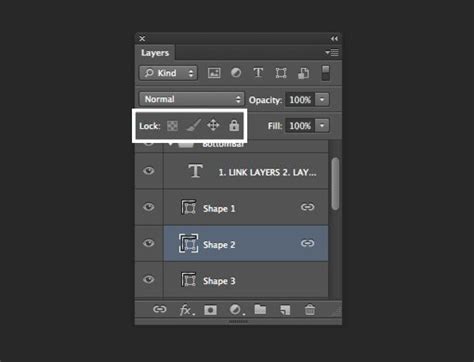
Crucially, layer styles are non-destructive. You can edit or remove a stroke at any time by double-clicking the "Stroke" effect in the Layers panel. This offers a significant advantage over applying a stroke directly with a brush tool.
5 Pro Photoshop Masking Tricks You Don't Know (Probably)
Alternative Strategies for "Mistakes" and Unwanted Strokes
Given Photoshop's pixel-based nature, the most practical advice for managing unwanted "strokes" or edits often boils down to accepting that mistakes are part of the creative process, much like they are for offline painters. The key is to develop strategies for working around, modifying, or even embracing these perceived imperfections.
1. The Art of Painting Over:This is the most direct and often the most effective method. If a brush stroke is not where you want it, or if it's the wrong color or shape, simply paint over it with the desired color and brush. Because Photoshop is pixel-based, this is a literal replacement of pixels. To achieve a seamless result, pay attention to:
- Color Matching: Use the Eyedropper tool to sample colors from the surrounding area to ensure your paint-over matches perfectly.
- Brush Texture and Opacity: Use brushes that mimic the texture of the original paint and adjust opacity to blend the new paint with the existing.
- Layering: If the stroke you want to cover is on a separate layer, you can simply paint over it on that layer. If it's on the same layer, you might need to consider creating a new layer above it to paint the correction, or carefully paint directly on the original layer.
2. Subtle Erasure and Blending:While there isn't a magical "remove stroke" button for individual pixel edits, the Eraser tool, when used judiciously, can achieve a similar effect.
- Soft-Edged Eraser: Using a soft-edged eraser with low opacity can allow you to subtly reduce the visibility of a stroke, blending it into the background or surrounding elements. This is particularly useful for softening harsh lines or reducing the intensity of an unwanted color.
- Eraser as a Mask: Consider using layer masks in conjunction with the Eraser tool. Instead of erasing pixels directly, you can paint black on a layer mask to hide parts of a layer, effectively "erasing" them without permanently deleting the pixels. This is a non-destructive workflow that allows for easy reversal.
3. Working Around the "Mistake":Sometimes, the most creative solution is to adapt your artwork to incorporate the element you initially considered a mistake.
- Inspiration from Imperfection: An unintended brush stroke might suggest a new direction for your artwork. Perhaps it can become a shadow, a texture, or an entirely new element. Offline painters have been doing this for centuries, finding beauty and utility in unexpected marks.
- Redefining the Element: Can the "stroke" be reinterpreted as something else? A bold line might become a decorative element; a smudged area might become atmospheric haze. This requires a shift in perspective, viewing the "mistake" not as an error but as an opportunity.
4. Utilizing Blend Modes and Opacity:Even if you can't easily "remove" a stroke, you can significantly alter its appearance and impact by using blend modes and adjusting opacity.
- Blend Modes: Experiment with different blend modes (e.g., Multiply, Screen, Overlay) on the layer containing the unwanted stroke. These modes change how the pixels of that layer interact with the pixels below, potentially making the stroke less noticeable or even integrating it into the overall composition in an interesting way.
- Opacity: Simply reducing the opacity of the layer can make a strong stroke much more subtle, allowing it to recede into the background.
The Fill and Stroke Analogy: Understanding "Opaque Pixels"
When discussing tools like the Paint Bucket or Stroke layer styles, the concept of "opaque pixels" becomes relevant.
- Strokes Only Areas Containing Opaque Pixels on a Layer: This means that if a layer has transparency, a stroke applied to it will only appear on the parts of the layer that are not transparent. If you have a semi-transparent brush stroke on a layer, a subsequent stroke layer style might not appear where the original brush stroke was less opaque. This highlights the importance of understanding how transparency interacts with different tools and effects.
Conclusion: A Mindset Shift for Photoshop Users
Ultimately, the question of "removing a stroke from shape in Photoshop" is less about a specific tool and more about adopting a strategic mindset. Photoshop's pixel-based nature demands a different approach than vector-based software. By embracing layers, groups, non-destructive editing techniques, and a willingness to adapt and improvise, users can effectively manage and refine their digital artwork, turning perceived mistakes into opportunities for creative growth. The emphasis shifts from a rigid, object-based editability to a fluid, pixel-level manipulation and composition.