In the realm of digital artistry and image manipulation, achieving the illusion of transparency can elevate a photograph from ordinary to extraordinary. This technique, often seen in creative product shots or artistic compositions, allows elements to appear as if they are see-through, revealing what lies beneath. For those new to Adobe Photoshop, the prospect of creating such effects might seem daunting, but with a systematic approach and understanding of the tools, it becomes an accessible and rewarding process. This article will guide you through the fundamental principles and practical steps to achieve a "see-through" effect, focusing on making objects appear partially or wholly transparent.
Layering: The Foundation of Transparency
At its core, creating a see-through effect in Photoshop relies on the fundamental concept of layering. Imagine stacking multiple transparent sheets, each containing a different part of your image. By adjusting the visibility and opacity of these layers, you can control what parts of the underlying layers are visible.
The initial step often involves preparing your images to be worked with as distinct layers. If you are working with a single image where you want to create transparency within it, you may need to duplicate the background layer. This is crucial because destructive editing techniques (like erasing directly on the background) are irreversible and can compromise your original image. Creating a new layer from the background image provides a non-destructive workspace.
For combining elements from different photographs, the process begins by bringing these images into a single Photoshop document. This is achieved by using the Move Tool. You can drag one image directly onto another, or copy and paste elements. The key is to ensure that each distinct image or element occupies its own layer. Once these layers are stacked, you can begin manipulating their visibility and transparency. For instance, if you want to create a "see-through hood" effect, you would have the image of the person wearing the hood on one layer and the image of what's underneath (e.g., an engine) on a layer below it.
Mastering Opacity and Erasure for Gradual Transparency
Once your images are correctly layered, the next critical step is to selectively reveal the underlying layers. This is where the concepts of opacity and erasure come into play.
Opacity refers to the degree of transparency of a layer. A layer with 100% opacity is fully opaque, meaning nothing behind it can be seen. As you reduce the opacity, the layer becomes more transparent, allowing the layers beneath to show through. For achieving a subtle see-through effect, a low opacity setting is often used.
The Eraser Tool is a direct method for removing parts of a layer. However, to create a smooth and controlled transparency, it's highly recommended to use a low opacity erasure brush. Instead of erasing pixels completely, a low opacity brush will partially remove them, creating a gradual blending effect. This is particularly useful when you want to simulate light passing through a material or when you want to subtly reveal details from a background layer. For example, if you’re trying to make a fabric hood appear see-through, you would use a soft-edged, low-opacity eraser to gently remove portions of the hood layer, allowing the background image to peek through in a natural, blended way.
✔ Eraser Tool | Photoshop for Complete Beginners | Photoshop Tutorial | Artose
Selection Tools: Precision in Revealing Details
While the Eraser Tool offers a direct approach, selection tools provide a more precise and often non-destructive way to isolate areas for transparency. Photoshop offers a variety of selection tools, each suited for different scenarios:
- Quick Selection Tool: This tool allows you to "paint" a selection, and Photoshop intelligently tries to find the edges of the object you're selecting. It's intuitive for selecting defined subjects.
- Magic Wand Tool: This tool selects contiguous pixels of similar color with a single click. It's very effective for selecting solid areas of color, like a plain background.
- Lasso Tools (Lasso, Polygonal Lasso, Magnetic Lasso): These tools allow for freehand selections, straight-edged selections, or selections that snap to edges, respectively. They offer manual control over the selection border.
- Pen Tool: For the most precise and complex selections, the Pen Tool is invaluable. It allows you to create vector paths that can be converted into selections, offering clean and sharp edges.
Once you have made a selection, you can then apply various actions to the selected area. For instance, you can adjust the opacity of just that selected area, or you can use this selection to create a layer mask.
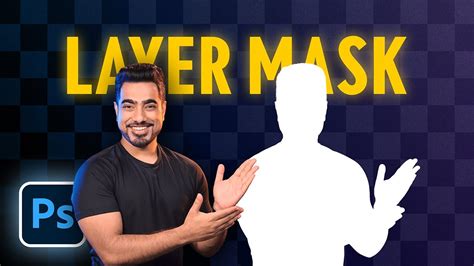
Layer Masks: The Power of Non-Destructive Editing
Layer masks are a cornerstone of non-destructive editing in Photoshop. Instead of erasing pixels, a layer mask allows you to hide or reveal parts of a layer without permanently deleting anything. A mask is essentially a grayscale image attached to a layer. White on the mask reveals the layer content, black conceals it, and shades of gray create varying levels of transparency.
To create a see-through effect using layer masks:
- Select the area you want to make transparent.
- Add a layer mask to the layer you are working on. The selected area will typically be revealed, and the unselected area will be hidden.
- To make parts of the selected area transparent, paint with black on the layer mask. To make previously hidden parts visible again, paint with white. You can also use shades of gray to create semi-transparency.
This method is highly flexible because you can always go back and refine the mask by painting with black or white, making it easy to adjust the transparency effect without damaging the original image data.
Refining Edges for Seamless Integration
When creating transparency, especially when compositing images or isolating subjects, the edges of your selections are crucial for a realistic outcome. Rough or jagged edges can make the effect look artificial. Photoshop provides tools to refine these edges:
- Refine Edge: This feature (often accessed after making a selection or through the Select and Mask workspace) offers sliders to smooth, feather, and adjust the contrast of your selection edges. Feathering softens the transition between the selected and unselected areas, creating a more natural blend.
- Global Refinement Sliders: Within the Select and Mask workspace, you'll find sliders that allow you to globally adjust the smoothness and feathering of your selection, helping to create a seamless integration of elements.
By carefully refining the edges, you can ensure that the "see-through" areas blend harmoniously with the underlying image, making the illusion more convincing.
Advanced Techniques and AI Assistance
While manual techniques offer great control, Photoshop's evolution has introduced powerful automated tools, including those powered by Artificial Intelligence (AI). These tools can significantly speed up the process of isolating subjects and removing backgrounds, which is often a prerequisite for creating transparency effects.
- Remove Background: In newer versions of Photoshop, you can find a "Remove Background" button within the Properties panel of a layer. This button, powered by Adobe Sensei (Adobe's AI engine), can automatically detect and remove the background from your image, leaving your subject isolated. This is an excellent starting point for creating transparent backgrounds or for isolating elements that you intend to make see-through.
- Subject Selection Tool: Similar to "Remove Background," the Subject Selection tool uses AI to automatically identify and select the main subject(s) in your image, making it easier to create masks or isolate areas for transparency.
These AI-powered features are particularly useful in product photography and graphic design, where the focus needs to be solely on the product itself. By making backgrounds disappear or become transparent, your subjects can truly shine.
Transparency and File Formats: Considerations for Output
It's important to remember that not all image file formats support transparency. When you create an image with transparent areas, you need to save it in a format that preserves this information.
- PNG (Portable Network Graphics): This is the most common and recommended format for images with transparency. PNG supports alpha transparency, meaning it can handle varying levels of opacity.
- GIF (Graphics Interchange Format): While GIFs can support transparency, they have limitations. Each pixel in a GIF is either fully transparent or fully opaque; there's no in-between. This means you cannot achieve smooth, graduated transparency with GIFs.
- JPEG (Joint Photographic Experts Group): JPEGs do not support transparency. Any transparent areas will typically be filled with a solid color (usually white) when saved as a JPEG.
Therefore, if your goal is to have a see-through effect that is preserved when the image is used on a website or in other digital contexts, saving your work as a PNG is essential.
Addressing Common Challenges
As a beginner, you might encounter specific hurdles. For instance, images might exceed maximum dimensions, or file types might not be processable. Always ensure your source images are within Photoshop's processing limits (e.g., 8,000 x 8,000 pixels) and that you are working with compatible file types.
Sometimes, the difficulty lies in specific steps. If you're struggling with a particular step, like Step 3 in a given workflow, it's often helpful to have someone else review the images and the process. This collaborative approach can quickly identify the source of the problem.
For users on macOS, alternative software like GraphicConverter or Color-it can also perform basic cut-and-paste operations and offer some selection-based editing capabilities, though Photoshop provides a far more comprehensive suite of tools for advanced transparency effects.
The journey to mastering transparency in Photoshop is one of practice and exploration. By understanding layering, opacity, selection tools, layer masks, and edge refinement, you can unlock a vast potential for creative image manipulation, making objects appear to defy the very nature of opacity.