Adobe Photoshop stands as an indispensable tool for designers and artists, offering a vast array of features to bring creative visions to life. However, navigating its extensive menus and toolbars can often be a time-consuming process, potentially hindering the creative flow. One of the most effective strategies to significantly enhance efficiency and productivity within Photoshop lies in the mastery of its keyboard shortcuts. These powerful keystroke combinations allow for the rapid execution of tasks, minimizing the need for manual menu navigation and freeing up valuable time to focus on the creative aspects of a project. This guide delves into a comprehensive collection of Photoshop shortcut keys that every designer and digital artist should have at their fingertips, aiming to transform your workflow from a laborious process into a seamless and efficient experience.
Navigating the Canvas and Selections with Speed
Efficiently manipulating your canvas and making precise selections are fundamental to any Photoshop workflow. Fortunately, a suite of keyboard shortcuts exists to expedite these common actions, ensuring you spend less time clicking and more time creating.
To select everything on your current layer or canvas, a crucial first step for many operations, the shortcut is Ctrl + A (Windows) or Command + A (Mac). This command instantly highlights all elements within your active document, allowing for global adjustments or manipulations. When you need to remove a selection, rather than navigating through menus, the shortcut Ctrl + D (Windows) or Command + D (Mac) deselects your current active area. If you find yourself needing to reapply the last active selection, perhaps after an accidental deselect, Shift + Ctrl + D (Windows) or Shift + Command + D (Mac) will restore it. Discarding a selection entirely is also a one-keystroke affair; after working with your selection, Ctrl + D (Windows) or Command + D (Mac) will discard it.
For freehand selections, the Lasso tool is invaluable. This tool can be accessed swiftly by pressing the L key. More precise, area-based selections can be achieved with the Magic Wand tool, which selects areas of similar color. This tool is typically accessed by pressing W (which may also cycle through other selection tools like Quick Selection). When precise selections are paramount, the Pen tool is the artist's best friend for creating clean paths. You can activate it instantly by pressing the P key. If you're working with paths and need to select all of them, Ctrl + A (Windows) or Command + A (Mac) will serve this purpose. The Quick Selection Tool, another powerful selection aid, can be activated by pressing W. It helps you paint over an area to select it, and combined with the ability to select everything in your document with Ctrl + A (Windows) or Command + A (Mac), you have rapid control over your selections.
Essential Editing and Transformation Tools
Beyond selections, Photoshop offers a wealth of tools for editing, transforming, and manipulating your images. Keyboard shortcuts can dramatically speed up your access to these essential functions.
The ability to cut, copy, and paste are among the most frequently used commands in any image editor's toolkit. While not directly assigned to F keys as some sources suggest, the standard shortcuts remain the most efficient: Ctrl + X (Windows) or Command + X (Mac) for Cut, Ctrl + C (Windows) or Command + C (Mac) for Copy, and Ctrl + V (Windows) or Command + V (Mac) for Paste. These allow you to instantly cut, copy, or paste content into your project.
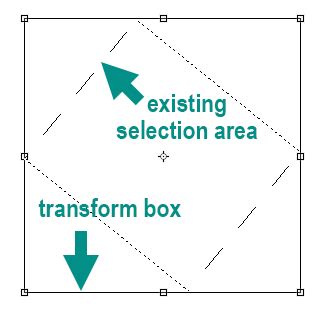
Transforming and resizing objects is a core part of many design processes. You can activate the Free Transform tool with Ctrl + T (Windows) or Command + T (Mac). This allows you to drag the corners to resize or grab outside a corner to rotate. To apply the transformation, simply hit Enter. To cancel the transformation and revert to the original state, press Esc.
Mastering Layers and Adjustments
Layer management and image adjustments are central to non-destructive editing in Photoshop. Shortcuts here can prevent significant workflow interruptions.
To quickly create a new layer, a fundamental operation for organized editing, you can click on the New Layer icon in the Layers panel, or for a more direct approach, there are often dedicated shortcuts depending on your Photoshop version and custom settings. To duplicate an existing active layer, which is useful for increasing the intensity of an adjustment or creating a backup, use Ctrl + J (Windows) or Command + J (Mac). This creates a new layer that duplicates your selection.
Combining selected layers into a single layer is often necessary to simplify a complex project. The shortcut for this is Ctrl + E (Windows) or Command + E (Mac) to merge selected layers. For more organized workflow, grouping layers makes it easy to manage multiple elements. To group selected layers, press Ctrl + G (Windows) or Command + G (Mac). This places them under a single folder, which can then be named. To ungroup layers when a grouped layer is selected, hold Shift and use the same shortcut: Shift + Ctrl + G (Windows) or Shift + Command + G (Mac).
There are also shortcuts for copying and merging layers in various ways. Ctrl + Shift + Alt + E (Windows) or Command + Shift + Option + E (Mac) will copy all visible layers, merge them, and add them as a new layer to your layer stack. This is effectively a "copy-merged" command that places the result directly in your layers. If you need to copy the entire project to your clipboard as a merged copy, which you can then paste into a new layer or file, Ctrl + Shift + C (Windows) or Command + Shift + C (Mac) is the shortcut.
Fine-tuning images often involves adjusting various properties. While Ctrl + M (Windows) or Command + M (Mac) opens the Curves dialog for precise tonal adjustments, for simpler adjustments like Brightness and Contrast, you would typically use adjustment layers. When working with adjustment panels, holding Alt (Windows) or Option (Mac) while dragging sliders can reveal clipping in highlights or shadows, helping you check for overexposed or underexposed areas.
Brush and Color Control Shortcuts
Precision with brushes and efficient color management are vital for detailed retouching and painting.
The Brush tool itself can be accessed by pressing the B key. When working with the Brush tool, you'll often need to adjust its size. You can easily broaden or narrow it with your keyboard brackets: use the [ key to decrease brush size and the ] key to increase brush size. If you need a harder brush for masking along fine edges, you'd typically adjust the hardness within the brush settings. Conversely, for masking along rougher edges, a softer brush is preferred. For increased precision when brushing, if you have the Brush Tool selected, tapping the Caps Lock key will transform the cursor into crosshairs, allowing for more effective positioning.
Swapping the foreground and background colors with a single keystroke is a common need. The shortcut X toggles between your foreground and background colors. To reset your foreground and background colors to their default black and white, press D. If you've changed your foreground and background colors and want to quickly revert to the defaults, pressing D will achieve this. To fill a selection or layer with your foreground color, use Alt + Backspace (Windows) or Option + Delete (macOS). To fill with your background color, you can use Ctrl + Backspace (Windows) or Command + Backspace (macOS).
When using the Brush tool or the Clone Stamp tool, adjusting the opacity for subtle effects is crucial. Simply pressing the number keys (1-9) will set the opacity to any value between 10% and 90%. Pressing 0 will set the opacity to 100%, and pressing 00 will set it to 0%. If you need to adjust the flow of your brush, holding Shift and pressing the number keys will set the flow opacity.
Navigating the Interface and Managing Your Workspace
A clean and efficient workspace is key to productivity. Photoshop offers shortcuts to quickly hide and reveal interface elements.
To hide all palettes and toolbars, allowing you to concentrate solely on your image, press the Tab key. Pressing Tab again will bring them back. If you only wish to hide the panels (like Layers, Adjustments, etc.) while keeping the toolbar and options bar visible, you might need to press Shift + Tab. The Layers panel, a central hub for managing your image, can be opened or closed by pressing F7. Similarly, the History panel, which allows you to step back through your edits, can be opened or closed using Ctrl + Z (Windows) or Command + Z (Mac) for quick undo and redo actions, and the panel itself can be accessed through other means.
Switching between different screen modes can be very useful. Pressing F (Windows and Mac) cycles through three screen modes: Standard Screen, Full Screen with Menu Bar, and Full Screen with a Black Background. The Hand tool, which lets you pan around a zoomed-in image, is activated by pressing the H key. The Zoom tool, which allows you to zoom in with a single click, is activated by pressing the Z key. Holding Alt (Windows) or Option (Mac) while using the Zoom tool will reverse its function, allowing you to zoom out. To zoom in to a specific area, click and drag a marquee with the Zoom tool. For precise zooming, Ctrl + + (Windows) or Command + + (Mac) zooms in, and Ctrl + - (Windows) or Command + - (Mac) zooms out. Pressing Ctrl + 0 (Windows) or Command + 0 (Mac) fits the entire image to your screen.
Undo, Redo, and Saving: The Safety Net
Mistakes are inevitable in any creative process. Photoshop provides robust shortcuts for undoing actions and saving your progress.
To undo your last action, a critical command for correcting mistakes, use Ctrl + Z (Windows) or Command + Z (Mac). By default, Photoshop stores a limited number of steps in its history. You can adjust this number in Edit > Preferences > Performance > History States and change the number to whatever you want. However, remember that more history states require more scratch disk space. To go back multiple steps in your history, you can repeatedly press Ctrl + Z (Windows) or Command + Z (Mac), or utilize the History panel. The History panel allows you to jump back to any previous state of your document.
Saving your work is paramount to prevent the loss of hours of effort. The command Ctrl + S (Windows) or Command + S (Mac) allows you to save your project without interrupting your workflow. It is always important to save early and save often.
Advanced Shortcuts and Tool Functions
Beyond the basics, numerous shortcuts unlock more advanced functionalities and tool-specific operations.
When you're working with a graphics tablet, editing a stationary image can sometimes be counterintuitive. To activate the Rotate View tool and turn your canvas to a more comfortable angle, use the R keyboard shortcut. When you are done rotating, simply press Esc to return your canvas to its original orientation.
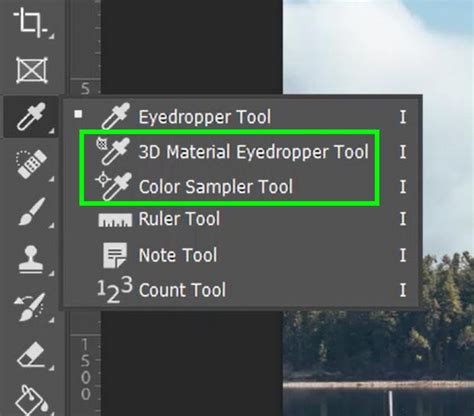
The Eyedropper tool, activated by pressing I, is invaluable for picking up colors from your image and applying them elsewhere. This is particularly useful for matching colors or creating harmonious palettes.
When you need to resize your brush, you don't have to interrupt your thought process. Easily broaden or narrow it with your keyboard brackets ([ or ]). For PC users, an alternative method for brush resizing involves holding down the Alt key, then clicking and dragging with the right mouse button.
Customization and Learning Resources
Photoshop's power is amplified when its shortcuts are tailored to your individual workflow.
You can customize keyboard shortcuts to fit your needs better or reset them if you require the original settings. To create your own shortcuts, start by selecting Edit > Keyboard Shortcuts. From there, you can click on a command and enter a new key combination you want to use, then save your changes. At the bottom of the dialog box, youâll find an option to reset all shortcuts back to their original keys.
For those looking to learn and retain these shortcuts, a printable cheat sheet can serve as a handy reference to keep on your desk. An online interactive shortcut reference also offers an engaging way to learn and remember commands. To view all available Photoshop shortcuts, navigate to Edit > Keyboard Shortcuts or press Alt + Shift + Ctrl + K (Windows) or Option + Shift + Command + K (Mac). You can also hover over tool icons in the toolbar to see their associated shortcuts in tooltips.
Embracing Efficiency for Creative Excellence
Mastering these Photoshop shortcut keys is not merely about speed; it's about enhancing your efficiency and workflow, allowing you to dedicate more cognitive energy to the creative aspects of your projects rather than getting bogged down by repetitive manual processes. By integrating these shortcuts into your daily routine, you will not only accelerate your work but also potentially improve the overall quality and precision of your designs. The journey to unlocking Adobe Photoshopâs full potential is significantly smoother when armed with this knowledge, transforming your digital art process and empowering you to produce stunning visuals with greater ease and precision. Whether youâre adjusting layers, refining selections, or navigating the interface, these Photoshop quick keys will help you achieve your design goals more swiftly.