Have you ever experienced a moment that you wished you had captured in 'slow motion mode' with your camera, but didn't? If this sounds familiar and you're eager to learn how, or even if it's possible, to achieve this effect in DaVinci Resolve after the fact, then you've arrived at the right destination. DaVinci Resolve offers a variety of methods for creating the 'slow motion effect.' The optimal choice for you will hinge on whether you desire a 'variable speed effect' (or not), if the resulting quality meets your expectations, and whether you possess the paid version of DaVinci Resolve, known as DaVinci Resolve Studio.
At its core, all slow-motion effects are achieved by altering the frame rate of the shot to a rate slower than the frame rate at which the camera originally recorded it. For instance, if your footage was captured at 24 frames per second (fps), you would adjust the playback rate of your shot to 23 fps or lower. It's important to note that if the clip has already been integrated into a Timeline, making this modification can negatively impact its existing instance. In such scenarios, you might need to replace that specific shot in the timeline each time it appears.
The Fundamentals of Slow Motion in Video Editing
Slow motion is that captivating effect frequently observed in films, where time appears to decelerate, allowing for a detailed examination of action. The ambition of this guide is to empower you to harness this same capability for your own projects. Before we delve into the practicalities, it's beneficial to briefly reiterate what constitutes true slow motion. The exceptionally smooth slow-motion sequences seen in professional cinema are typically filmed at high frame rates, ranging from 60 to 240 frames per second (fps) and even higher. This high-frame-rate footage is then played back at a standard, lower frame rate, such as 24 fps, thereby slowing it down in real-time. For context, one second of footage recorded at 240 fps would take 10 seconds to play back at 24 fps, resulting in exceptionally smooth slow motion. For reference, we generally consume video content at either 24 fps or 30 fps.
This tutorial, however, focuses on how to create a slow-motion effect in post-production - that is, after the footage has already been shot. While this approach can produce a convincing slow-motion look, it will inherently be less natural than footage specifically captured for slow motion. Whenever feasible, it is advisable to utilize a dedicated slow-motion camera during filming to achieve the most authentic effect. If that's not an option, the handy DaVinci Resolve techniques detailed herein will soon transform your footage into something truly remarkable. Let's proceed.
To effectively slow down any footage, it is imperative to play it back at a frame rate lower than its original recording rate. Without generating new frames, slowing down footage that wasn't filmed at a higher frame rate is not possible. These newly generated frames will fill the temporal gaps, thereby creating the illusion of slow motion.
Method 1: Adjusting Clip Speed for Consistent Slow Motion
This is the most straightforward approach to slowing down footage that was recorded at 'normal' speed but you now wish to decelerate within your timeline. This method applies a single, consistent frame rate for the entire duration of the clip.
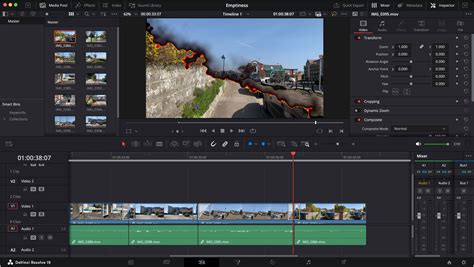
To implement this, locate the clip in your timeline. Hover your mouse cursor over the 'Speed' text box. Click and drag your mouse to the left to decrease the clip's speed, thereby achieving a slow-motion effect. You will observe that the clip's 'Duration' updates concurrently with changes made to its speed. As you slow down the clip, its length in the timeline will increase. Alternatively, you can directly input a desired numerical value into the 'Speed' text box.
The 'Speed,' 'Frames per second,' and 'Duration' parameters are intrinsically linked and interact with each other. A speed of '100%' corresponds to the clip's base frames per second (FPS), displaying its default FPS and duration. You have the flexibility to input numerical values directly into these text boxes.
Freeze Frame Functionality
For an immediate freeze-frame effect, pause the playback on the precise frame you wish to freeze. Subsequently, open the 'Change Clip Speed' menu and select the checkbox labeled 'Freeze Frame.' This action will freeze the entire clip, effectively halting its motion.
Ripple Sequence for Timeline Integrity
If your objective is to slow down the speed of your clip while preserving its original first and last frames, thereby extending its duration, you can enable the 'Ripple Sequence' checkbox. This ensures that the entire timeline following the modified clip is automatically adjusted to accommodate the increased length of the slow-motion clip, preventing any overlaps or gaps.
Method 2: Interpreting Footage at a New Frame Rate
This method is particularly effective when you have footage that was shot at a higher frame rate than your timeline's default, such as 60p or even 30p, and you want to achieve a crisper slow-motion effect. It involves instructing DaVinci Resolve to interpret the clip's existing frames as if they were captured at a lower frame rate.
Step 1: Import Your FootageImport your high-frame-rate footage into your DaVinci Resolve project. Crucially, do not add it to the timeline at this stage.
Step 2: Set Your Timeline Frame RateBefore proceeding, ensure that your project's timeline frame rate is configured to your desired playback speed. A common choice for cinematic playback is 23.976 fps. You can verify and adjust this in the project settings.
Step 3: Access Clip AttributesLocate the imported clip in your Media Pool. Right-click on the clip (or use Ctrl+click on Windows/Cmd+click on Mac) and select 'Clip Attributes' from the context menu.
Step 4: Modify the Clip's Frame RateWithin the 'Clip Attributes' window, navigate to the 'Frame Rate' option. Here, you will change the clip's designated frame rate to match your timeline's frame rate (e.g., 23.976 fps). By doing this, you are essentially telling DaVinci Resolve to treat each frame of the original footage as if it were part of a slower sequence.
Step 5: Add to TimelineNow, drag and drop your modified clip onto your timeline.
When you play the clip back on the timeline, it should exhibit a smooth, slow-motion effect. This technique is highly beneficial for achieving a fluid slow-motion look without relying on extensive frame interpolation, provided your source footage has a sufficiently high frame rate.
Method 3: Utilizing Retime Controls for Variable Speed Effects
For more dynamic and nuanced slow-motion, DaVinci Resolve offers 'Retime Controls,' which allow you to alter a clip's speed multiple times within a single segment. This is ideal for creating 'slow-motion ramps' - where a clip plays at normal speed, then smoothly decelerates, and perhaps even accelerates back to normal speed.
Activating Retime Controls
There are several ways to access the Retime Controls. You can select the clip in your timeline and choose 'Retime' from the right-click menu or from the 'Clip' menu at the top of the interface. Alternatively, a common shortcut is pressing Ctrl+R (or Cmd+R on Mac).
Once activated, you will see a speed control interface overlaid on the clip. This interface typically includes a dropdown menu for speed adjustments and handles at the clip's edges.
Creating Basic Speed Ramps
Within the Retime Controls, you can select from various pre-defined ramp options under the 'Speed' dropdown. These options often divide the clip into multiple segments, each assigned a different speed (e.g., transitioning from 100% to 10% speed). You can then further customize the speed of each individual segment as needed.
Manual Speed Point Addition
For more granular control, you can manually add 'speed points' to define specific points in time where the speed change should occur. To do this, park the timeline playhead on the first frame where you want your ramped slow-motion effect to begin. Then, within the Retime Controls, select the 'Speed' dropdown and choose 'Add Speed Point.' You can add as many speed points as required to precisely sculpt your desired speed curve.
Smoothing Transitions with Retime Curves
When you initially add speed points or use ramp options, the transitions between different speed sections can sometimes appear abrupt or jerky. To achieve a seamless, cinematic flow, DaVinci Resolve provides 'Retime Curves.'
Step 1: Access Retime CurvesRight-click on the clip in your timeline and select 'Retime Curves' from the context menu. You will now see a graphical representation of your clip's speed over time.
Step 2: Adjusting Speed Point HandlesThe Retime Curves display speed points, often marked with keyframe icons. To smooth the transitions between these points, click on a speed point. You will then see 'Bézier Handles' appear. By dragging these handles, you can manipulate the curve and create smooth, gradual changes in speed. Experiment with the handles to achieve the desired ramp effect, whether it's a gentle deceleration or a rapid acceleration.
You can also add new speed points directly within the Retime Curves interface by clicking on the keyframe icon. This allows for intricate control over complex speed ramps.

Advanced Slow Motion: Frame Interpolation Techniques
What happens if you don't have enough frames in your original footage to achieve the desired slow-motion effect? DaVinci Resolve offers powerful frame interpolation techniques to generate new frames, effectively filling the gaps and creating a smoother slow-motion experience from footage that wasn't originally shot at high frame rates. This process is crucial when you need to slow down a clip significantly, for example, taking a 1-second, 24 fps clip in a 24 fps timeline and slowing it down by 50%. DaVinci Resolve needs to create 24 new frames to bridge the temporal void. Similarly, dropping a 24 fps clip into a 30 fps timeline requires Resolve to generate 6 additional frames for every second of footage.
The method of frame interpolation employed has a significant impact on the quality of the resulting slow-motion effect. DaVinci Resolve offers several interpolation modes, each with its own strengths and weaknesses:
Nearest Frame Interpolation
This is the most computationally inexpensive method. 'Nearest' interpolation effectively duplicates the nearest existing frames to fill the gaps. In the 24 fps example described earlier, this would mean each original frame is shown twice. While this method is straightforward and places minimal demand on your system, the resulting motion can appear noticeably choppy and artificial, especially during significant speed reductions.
Frame Blending
'Frame Blend' takes a more sophisticated approach by blending adjacent frames to create the intermediate frames. This method is more demanding on your computer's processing power but generally yields a better, smoother result than 'Nearest' interpolation. It works reasonably well for certain types of footage, such as time-lapses, where the motion might be less complex.
Optical Flow
Stepping up from 'Frame Blend,' 'Optical Flow' is a more advanced technique. This method analyzes the motion of pixels within the frames and uses this information to generate new frames. Optical Flow is considerably more resource-intensive and can put a significant strain on your system. However, in most scenarios, it delivers superior results, producing a much smoother and more natural-looking slow-motion effect.
200fps Flowframes vs Davinci Resolve Optical Flow
Speed Warp (Neural Engine Powered)
Taking the capabilities of Optical Flow even further, 'Speed Warp' leverages the DaVinci Resolve Neural Engine and advanced machine learning algorithms. This is the most computationally intensive method available, but it often produces the most exceptional results, creating highly realistic new frames and enabling incredibly smooth slow-motion even from footage with complex motion. For the best results with Speed Warp, it's often recommended to render the effect out to a new clip before further editing.
Handling Audio with Slow Motion
When you alter the playback speed of a clip, any audio directly linked to that clip will also be affected, changing its pitch and speed accordingly. This behavior does not extend to changes made through 'Clip Attributes' in the Media Pool or to unlinked audio tracks. If you wish to modify separately recorded audio in sync with the clip's speed change, you must ensure that the audio is linked to the video clip.
Generally, audio intended for slow-motion clips is best handled separately by unlinking it from the video. This allows you to maintain the original audio's natural speed and pitch. However, there are instances where altering the audio along with the video can be intentional, such as in a dramatic slow-motion reaction shot where a distorted voice-over might enhance the effect.
Common Challenges and Solutions in DaVinci Resolve Slow Motion
While DaVinci Resolve offers robust tools for creating slow-motion effects, users may encounter certain issues. Most of these stem from a misunderstanding of how DaVinci Resolve handles frame rates and speed adjustments. By understanding the principles outlined in this guide, you can proactively avoid many common problems.
Addressing Choppy Footage
In most cases, choppy footage results from attempting to slow down a clip beyond the capability of its original frame rate. DaVinci Resolve is forced to generate new frames to compensate, and if the source material is insufficient, these generated frames may not accurately represent the motion, leading to choppiness. There isn't an explicit warning for this; you need to be aware of your footage's frame rates and how far you can push the speed reduction.
If you find yourself in a situation where you lack sufficient frames but still need to achieve a slower playback speed, experiment with the frame interpolation settings for the clip. Cycle through the 'Nearest,' 'Frame Blend,' 'Optical Flow,' and 'Speed Warp' options until you find a result that is acceptable for your project. Exercise caution, as these advanced interpolation methods are resource-intensive and can tax even high-performance systems, particularly when applied to extensive footage or complex motion.
System Performance Considerations
The frame interpolation methods, especially 'Optical Flow' and 'Speed Warp,' are computationally demanding. Slowing down footage excessively, particularly when combined with these advanced interpolation techniques, can cause even powerful systems to struggle. If you notice significant playback stuttering or sluggishness, consider rendering the affected clips as new files with the slow-motion effect baked in. This can alleviate the real-time processing load during playback and further editing.
The Importance of Understanding Frame Rates
Ultimately, a comprehensive understanding of frame rates and how DaVinci Resolve's slow-motion features operate is paramount. Once this core concept is grasped, creating impressive slow-motion effects within DaVinci Resolve becomes a straightforward and highly effective process. By carefully selecting the appropriate method for your footage and desired outcome, you can add dramatic tension and visual flair to your video projects.