Photoshop offers a vast array of tools and techniques for digital artistry, and creating custom brushes is one of its most powerful features. This tutorial delves into the process of crafting a unique snowflake brush and then utilizing it to design an elegant snowflake border around an image. While Photoshop provides default snowflake shapes, this guide emphasizes the creation of a custom brush to overcome limitations in size and sharpness, ensuring a professional and visually appealing result. We will explore transforming a simple shape into a dynamic brush, adjusting its settings for realistic scattering and variation, and applying it to create a decorative border.
The Foundation: Setting Up Your Canvas and Basic Shapes
To begin, we establish a new document with specific dimensions and color parameters. This initial setup is crucial for defining the working space for our snowflake brush creation.
- Document Setup: Create a new document with dimensions of 1024x768 pixels. Set the foreground color to a rich
#605ca8and the background color to a deep#0254a6. - Initial Shapes: Select the Ellipse tool, ensuring the options are set to "shape layer" and foreground color to white. Construct three circles, each progressively smaller than the last. These might serve as a base for a character or simply as decorative elements within a larger composition.
Constructing a Festive Element: The Snowman's Hat
Next, we move on to building components that might be part of a larger scene, such as a snowman. This involves using different shape tools and color selections.
- Hat Crown: Change the foreground color to black. Select the Rounded Rectangle Tool and create a vertical shape for the main part of the hat.
- Hat Brim: Switch to the Rectangle tool and create a horizontal shape to form the brim of the hat, connecting it to the crown.
Adding Details: A Scarf and Embellishments
To further enhance the visual narrative, we can add elements like a scarf. This step showcases the versatility of the Pen Tool for creating custom shapes.
- Scarf Creation: Change the foreground color to orange. Select the Pen Tool. Then, change the foreground color to
#00aeef. Using the Pen Tool again, create a bent rectangle that will encircle the snowman's neck. This is achieved by drawing a rectangle and then adding two anchor points halfway down its length. Drag these anchor points downwards to create a curved effect that drapes naturally. Adjust the edge anchors to fit snugly around the snowman's neck. - Layer Grouping: For better organization, select all the layers that were used to create the arm (assuming this was part of a larger snowman design) and group them. This can be done by navigating to
Layer > Group Layer. - Text Manipulation: Duplicate the "Happy Text" layer by dragging it to the New Layer icon or by pressing
Control & J(Windows) orCommand & J(Mac). Right-click on the duplicated layer in the Layer Palette and select "Rasterize Text." This converts the editable text into pixels, allowing for further manipulation. - Inverting Colors: To create a contrasting effect, invert the colors of the rasterized text layer by pressing
Control & I(Windows) orCommand & I(Mac). - Adding Additional Snowflakes: Set the foreground color to white and create a new layer. On this layer, add some different snowflakes. This preliminary step hints at the broader theme of snowflakes, leading into the core tutorial on brush creation.
The Core Task: Creating a Custom Snowflake Brush
Photoshop includes pre-made snowflake brushes, but they often suffer from a lack of detail when scaled up. Creating a custom brush offers superior control and sharper results.
Step 1: Preparing the Brush Canvas
- New Document for Brush: Open the "New" dialog box. Set both the Width and Height to 300 Pixels. Ensure "Pixels" is selected as the measurement unit. The Resolution and other options can be left at their default values. Click "OK."
Step 2: Loading and Selecting a Snowflake Shape
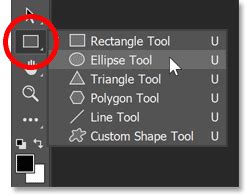
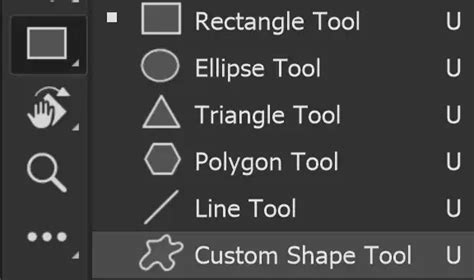
- Custom Shape Tool: Locate the Custom Shape Tool in Photoshop's Tools panel. It's often nested behind the Rectangle Tool; click and hold the Rectangle Tool to reveal a fly-out menu and select the Custom Shape Tool.
- Loading Shape Sets: Photoshop includes a "Nature" shape set that contains snowflake designs. Access the Custom Shape Picker. A menu will appear listing additional shape sets. Select the "Nature" set. Photoshop may ask if you wish to replace the current shapes; confirm this action.
- Choosing a Snowflake: Within the Custom Shape Picker, scroll through the thumbnails until you find the snowflake shapes. There are typically three in a row. Hovering over them with Tool Tips enabled will display their names. Double-click your preferred snowflake shape to select it and close the picker.
Step 3: Drawing the Snowflake as a Pixel-Based Shape
- Shape Type: Photoshop allows drawing shapes as vector shapes, paths, or pixel-based shapes. Since we are creating a brush, which is pixel-based, we need to select this option.
- Color Preparation: Brushes are formed from the black areas of an image; white areas become transparent. Therefore, we need to draw our snowflake in black. Press the 'D' key on your keyboard to reset the Foreground color to black.
- Drawing the Snowflake: With the snowflake shape selected and black as the Foreground color, click near the top-left corner of your 300x300 pixel document. Drag diagonally down to the bottom-right corner. To maintain the correct proportions and prevent distortion, press and hold the
Shiftkey while dragging. Aim to draw the largest shape possible that fits within the document boundaries. Release the mouse button first, then theShiftkey.
Step 4: Defining the Brush Preset
- Define Brush Preset: Navigate to
Edit > Define Brush Preset. - Naming the Brush: In the "Brush Name" dialog box that appears, enter a descriptive name, such as "Snowflake," and click "OK." Your custom snowflake shape is now saved as a brush preset.
- Closing the Document: You can now close the 300x300 pixel document without saving it, as the brush has already been created.
Applying the Custom Brush: Creating a Snowflake Border
Now that we have our custom snowflake brush, we can use it to create a decorative border around an image.
Step 1: Preparing the Image and Border Area
- Open Photo: Open the image you wish to apply the border to.
- New Layer for Border: Add a new layer above your photo layer. This layer will hold the border.
- Fill with White: Temporarily fill this new layer with white. Go to
Edit > Filland select "White" from the "Use" dropdown menu. - Selecting the Photo Area: Use the Rectangular Marquee Tool to draw a selection around the area where your photo will appear. Position it so there's an equal amount of space around all four edges, centering the photo area.
- Deleting the White: With the selection active, press
Backspace(Windows) orDelete(Mac) to remove the white area inside the selection, revealing your photo underneath.
Step 2: Refining the Border Edges
- Transform Selection: To adjust the selection outline without affecting the photo pixels, use the "Transform Selection" command. Press and hold
Alt(Windows) orOption(Mac). Click and drag the top center handle upwards a short distance, roughly halfway between the photo's top edge and the document's top edge. The bottom edge will move in tandem. - Adjusting Sides: Continue holding
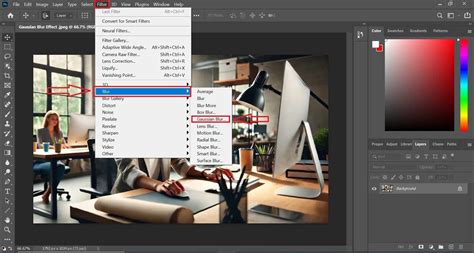
AltorOption, click and drag the left center handle towards the left, creating equal space between the photo's left edge and the document's left edge. The right edge will adjust accordingly. Ensure equal spacing all around. PressEnter(Windows) orReturn(Mac) to commit the transformation. - Softening Edges with Blur: To create a smooth transition between the border and the photo, apply a Gaussian Blur. Navigate to
Filter > Blur > Gaussian Blur. Adjust the "Radius" slider until the border edges appear soft and blended. The exact value will depend on your image size. Click "OK."
Step 3: Applying the Snowflake Brush to the Border Path
- Selection Outline: Keep the selection outline active.
- Convert to Path: Switch to the Paths panel (usually grouped with Layers and Channels). Click the "Convert selection to work path" icon at the bottom of the panel. This transforms the selection outline into a temporary path.
- Set Foreground Color: We want white snowflakes. Press the 'X' key to swap your Foreground and Background colors, making white the Foreground color.
- Select Brush Tool: Choose the Brush Tool (B).
- Access Brush Preset Picker: Right-click (Windows) or
Control-click(Mac) anywhere on the canvas to open the Brush Preset Picker. Select your newly created "Snowflake" brush. It should be the last one in the list. - Adjust Brush Size: The default size of your snowflake brush is likely too large. Adjust the "Size" slider in the Brush Preset Picker to a smaller value. Experimentation is key here; a size around 150 px might be a good starting point, but this will vary depending on your image resolution. Press
EnterorReturnto close the picker.

Step 4: Configuring Brush Dynamics for Realism
To make the snowflakes appear natural and varied, we need to adjust the brush settings.
- Open Brush Settings: Press
F5or go toWindow > Brush Settings. - Shape Dynamics: Click directly on the words "Shape Dynamics" in the left-hand column.
- Set "Size Jitter" to 100%.
- Set "Angle Jitter" to 100%.
- Scattering: Click on "Scattering."
- Increase the "Scatter" value to around 250%.
- Transfer: Click on "Transfer."
- Increase the "Opacity Jitter" value to 75%. This ensures a random variation in the density of the snowflakes.
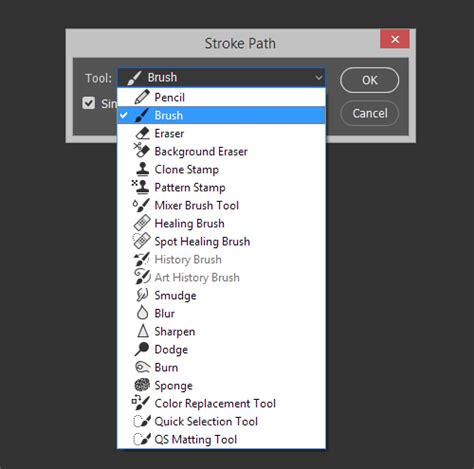
Step 5: Stroking the Path with Snowflakes
- Stroke Path: With the path active in the Paths panel, click the "Stroke Path With Brush" icon at the bottom. This will paint snowflakes along the path.
- Adding More Snowflakes: If you desire more snowflakes, you can click the "Stroke Path With Brush" icon multiple times. You can also adjust the brush size using the
[and]keys for finer control between strokes. - Concealing the Path: In the Paths panel, click in the empty gray box below "Work Path" to hide the path line from view.
Enhancing Realism: Multiple Layers and Filters
For a more dynamic and realistic snow effect, consider using multiple layers and applying subtle filters.
Step 1: Adding Layers of Snow
- New Snow Layer: Create a new layer above your existing image and border layers. Name it "Snow."
- Smaller Snowflakes: Select your snowflake brush. Adjust its size to be smaller (e.g., around 45 px). Paint a layer of snow, representing snowflakes further away. Reduce the opacity of this layer to around 70% for a softer effect.
- Mid-Ground Snow: Create another new layer, "Snow 2." Increase the brush size (e.g., to 200 px) and paint a second layer of snow, appearing slightly closer.
- Foreground Snow: Add a final layer, "Snow 3." Further increase the brush size (e.g., to 900 px) to represent snowflakes that are very close to the viewer.
Step 2: Applying Motion Blur for Movement
- Motion Blur on Snow 3: Select the "Snow 3" layer. Go to
Filter > Blur > Motion Blur. Adjust the "Angle" and "Distance" to simulate movement for the closest snowflakes, making their edges less defined. For instance, an Angle of 63º and a Distance of 44 pixels can create a noticeable effect. - Motion Blur on Snow 2: Select the "Snow 2" layer and apply a Motion Blur with different settings (e.g., Angle of 7º and Distance of 17 pixels) to add subtle movement to the mid-ground snow.
Understanding the Snowflake Border and Brush Concepts
The snowflake border, as demonstrated, is an artistic design that frames an image with snowflake motifs. Its creation relies on the power of custom brushes in Photoshop.
What is a Snowflake Brush?
A Photoshop brush is essentially a digital tool that allows you to "paint" with a specific pattern or image. When creating a custom brush, you define the shape and behavior of this tool. A snowflake brush, therefore, is a brush preset that uses a snowflake image as its stamp.
Why Create a Custom Brush?
Photoshop's default brushes, including its built-in snowflake brushes, often have limitations. When you scale them up significantly, they can become pixelated and lose sharpness. Creating a custom brush from a larger, well-defined shape ensures that you can resize it within reasonable limits without sacrificing quality. This allows for greater flexibility and professional results.
Key Photoshop Concepts Utilized:
- Shape Layers vs. Pixel Layers: Understanding the difference is crucial. Vector shapes are scalable without quality loss, while pixel-based shapes are rasterized and behave like images. For brushes, pixel-based is essential.
- Pen Tool and Path Creation: The Pen Tool is invaluable for creating precise custom shapes. Converting selections into paths allows for more controlled stroke applications.
- Brush Settings Panel: This panel is the heart of brush customization. Options like "Shape Dynamics," "Scattering," and "Transfer" allow you to control the size, angle, spacing, and opacity of individual brush marks, leading to organic and realistic effects.
- Layer Management: Using separate layers for different elements (photo, border, snow layers) provides non-destructive editing capabilities, allowing for easy adjustments and revisions.
- Filters: Filters like Gaussian Blur and Motion Blur can enhance the visual appeal by softening edges or simulating movement, adding depth and realism to the final image.
8-Step GUIDE: Blend Images and Create Composites Like a Pro with Photoshop ✅🔥
By mastering these techniques, users can move beyond pre-made assets and develop unique artistic elements for their Photoshop projects, from custom brushes to intricate borders and effects. The ability to create a bespoke snowflake brush, for instance, opens up possibilities for seasonal designs, holiday cards, or simply adding a touch of winter magic to any photograph. The process, while detailed, is systematic and rewarding, empowering users to inject their personal creative vision into their digital artwork.