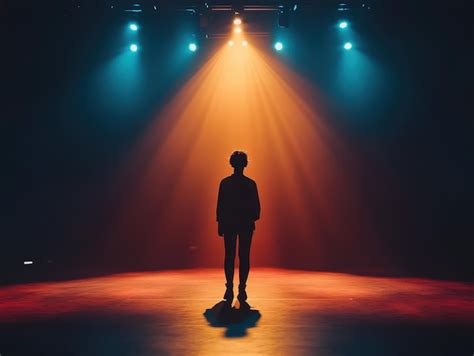
A spotlight is an incredibly effective tool in visual storytelling, capable of instantly drawing the viewer's attention to a specific subject within an image. This dramatic lighting technique is widely utilized across various media, from the captivating allure of concerts and theaters to the dynamic environments of television shows. In this tutorial, we will delve into how to create a realistic spotlight effect in Photoshop, offering a step-by-step guide to enhance your images with this powerful visual element.
Adobe Photoshop, with its robust suite of editing tools, makes it remarkably accessible to manipulate lighting within the context of an image. For this particular effect, we will leverage the power of the Lighting Effects filter, a feature that allows for precise control over illumination and atmosphere.
Accessing the Lighting Effects Filter
The journey to creating a spotlight effect begins with opening your chosen image in Photoshop. To do this, simply press CTRL+O on Windows or Command+O on Mac. This action will prompt a dialog box, allowing you to navigate and select the image you wish to enhance.
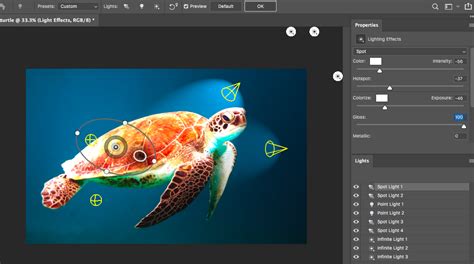
Once your image is open, the next crucial step is to apply the Lighting Effects filter. This is a straightforward process: navigate to Filter > Render > Lighting Effects. Upon selecting this option, you will be presented with a dedicated interface that grants you comprehensive control over the lighting applied to your photograph. Crucially, the default effect within this filter is often set to "Spot Light," which is precisely what we aim to achieve.
Add Dramatic Light Effect in Photoshop Tutorial for beginners
Step-by-Step Guide to Creating the Spotlight
Step 1: Applying the Initial Lighting Effect
After navigating to Filter > Render > Lighting Effects, you will find yourself within the Lighting Effects dialog box. As mentioned, the "Spot Light" preset is an excellent starting point. This filter doesn't just allow for basic lighting adjustments; it also enables you to apply textures while simultaneously fine-tuning the photo's lighting, color, exposure, gloss, and even metallic effects. This multifaceted control ensures a more nuanced and realistic outcome.
Step 2: Adjusting the Lighting Area and Intensity
This is arguably the most critical stage in achieving an optimal spotlight effect. A fundamental understanding of lighting direction in your image will significantly contribute to more natural-looking results. Within the Lighting Effects dialog, you'll notice a prominent circle, often with adjustable points. Manipulating these points allows you to precisely define the area and intensity of your spotlight. Dragging these points allows you to shape the light, extend its reach, and control its falloff. Experimentation here is key; playing with the circle points gives you a tangible sense of adjusting the lighting based on the specific characteristics of your image.
For instance, if you are aiming for a hard-edged spotlight, you might keep the selection points tighter. Conversely, for a softer, more diffused spotlight, you would expand these points and potentially adjust the overall intensity. The goal is to create a visual cue that guides the viewer's eye without appearing artificial.
Step 3: Refining Color and Atmosphere
Once you have established the shape and intensity of your spotlight, you can further enhance the effect by adding color. Within the Lighting Effects properties, there is an option to choose a color for your light source. This step can add significant flair and mood to your image. However, picking the appropriate color might require some careful consideration.
If your photograph already possesses a strong color palette, selecting a complementary color for the spotlight can create a harmonious and professional look. For example, a warm yellow or orange spotlight can evoke a sense of intimacy or drama, while a cool blue might suggest a more sterile or melancholic atmosphere. If, however, you feel your photo doesn't require additional color, or if a colored spotlight would detract from the subject, then you are perfectly fine with leaving the light source white or a very subtle shade. The key is to ensure the color enhances, rather than overwhelms, the original image.
Step 4: Incorporating Texture and Grittiness
For those seeking a more complex or stylized spotlight, there are alternative approaches that involve incorporating texture and blur. In some instances, particularly when aiming for a grittier, smokier effect, using a radial zoom blur can be highly effective. Experimenting with the blur settings, such as choosing "draft" or "good" rather than "best," can yield a more pronounced and textured appearance, avoiding an overly smooth or artificial look.
Alternative Approaches to Spotlight Creation
While the Lighting Effects filter offers a direct and powerful method, it's worth noting that there are other techniques to achieve a spotlight effect in Photoshop, particularly for those who might be less familiar with the full capabilities of the software or who prefer a more manual approach.
Method Using Selection and Feathering
One such method, often favored by users who primarily work with vector programs, involves a more hands-on approach. This technique begins by selecting the elliptical marquee tool. By holding down the Shift key while using this tool, you can ensure the selection remains perfectly round. You would then create a selection behind your subject, defining the general area of your spotlight.
Following the creation of this circular selection, the next step is to soften its edges to create a more natural falloff. This is achieved by feathering the selection. The amount of feathering will depend on the desired intensity and spread of your spotlight. A higher feather value will result in a softer, more diffused light, while a lower value will produce a sharper, more defined beam.
To further refine this effect, you can apply a blur to the feathered selection. Gaussian blur is a common choice, allowing for controlled softening of the light's edges. Adjusting the radius of the blur will determine how gradually the light fades.
Method Using Fibers and Radial Blur
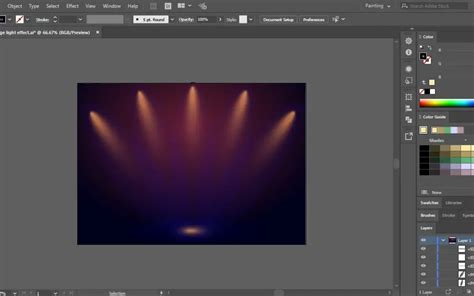
Another method, often employed for a more abstract or atmospheric spotlight, involves utilizing Photoshop's render filters. This technique might start by creating a mask and then applying the Filter > Render > Fibers option. The settings for the fibers can be adjusted to create a textured background that can then serve as a basis for a spotlight. Following the fiber generation, a radial zoom blur can be applied to simulate the outward expansion of light. Experimenting with different blur settings and blend modes can lead to unique and artistic spotlight effects.
Method Using Custom Brushes and Color Blending
For those who enjoy a more artistic and brush-driven workflow, custom brushes can also be instrumental in creating a spotlight. Years ago, users might have found collections of Photoshop brushes specifically designed for lighting effects. These brushes could simulate beams of light, glows, and atmospheric particles.
A manual approach using custom brushes could involve starting with a dark background, such as midnight blue. Then, using brushes with colors like mid-blue, light-blue, and near-white, you would paint in areas of light, building up the spotlight effect gradually. This method offers immense creative freedom, allowing for a highly personalized and unique spotlight.
Historical Context and Photoshop's Evolution
It is important to acknowledge a significant shift in Photoshop's capabilities regarding 3D features. Sadly, starting around a year ago, Adobe began a process of removing all 3D aspects from Photoshop. This means that some of the more advanced, built-in 3D lighting tools that may have existed in older versions are no longer available in the latest iterations.
However, the spotlight effect can still be achieved by installing an older version of Photoshop (any version up to 22.2) in parallel with your current installation. It is crucial to avoid updating this older version to retain access to its 3D features. This allows users to continue utilizing powerful, albeit older, functionalities for effects like the spotlight.
It's also worth noting that different tutorials and creators may employ unique methodologies. For instance, a video tutorial by Dewis might present a different approach to adding a spotlight, showcasing the diverse ways this effect can be realized within Photoshop. The core principle remains the same: to manipulate light and shadow to guide the viewer's attention.
Understanding the "Why" Behind the Spotlight
The effectiveness of a spotlight lies in its ability to leverage basic principles of human visual perception. Our eyes are naturally drawn to areas of higher contrast and brighter illumination. By strategically placing a spotlight, you are essentially creating a focal point that the viewer's gaze will instinctively follow. This is why spotlights are so prevalent in performance arts and visual media â they are a direct and powerful way to direct audience engagement.
When creating a spotlight, consider the narrative you wish to convey. Is it a dramatic reveal? A moment of introspection? A playful highlight? The intensity, color, and spread of your spotlight can all contribute to the emotional tone and story of your image.
Considerations for Different Skill Levels
The methods described above cater to a range of user proficiencies. The Lighting Effects filter, while powerful, might initially seem complex to a beginner. However, with practice and by following step-by-step guides, users can quickly master its controls. The selection and feathering method offers a more intuitive, albeit potentially more time-consuming, approach for those who are more comfortable with basic selection tools. For advanced users, the exploration of custom brushes and textures provides a canvas for highly creative and unique interpretations of the spotlight effect.
Ultimately, the "best" method is subjective and depends on your individual workflow, the specific image you are working with, and the desired outcome. Experimentation and a willingness to explore different techniques are key to mastering this versatile Photoshop effect.