Adobe InDesign is a powerful desktop publishing application manufactured by Adobe, forming a core part of their Creative Suite alongside Photoshop and Illustrator. It is the go-to software for creating and publishing a wide array of print and digital documents, particularly those with complex layouts and multiple pages. If your design project, whether it's a magazine, brochure, book, or flyer, is centered around a layout that spans one or multiple pages, InDesign is an excellent choice. For beginners, diving into InDesign can seem daunting, but understanding its fundamental tools and features is key to unlocking its potential.
Navigating the InDesign Workspace: Tools and Frame Basics
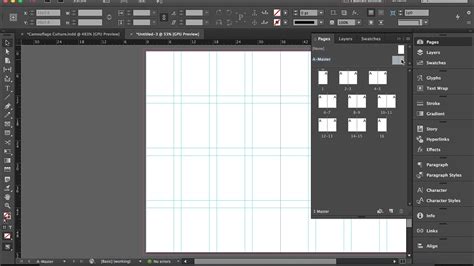
The foundation of any InDesign document lies in its frames, which act as containers for text and graphics. The primary tools for creating these essential frames are conveniently located in the toolbox. Once a frame is established, its appearance can be easily modified. For instance, the corner radius of a frame can be adjusted by selecting the frame and then interacting with the yellow box found in the upper-right corner of the frame. By clicking and dragging this box, users can achieve desired corner effects, adding a polished touch to layouts.

When it comes to manipulating the content within these frames, the Selection tool is your primary instrument. To rotate content, you simply select the object using the Selection tool. Similarly, to flip content, the same process applies: select the content with the Selection tool. For more granular control over transformations, the Properties panel offers a wealth of options. Within the Transform section of this panel, clicking "More Options" reveals a deeper set of controls, allowing for precise adjustments to an object's position, scale, and rotation.
Safeguarding Your Work: Locking and Hiding Content
Accidental edits can disrupt workflow and compromise design integrity. InDesign provides mechanisms to prevent such mishaps. Temporarily locking content is a crucial feature that can safeguard elements from being inadvertently altered. To lock content, select the desired object with the Selection tool and then navigate to Object > Lock, or utilize the keyboard shortcut Control+L (Windows) or Command+L (macOS). A visual indicator, a lock icon, will appear on the frame edge, signifying that the content is protected. Unlocking an individual object is equally straightforward: simply click the lock icon that appears on the bounding box of the selected object.
Beyond locking, InDesign also allows for content to be hidden. This is particularly useful for elements that are not intended for the final output but might be needed for reference or future revisions. To hide content, select it with the Selection tool and choose Object > Hide. Hidden content is effectively removed from the printed or exported output and cannot be selected, ensuring a clean and focused final product. To reveal hidden content, you would typically go to View > Show > Hidden Characters and then select the hidden content to unhide it.
Precision Alignment: The Power of Guides
Achieving precise alignment is paramount in professional design, and InDesign offers robust tools to facilitate this. Ruler guides are nonprinting objects that serve as visual aids for aligning content. They can be positioned anywhere on the page or pasteboard, providing flexible alignment points. To create a ruler guide, ensure that no objects are selected. Then, in the Properties panel, click the "Show Rulers" button to display the page rulers. You can then drag from either the horizontal or vertical ruler into the page or pasteboard area to create a guide. Objects can then be easily aligned by dragging them close to these guides, benefiting from InDesign's smart snapping behavior.
The zero point on the rulers can also be customized. By default, the zero point is set at the upper-left corner of the page. However, you can drag the zero point on the rulers to establish a new origin for each ruler, which can be incredibly useful for specific layout calculations or when working with complex grids. To prevent guides from being accidentally moved or deleted, they can be locked. With nothing selected, click the "Lock Guides" button in the Properties panel, or navigate to View > Grids & Guides > Lock Guides.
Advanced Editing and Workflow Enhancements: Find/Change and Preferences
Efficiently managing text is a cornerstone of any design project, and InDesign's Find/Change feature is an indispensable tool for this purpose. At its most basic, Find/Change allows users to locate a specific word or phrase and replace it with another. Accessing this powerful feature is done via the Edit menu, selecting Find/Change, or by using the keyboard shortcut Command+F (macOS) or Control+F (Windows).
The Find/Change dialog box presents a multitude of options. At its core, you have "Find what" and "Change to" fields. For instance, if you need to locate and replace instances of the word "end," you would type "end" into the "Find what" field. Then, clicking "Find Next" will take you to the first occurrence in your document. A remarkable feature is the ability to zoom in and even edit text directly within the document while the Find/Change dialog box remains open, offering a seamless editing experience.
InDesign Tutorial - Lesson 19 - Find and Change
The power of Find/Change extends beyond simple text replacement. You can precisely control the scope of your search. The search can be limited to the current "story" (a continuous block of text), from the cursor's position to the end of the story, to the entire document, or even across multiple open documents. If you have an active selection of content, you can also restrict the search to that specific selection.
Furthermore, the Find/Change feature offers advanced search criteria. You can make the search "case-sensitive," ensuring that "Apple" is treated differently from "apple." The "Whole word" option prevents partial matches; for example, searching for "end" with this option enabled would not find "ending" or "weekend." When dealing with potential variations in capitalization or plural forms, it's often advisable to leave these options unchecked to ensure all relevant instances are found.
Once a match is found, you have several options: "Change" will replace the current instance and move to the next; "Change All" will replace every instance that matches your criteria throughout the specified scope. This "Change All" functionality is a significant time-saver for large documents.
Beyond specific document tasks, InDesign's application preferences can be optimized to enhance your overall workflow. These preferences are set when no documents are open, meaning they will apply to all new documents you create. While Adobe engineers set the default preferences, many professional users find it beneficial to customize them. To access these preferences, start InDesign without opening any documents, then go to Edit > Preferences (Windows) or InDesign > Preferences (macOS).
Some preferences are document-specific, meaning they only affect the currently open document, while others are application-specific, influencing all future documents. Understanding this distinction is key to tailoring InDesign to your needs. For example, interface appearance, such as the dark theme, is an application-specific preference. Features like "NoMo Noto!" (likely referring to a specific font or character display setting), global changes, import command behavior in the Layers panel, visibility of hidden characters, word count management, handling of overset text, and external image link management can all be influenced by preference settings.
Practical Applications and Tutorials: From Flyers to eBooks
InDesign is a versatile tool used to create a vast range of professional-quality documents. Its capabilities extend to:
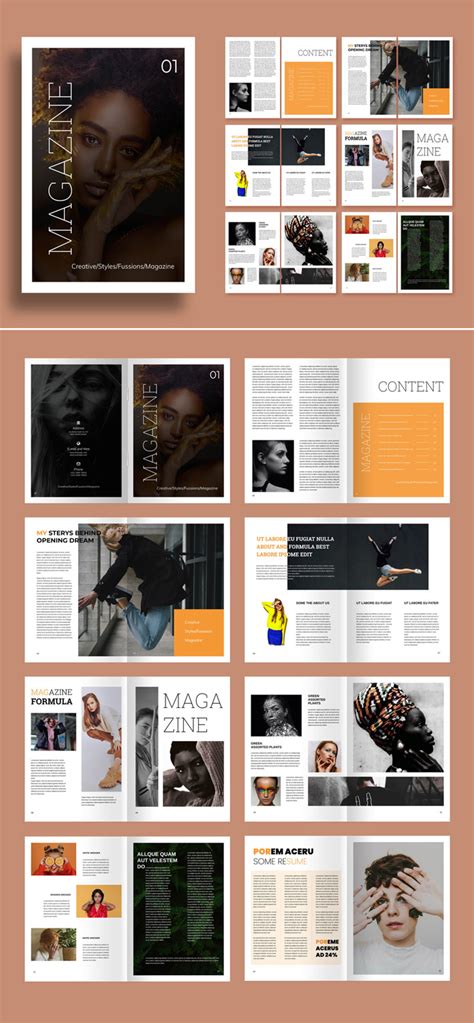
- Multi-page Print Publications: Magazines, books, newsletters, and catalogs are prime examples of documents where InDesign excels. Its robust master page functionality, robust typography controls, and precise layout capabilities make it ideal for managing complex, multi-page projects.
- Brochures and Flyers: Whether you're designing a stylish corporate brochure, a simple yet versatile multipurpose brochure, or a visually striking flyer, InDesign provides the tools to create impactful single-page or multi-fold designs.
- Business Cards and Stationery: Even small items like business cards and complete stationery sets are easily produced in InDesign, offering a great starting point for designers to familiarize themselves with the software.
- Catalogs and Lookbooks: For businesses showcasing products, InDesign is the perfect choice for creating visually appealing catalogs and lookbooks that can be printed or exported for digital distribution.
- eBooks and Digital Publications: InDesign also facilitates the conversion of layouts into eBooks, allowing designers to take their print designs into the digital realm.
For those looking to deepen their InDesign knowledge, a wealth of resources is available. Envato Tuts+ offers a substantial collection of free InDesign tutorials, covering a broad spectrum of topics. These tutorials range from beginner-friendly introductions to more specialized techniques.
For instance, you can find tutorials on:
- Creating Magazine Templates: Learn to build a complete magazine layout, including essential elements like page numbers, master pages, and running headers.
- Threading Text: Discover how to thread text frames to improve the flow and editing experience of copy within layouts.
- Importing and Managing Images: Understand the various methods for importing image files, as well as how to replace and rescale them effectively within your documents.
- Specialist Print Finishes: Explore techniques for incorporating special print finishes like foiling and die-cutting into your designs, often through invitation tutorials that showcase advanced print skills.
- Creating Multi-page Booklets: Learn the steps involved in creating multi-page booklets, with skills that are transferable to catalogs, brochures, and other print publications.
- Typography Fundamentals: Gain insights into typography and how to apply it professionally to print designs.
- Creating Effects: Master techniques for achieving specific visual effects, such as a paper cut-out effect for text.
- Restaurant Menu Design: Develop skills in designing professional and appealing restaurant menus.
- Placing Images within Characters: Learn a design-forward technique for placing images inside single characters for a unique visual impact.
InDesign Tutorial - Lesson 19 - Find and Change
For a comprehensive learning experience, structured courses are also available. A typical InDesign course, often led by Adobe Certified Instructors, might guide you through real-life projects. This could involve starting with a simple company flyer, progressing to a brochure and company newsletter, creating business cards, and managing the complexities of a long annual report. Such courses often cover color selection and usage (including corporate colors), professional font selection and application, and the effective finding, resizing, and cropping of images. Many courses provide exercise files to allow students to practice alongside the instructor, and often include support through Q&A sections.
Essential Considerations for Effective InDesign Use
When embarking on InDesign projects, several key considerations can significantly impact your workflow and the quality of your final output:
- Understanding Document vs. Application Preferences: As mentioned, knowing which preferences apply globally and which are document-specific is crucial for efficient customization.
- Master Pages: For multi-page documents, master pages are indispensable. They allow you to define repeating elements such as page numbers, headers, and footers, ensuring consistency across your entire publication. Any changes made to a master page are automatically applied to all pages that use it.
- Typography: InDesign offers unparalleled control over typography. Mastering font selection, leading (line spacing), kerning (space between specific letter pairs), tracking (uniform space between letters), and paragraph and character styles is vital for professional-looking documents.
- Image Handling: The way images are placed, linked, and scaled in InDesign has a significant impact on both the design and the final output file size. Understanding the difference between embedding images and linking them, and using the appropriate resolution for print or digital, is essential. When scaling images within InDesign, it's important to consider whether you are scaling the frame or the content within the frame, and to maintain aspect ratio to avoid distortion.
- Color Management: Ensuring accurate color reproduction across different media (print vs. screen) requires a solid understanding of color profiles and InDesign's color management settings.
- Exporting for Different Outputs: The process of exporting your InDesign document varies depending on the intended output. Exporting for print typically involves creating a high-resolution PDF with specific bleed and trim settings, while exporting for digital might involve creating interactive PDFs or EPUBs.
By familiarizing yourself with InDesign's core tools, understanding its workflow enhancements, and leveraging the wealth of available tutorials and courses, you can confidently tackle a wide range of design projects and produce professional, visually compelling results.