Substance Painter is a powerful tool that can significantly enhance your 3D projects, yet many motion designers have yet to explore its capabilities. This guide aims to demystify Substance Painter, demonstrating how to integrate it seamlessly into your workflow, particularly within Cinema 4D. By adding intricate detail and lifelike qualities to your 3D assets, you can elevate your renders beyond what might be achievable with the built-in tools of standard software, which can often be cumbersome. It's time to consider a more efficient and creative approach: Substance Painter.
Substance Painter offers a potent addition to your Cinema 4D workflow. Its ability to rapidly and easily author highly detailed custom materials, coupled with the flexibility to edit them directly within Cinema 4D, revolutionizes your 3D material workflow. This tutorial will guide you through the essential steps, from preparing your model in Cinema 4D and baking mesh maps in Substance Painter, to applying masks and generators, and finally, exporting your textured assets back into Cinema 4D to build sophisticated shaders.
Before diving in, it's highly recommended to download the accompanying project files to follow along with the practical examples provided.
What is Substance Painter?
At its core, Substance Painter can be thought of as Photoshop for 3D models. It empowers you to paint directly onto your 3D assets by hand, while also incorporating procedural tools for effects like edge wear. A common challenge across different render engines is their varied methods for achieving similar visual results. Substance Painter acts as a universal material editor, enabling you to create effects that will appear consistent across various render engines. This means an exceptional material crafted for Octane can be effortlessly adapted for Standard Render, Redshift, or even Unreal Engine.
It is an exceptionally versatile tool that automates the technical aspects of texture conversion between different software packages, allowing you to concentrate on your creative process. A prerequisite for using Substance Painter is that your models must be UV unwrapped. If UV unwrapping is a new concept to you, an excellent tutorial on utilizing the latest UV tools in S22 is available. To simplify the process for this guide, a 3D model that is already UV unwrapped is provided, allowing you to jump right into the practical application.
Let's begin by preparing the model in Cinema 4D.
Preparing Your Model in Cinema 4D
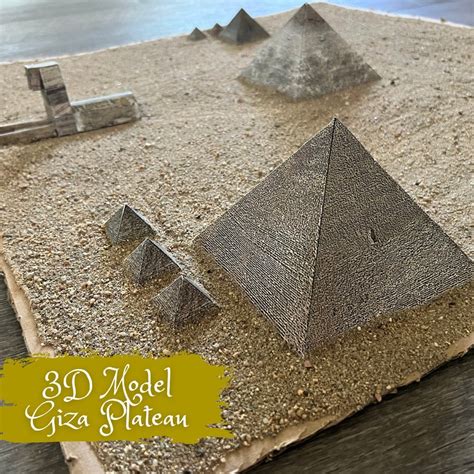
The initial step involves creating a single material for the object, in this case, the SOM Pyramids. Consolidating to one material significantly streamlines the process once you transition to Substance Painter. This is a crucial time-saving technique.
Begin by selecting your object in Cinema 4D. Navigate to the Polygon mode. Utilize the shortcut "U+F" to activate the Fill Selection Tool. This tool allows you to select individual pyramids. Select one pyramid, then hold down the "Shift" key and switch to Point mode. Now, you can assign a vertex color. To do this, press "Shift+C" to open the Commander window, and then type "Vertex."
After executing this command, your object will appear entirely black. Next, you'll need to color-pick the School of Motion Logo, which is available in the provided program files, to ensure your color scheme is accurate. Simply select the pyramid, sample the desired color from the logo, and then click "Apply Selected."
With the pyramids correctly colored, the model is now ready to be transferred to Substance Painter.
Baking the Model in Substance Painter
Before proceeding, ensure that your model has a UV tag applied. This tag contains all the necessary UV information. Navigate to "File > Export > FBX." In the export window, make certain that the "Vertex Colors" box is checked.
Click "OK," select your desired save location, and your model is prepared for export. Within Substance Painter, open the exported FBX file. Drag and drop the file into the Substance Painter interface. Crucially, ensure that "Auto-Unwrap" is deactivated and set your "Template" to "Metallic Roughness" before clicking "OK." You will then see your model and its corresponding UV map displayed. You can verify that everything is functioning correctly by attempting to draw on the model; these markings will be accurately reflected on the UV map.
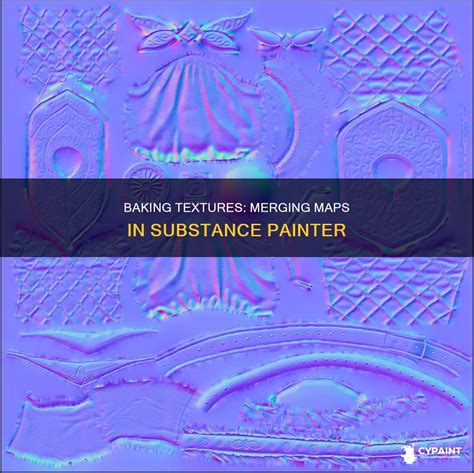
Before we can fully leverage the capabilities of Substance Painter, it's essential to bake the model's mesh maps. Access the "Texture Set Settings" panel. Scroll down until you locate the "Bake Mesh Maps" option. Clicking this will open a small window. Typically, this is where users import high-polygon meshes, such as those created in ZBrush, to bake down details. However, for this tutorial, we will use a different approach.
Within the "Bake Mesh Maps" window, navigate to the "ID" section and change the color setting to "Vertex Color." Additionally, under the "Common" settings, increase the "Resolution" to 2K. Then, click "Bake Selected Textures."
Baking essentially generates additional maps that provide the software with crucial information about how to interpret edges, ambient occlusion, and normals. These can be considered utility passes and are vital for utilizing generators effectively later in the process.
Utilizing Masks and Generators in Substance Painter
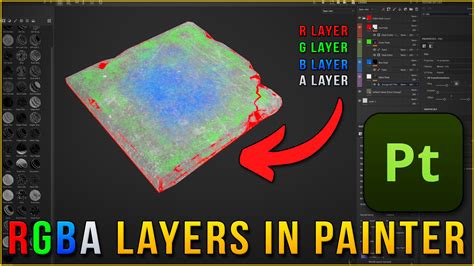
Examining the "Project" tab within the Substance Painter interface, you will find the UV map that was colored in Cinema 4D. If you drag these colors into the "Fill" option, you can begin applying materials based on your vertex coloring.
Now, let's explore the "Shelf" to find suitable materials. For this example, we will use two materials and demonstrate how to blend them. For the logo area, a plastic base with a metallic surface is desired. When you drag the plastic layer onto your object, you might notice it overrides the existing color. To prevent this, simply deselect the color option within that layer. This ensures that Substance Painter utilizes the colors from the "Fill" layer that was created in Cinema 4D, allowing the object to retain its intended color scheme while benefiting from the material's properties. The same process can be applied with an aluminum material to achieve a metallic effect.
This combination adds depth and character to the object. However, a uniform metallic look is often unrealistic. To address this, we will isolate the metallic effect to the edges. To achieve this, create a "Black Mask" by navigating to "Masks" and selecting "Add Black Mask." A mask effectively hides the physical characteristics of a layer, and you can then paint away areas to reveal the underlying material, much like in Photoshop. With the mask selected, click the "Wand" icon and choose "Add Generator."
This action opens a selection of "Generators." We will select one called "Metal Edge Wear." Upon applying this generator, you will observe that the aluminum material now prominently appears on the edges of your object. These generators are precisely why the baking process is so critical; they rely on the information derived from the utility maps generated during baking. Without these maps, the results would lack the desired crispness and visual impact.
At this stage, you can fine-tune the object's appearance to your exact specifications. Once you are satisfied with the texturing, it's time to return to Cinema 4D.
Exporting Textures Back to Cinema 4D
The next step is to bring the textured model back into Cinema 4D. Navigate to "File > Export Textures." This action will display all the texture files that will be transferred. While not all of them may be strictly necessary, including them will not cause any issues. Select your desired file destination, set the "Texture" preset to "Metallic Roughness," as this configuration works best for Cinema 4D, and then click "Export." It's worth noting that both Redshift and Octane renderers can utilize the "Redshift" preset, while the default preset is suitable for standard Cinema 4D materials.
Finally, let's focus on constructing a shader in Cinema 4D using these exported textures.
Cinema 4d 2023.1: Redshift Creating Materials From Online Textures
Building Shaders in Cinema 4D
Returning to Cinema 4D, select the material that was initially created at the beginning of this workflow. Within the "Basic" menu of the material properties, you will find options for creating shaders. While it's possible to achieve all of these effects within the "Reflectance" channel, we will focus on the "Color" channel for this demonstration. Activate the "Normal" channel, as this will be required for our Bump Map, and also activate "Displacement."
Under the "Color" settings, within the "Texture" section, drag and drop the texture file labeled "Base Color." You will now see all the colors that were applied earlier. Proceed to the "Reflectance" channel, remove the "Default Specular," and add a new layer. Select the "GGX" reflectance model for a smooth, shiny appearance.
Next, scroll down to "Roughness," expand the "Textures" section, and drag in your "Roughness Map." For "Reflection Strength," you can incorporate your "Metallic" layer.
At this point, the material is beginning to look more intricate. However, if you were to render now, you would only see the reflections and rough spots as they appear on your screen, lacking the full depth of the applied textures. To incorporate the color information correctly, go to "Layer Color" and drag the "Base Color" texture into the designated slot.
Subsequently, navigate to the "Normal" tab and drag in your "Normal Map." Finally, go to the "Displacement" channel and add some height to your textures. It is crucial to set the "Height" value low initially, as a high setting can cause the displacement to appear blown out or distort the model in undesirable ways. Ensure that "Sub Polygon Displacement" is activated; this setting subdivides your model, increasing the polygon count to allow for more detailed displacement.
With the textures correctly set up and rendered, add the model to an environment, implement appropriate lighting, and observe the remarkable fidelity of the transferred textures.
This comprehensive workflow demonstrates the power of integrating Substance Painter into your 3D creation pipeline. By mastering these fundamental steps of importing, texturing, and exporting, you can unlock a world of creative possibilities and imbue your 3D assets with an unprecedented level of detail and realism. For those ready to elevate their 3D skills further, exploring advanced courses that delve into fundamental and marketable 3D concepts is highly recommended.