DaVinci Resolve, a powerhouse in the post-production industry, offers robust tools for video editing and color grading. However, for many creators, especially those working with external audio recorders, the crucial step of synchronizing audio and video can present a challenge. This tutorial aims to demystify the process, guiding you through the essential techniques to ensure your audio perfectly aligns with your visuals, enhancing the overall quality and professionalism of your projects. We will delve into the specific functionalities within DaVinci Resolve that facilitate seamless audio syncing, from initial import to final timeline integration.
Importing and Initial Setup: Laying the Foundation for Sync
The journey to synchronized audio in DaVinci Resolve begins with the proper import of your media. Once you’ve imported your audio files, typically captured by external sound recorders like the popular MixPre series, alongside your camera footage, the next critical step involves informing DaVinci Resolve about the relationship between these disparate elements. This is achieved through the "Clip Attributes" window.
Upon selecting your imported clips within the DaVinci Resolve project, navigate to the "Clip Attributes" by right-clicking on the clip(s) and choosing the appropriate option. Within this window, you will find a dedicated "Audio" tab. This tab is where DaVinci Resolve displays the individual audio channels detected from your external audio recorder. This is a pivotal moment, as it allows Resolve to recognize the multi-channel audio that has been recorded separately from your video. The presence of these channels here is the first indication that the software is prepared to handle your external audio.
The Power of Clip Attributes: Linking and Configuring Audio Channels
The "Audio" tab within "Clip Attributes" is your central hub for managing external audio. Here, you can verify that all the channels from your sound recorder are correctly recognized and listed. This is also the stage where you can make initial adjustments to how these channels are interpreted by DaVinci Resolve. While the primary goal is synchronization, understanding these attributes can prevent potential issues down the line. For instance, ensuring the correct channel mapping is vital for accurate playback and editing.
This initial configuration is fundamental. DaVinci Resolve relies on this information to create linked clips, where the external audio is associated with its corresponding video. This association is what enables the magic of synchronization to occur seamlessly when you begin the editing process. Without this correct setup in the "Clip Attributes," the subsequent steps for syncing might not function as intended, underscoring the importance of this foundational stage.
Building Your Timeline: Working with Synced Clips
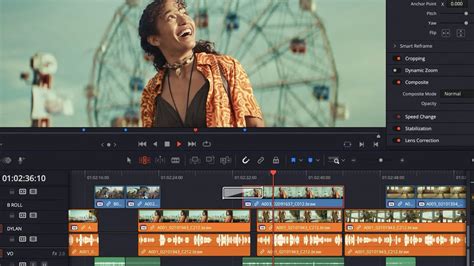
Once your audio and video clips have been correctly configured in "Clip Attributes," you are ready to bring them onto your timeline. The process is remarkably intuitive. When you drag and drop a "synced clip" - a clip that DaVinci Resolve now recognizes as having linked audio and video - onto your timeline, you will observe a clear representation of this integration.
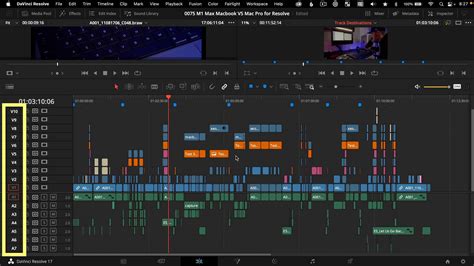
Each audio channel that was identified from your external recorder will now be visibly represented as a separate track, directly linked to the video clip on the timeline. This visual cue is incredibly helpful, as it immediately shows you the multi-track nature of your imported audio. You can see precisely which microphone captured which sound, all aligned perfectly with the visual information. This is the direct result of the proper setup in the "Clip Attributes" and DaVinci Resolve's sophisticated media handling.
Streamlining Your Workflow: Muting, Soloing, and Naming Tracks
Working with multi-channel audio can sometimes be overwhelming, especially when you’re trying to pinpoint specific sounds or isolate dialogue. DaVinci Resolve provides simple yet powerful tools to manage these channels directly on the timeline. The ability to "mute" and "solo" individual audio tracks is a game-changer for efficient editing.
Muting a track allows you to temporarily disable its playback without removing it from the timeline. This is useful if you have overlapping audio sources and want to focus on a particular microphone's input. Conversely, the "solo" function isolates a specific track, silencing all other audio channels on the timeline. This is invaluable for detailed audio mixing and for identifying the cleanest or most relevant audio source for a given scene. By strategically muting and soloing, you can avoid the cacophony of multiple microphones and focus on the audio that matters most.
Furthermore, to enhance clarity and organization, it is highly recommended to "name your audio tracks." This simple act of labeling each track with a descriptive name (e.g., "Lav Mic - John," "Boom Mic - Scene 1," "Room Tone") significantly improves your workflow. Knowing precisely which microphone is on which track prevents confusion and saves precious editing time. When you’re deep into a project, a glance at the track names can instantly tell you the source of the audio, facilitating quicker decisions and more accurate edits. This practice is a cornerstone of professional audio post-production.
5 Sound Design Effects in DaVinci Resolve
Beyond Basic Sync: Advanced Synchronization Techniques
While DaVinci Resolve’s automatic synchronization based on audio waveforms is often highly effective, there are instances where manual intervention or more advanced techniques are necessary. Understanding these methods ensures you can handle any audio sync challenge that comes your way.
Manual Synchronization with Timecode
For projects where precise synchronization is paramount, especially when dealing with multiple cameras and sound recorders that all capture timecode, DaVinci Resolve excels. If your camera and audio recorder have synchronized timecode, DaVinci Resolve can leverage this information for incredibly accurate automatic syncing. However, if for some reason the automatic sync isn't perfect, or if you are working with footage that lacks perfect timecode alignment, manual synchronization becomes the go-to solution.
This can involve using visual cues on the timeline or audible "claps" from a clapboard. By placing the video and audio clips side-by-side, you can identify a distinct visual event (like a clap) or a sharp audio spike. You can then manually adjust the position of the audio clip on the timeline until the visual event and the audio spike perfectly align. DaVinci Resolve’s waveform display is instrumental here, allowing you to visually match the peaks and troughs of the audio recording with the corresponding sound event in the video. Nudging the audio clip frame by frame ensures pixel-perfect sync.
Synchronizing Multiple Audio and Video Sources
When working with multi-camera shoots or complex productions involving numerous audio sources, the challenge of synchronization multiplies. DaVinci Resolve’s ability to handle multiple tracks makes it well-suited for these scenarios. The process often involves selecting all the relevant video and audio clips for a particular scene, right-clicking, and choosing a synchronization option. DaVinci Resolve can then attempt to sync them based on audio waveforms or timecode.
If automatic synchronization proves insufficient due to variations in recording levels or ambient noise, manual refinement is key. This might involve using a common reference sound (like a clap) across all sources to align them. The key is to ensure that all sources are synchronized to a single reference point. This often means syncing one audio track to the video, and then syncing all other audio tracks to that primary synced track. Careful organization and labeling of tracks become even more critical in these complex setups.
Utilizing PluralEyes or Other Dedicated Sync Software
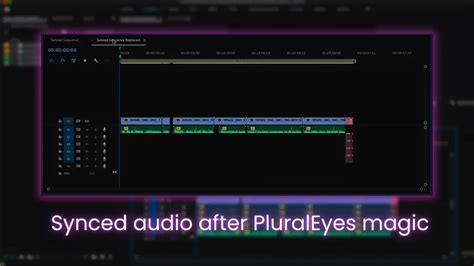
For extremely demanding projects with a high volume of clips or particularly tricky synchronization requirements, dedicated audio-video synchronization software can be a valuable asset. Tools like PluralEyes (now part of Red Giant's Universe suite) are specifically designed to analyze audio waveforms and automatically sync multiple clips with remarkable accuracy, often with minimal user intervention.
The workflow typically involves exporting your raw audio and video clips from DaVinci Resolve (or your NLE of choice), importing them into PluralEyes, allowing the software to perform its synchronization magic, and then exporting a new set of synced media files. These newly synced files can then be re-imported back into DaVinci Resolve, where they will already be perfectly aligned, significantly streamlining the editing process. While this adds an extra step, for complex projects, the time saved in manual syncing can be substantial.
Troubleshooting Common Synchronization Issues
Despite the powerful tools available, synchronization issues can still arise. Understanding common problems and their solutions will help you overcome these hurdles efficiently.
Audio Drift Over Time
One of the most frustrating issues is audio "drift," where the audio and video gradually fall out of sync over the course of a clip or sequence. This often occurs when different devices have slightly different internal clock speeds or when dealing with variable frame rate (VFR) footage.
- Variable Frame Rate (VFR) Footage: Cameras that record in VFR (often found in smartphones or screen recording software) can cause significant sync problems. DaVinci Resolve generally handles VFR better than many other NLEs, but it's always best practice to convert VFR footage to a constant frame rate (CFR) in a transcoding application (like HandBrake or Shutter Encoder) before importing it into Resolve.
- Internal Clock Discrepancies: Even professional cameras and recorders can have minor differences in their internal clocks. If timecode is not perfectly aligned or not used, this can lead to drift. In such cases, manual synchronization at the beginning of the clip, and then potentially re-syncing at the end, might be necessary. However, if the drift is consistent, you can sometimes correct it by adjusting the speed of the audio clip slightly to match the video's duration.
Missing or Corrupted Audio Channels
Occasionally, you might find that certain audio channels are missing or appear corrupted after importing or syncing.
- Re-import Media: The first step is often to try re-importing the affected audio files. Sometimes, the initial import process can be interrupted or corrupted.
- Check File Integrity: Ensure the original audio files are not corrupted. Play them back in a dedicated audio player to confirm they are intact.
- Verify Clip Attributes: Double-check the "Clip Attributes" settings to ensure all channels are correctly recognized and mapped. Sometimes, a specific channel might be accidentally disabled or misinterpreted.
- Audio Driver Issues: Though less common within Resolve itself, ensure your system's audio drivers are up to date, as this can sometimes affect how audio is processed.
Incorrect Sync When Using Automatic Waveform Sync
While DaVinci Resolve's automatic waveform sync is generally excellent, it can sometimes fail, especially in noisy environments or when the audio recordings are very similar.
- Provide a Clear Reference: If possible, ensure there's a distinct, sharp sound event in both the video and audio recordings (like a clap) that Resolve can easily identify.
- Manual Adjustment: If automatic sync fails, be prepared to perform a manual sync. Use the waveform display as your guide. Zoom in closely on the audio waveforms and the video's audio track to visually match sharp transients (like a clap or a spoken word's start).
- Check Audio Levels: Ensure that the audio levels on your external recorder were set appropriately and that the audio in your footage is not too low or too high, which can hinder waveform analysis.
The Importance of Audio Quality in Synchronization
It’s worth reiterating that the success of audio synchronization, particularly automatic waveform synchronization, heavily relies on the quality of the audio recordings themselves. High-quality, clean audio with distinct transient sounds will always yield better and more reliable synchronization results.
- Minimize Background Noise: While Resolve can often work around moderate background noise, excessively noisy environments can make it difficult for the software to accurately identify specific audio events for syncing.
- Record a Reference Tone/Clap: The age-old technique of using a clapboard or a sharp hand clap at the beginning of each take is invaluable. This creates a clear, distinct spike in the audio waveform across all recording devices, providing an easily identifiable point for manual or automatic synchronization.
- Consistent Recording Levels: Maintaining consistent and appropriate audio recording levels on your external recorder is crucial. Audio that is too quiet might not register clearly on the waveform, while audio that is heavily distorted can also interfere with the sync process.
By understanding these advanced techniques and troubleshooting common issues, you can confidently tackle any audio synchronization challenge within DaVinci Resolve, ensuring your projects sound as good as they look. The meticulous attention to audio sync is a hallmark of professional filmmaking and video production, elevating the viewer's experience significantly.