Adobe Photoshop is an incredibly versatile tool that enables users to explore their creativity through a variety of features and commands. Among these, the Warp tool stands out as a powerful instrument for manipulating the shape of images, text, and vector shapes. This tutorial will delve into the intricacies of Photoshop's Warp tool, exploring its various applications from corrective adjustments to highly creative distortions, ensuring a deep understanding for users of all levels.
Understanding the Core of the Warp Tool
The Warp tool in Photoshop allows users to manipulate the shape of images, text, and shapes by dragging control points. Essentially, it works by altering an underlying grid that conforms to the selected object. Using the Warp tool, graphic designers and photographers can achieve impressive results, such as correcting perspective problems and making various adjustments to image elements. The Warp Tool in Photoshop is a powerful feature that allows us to manipulate the shape of images, text, and shapes by altering the underlying grid.
Control Handles are essential components of the Warp Tool that we use to manipulate the image. These can be found at the intersection of the grid lines. The Layers Panel is particularly important for organizing and selecting the elements we want to warp. To access the Warp Command, we need to go to the top menu bar, click on Edit, then select Transform and Warp. The Warp Tool also offers a customizable grid that can have varying sizes and numbers of control points.
Accessing and Applying the Warp Command
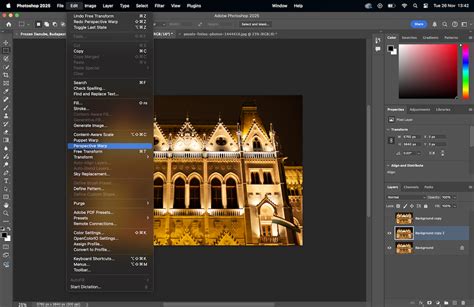
The primary method to access the Warp command is through the top menu bar. Navigate to Edit > Transform > Warp. Once activated, a bounding box with a customizable grid will appear around your selected layer or object. This grid is what you'll manipulate to achieve your desired deformation.
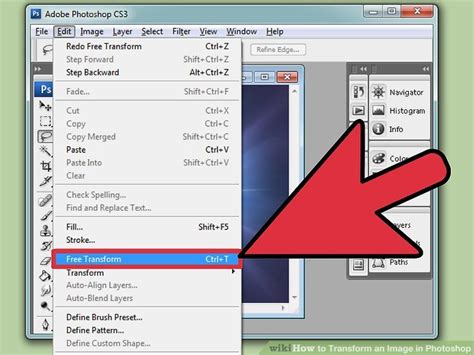
When working with the Transform Warp tool, it's essential to have a good understanding of the Free Transform command, as Warp is a sub-option within it. The tools in the Transform menu help you correct distortion, though you can also distort objects for creative purposes. You have a handful of options: Scale, Rotate, Skew, Distort, Perspective, and Warp. Keep in mind that you can’t use Transform tools as Smart Filters. In other words, you can’t go back and make adjustments even if you’re working on a Smart Object. If you want to make any changes, you have to undo the transformation and start over.
Harnessing the Power of Control Points and Grids
The Warp tool's effectiveness lies in its ability to precisely control deformations. The grid that appears over your object is composed of lines and control points. By clicking and dragging these points or the mesh lines themselves, you can bend, twist, and reshape the image.
Photoshop has different Warp tool grid options for the warp tool. Each of these nine sections can be moved by clicking inside the section and dragging. This grid gives you enormous editing freedom. But you haven’t seen anything yet. All other grids have handlebars on every section of the grid. A dropdown menu will appear. You can also drag the handlebars at each corner in or outside the grid. It appears as if they are lost in the folds of the warp action. A dropdown menu will appear. Here, you can use the filter sliders to distort your image.
Customizing the Warp Grid
One of the great features in the enhanced Warp tool is the ability to work with custom grids. This provides more control over image manipulation. Start by selecting the Warp command, then choose Grid from the options panel. Adjust the columns and rows as needed, and begin warping the image by dragging the control points.
To add points to the warp grid, we first need to enable the Warp tool by going to Edit > Transform > Warp. By holding down the Alt/Option key (on Windows or Mac), we can click anywhere on the grid to add a new control point.
Use the Density option to set how many lines appear between each Split Warp line. Add grid lines by splitting the warp: In the Options bar, select a Split icon to add predefined splits: Split Warp Horizontally, Split Warp Vertically, or Split Warp Crosswise. Select multiple points by Shift-clicking anchor points or dragging over them while holding Shift.
Exploring Different Warp Applications
The Warp tool is quite useful for making creative or corrective changes. Its applications span across various fields within digital design and photography.
Corrective Adjustments: Perspective and Distortion
Distortion and rotation are important aspects of Photoshop's Warp tool. To distort an image or object, we utilize the Enhanced Warp Tool by adjusting anchor points around the edges of the object. Applying a perspective warp requires a good understanding of the relationship between the camera's location and the objects being photographed.
The Perspective Warp tool is designed to give you extreme control over the perspective in your images. It’s primarily used to correct perspective distortion, which often needs addressing when photographing architecture, interior, and real-estate scenes. Other photographers who include buildings in their photos also rely on the Perspective Warp tool; travel photos of iconic buildings and city skylines often benefit from a bit of perspective correction, for example.
Flat-lay photographers face another common perspective problem. If the sensor isn’t perfectly parallel to the flat-lay surface, they end up with distortion, which they’ll need to fix in post-production. One of the easiest ways to make this correction?
Perspective warp tool Photoshop Tips and Tricks
Using the Perspective Warp Tool
To use the Perspective Warp tool:
- Duplicate your background layer and convert it into a Smart Object for non-destructive editing.
- Go to Edit > Perspective Warp.
- In Layout mode, draw grids (called quads) over the areas you wish to modify. You can draw one or multiple quads, connecting them by drawing edges close to each other.
- Adjust the quad handles to refine the grid.
- Switch to Warp mode.
- You can choose from auto-correct options (fixing vertical, horizontal, or both lines) or manually drag the quad handles to alter the perspective.
- Press Enter to apply the changes. The tool helps you achieve better results with less effort compared to older methods.
Creative Deformations: Bending, Twisting, and Reshaping
The Warp Tool in Adobe Photoshop is used to flexibly bend, reshape, or distort an image, text, or selection in a natural way. By dragging the control points or mesh lines, you can smoothly adjust curves, fix perspective, or match the object to another surface.
Photoshop offers a Warp pop-up menu in the Options bar, which provides several preset warp styles. These include Arc, Arch, Bulge, Flag, Fish, Fisheye, Lens, Modify, Ripple, Shell, Squeeze, Twist, and Wave. Choosing a style provides a starting point, which can then be further refined by adjusting the control points.
Change Warp Orientation: The button looks like a curved grid next to a down arrow and a right arrow. This allows you to change the orientation of a warp style, offering further creative possibilities.
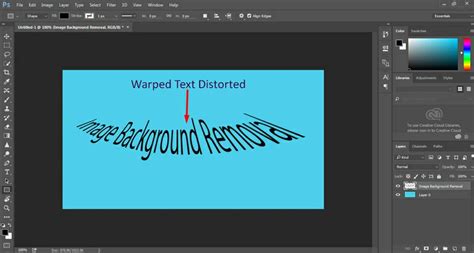
Warping Text Layers
Not only can we warp images, but also text layers in Photoshop. To apply Warp to text:
- First, create a text layer using the Type tool.
- Then, with the text layer active, go to Edit > Transform > Warp.
- A grid with control points will appear over the text, allowing you to manipulate its shape.
- Alternatively, select the Create Warped Text button in the options panel and choose a style from the Warp drop-down menu.
Cylinder Warp and Polar Coordinates
Cylinder Warp in Photoshop can be used to wrap images or elements around cylindrical objects. To accomplish this:
- Open the image to be warped in Photoshop.
- Create a rectangular selection around it.
- Go to Filter > Distort > Polar Coordinates, choosing the "Rectangular to Polar" option. This effectively transforms a rectangular image into a circular or cylindrical view.
Advanced Techniques and Tools
Beyond the standard Warp tool, Photoshop offers specialized features that enhance its deformation capabilities.
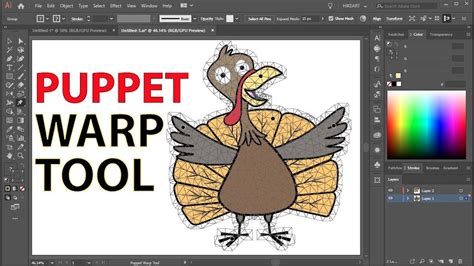
The Puppet Warp Tool
The Puppet Warp tool in Photoshop allows us to manipulate specific areas of an image by adding pins to create a flexible mesh-like structure. By moving these pins, we can smoothly distort and reposition segments of the image according to our needs. This is particularly useful for posing characters or subtly altering the form of objects.
To use Puppet Warp:
- Select the layer you want to manipulate.
- Go to Edit > Puppet Warp.
- Click on the image to add "pins" to define areas that should remain fixed or move with the pin.
- Drag the pins to deform the image. The areas around the pins will stretch and bend.
- You can change the Mode (Normal, Distort, Rigid) to control how the deformation behaves.
- Rigid: Keeps the mesh structure stiff.
- Normal: A balanced deformation.
- Distort: Allows for more extreme perspective changes, making parts of the object appear closer or further away.
- Adjusting the Density option changes the spacing of the mesh points, offering more or less precision.
- Press Enter to apply.
When working with Puppet Warp, it's often recommended to expand the canvas slightly before applying the tool. This can be done by going to Image > Canvas Size and increasing the dimensions. This provides more room for deformation and prevents clipping.
Vanishing Point Filter
The Vanishing Point filter allows you to follow the perspective of an image when you paint, clone, or add new elements. It has its own workspace where you can trace grids on your subject. While you can always come back to the workspace and find the grids, you can’t undo the work you’ve already done. Unfortunately, you can’t use the Vanishing Point filter on Smart Objects. This tool is invaluable for seamlessly integrating new elements into a scene while maintaining its existing perspective.
Working with Selections and Layers
Mastering selections and layer editing techniques is crucial for any Photoshop user, especially when utilizing advanced tools like Warp.
Selection Tools
One of the critical aspects of working with Photoshop is using selection tools. These tools help us isolate parts of an image from the rest, making it easier to edit specific areas.
- Marquee tools (Rectangular and Elliptical) allow us to create basic selections.
- Lasso tools (Lasso, Polygonal Lasso, and Magnetic Lasso) enable more precise and freeform selection.
- More advanced tools like the Quick Selection Tool and Object Selection Tool can also be very effective.
Layer Management
In Photoshop, layers are an essential component of organizing and editing images. The Layers panel allows us to access and manipulate layers efficiently. Some common layer editing techniques include adding layer masks and using blending modes. Layer masks allow us to hide or reveal areas of a layer non-destructively, which is critical when performing complex manipulations with the Warp tool.
It is always recommended to work on a duplicate of your original image or convert your layer into a Smart Object before applying warp transformations. This ensures that your original data remains intact and that you can revisit and adjust the warp effects later without starting from scratch. To convert a layer to a Smart Object, right-click on the layer in the Layers panel and select "Convert to Smart Object."
Considerations for Different Users
The Warp tool's flexibility makes it suitable for a wide range of users:
- Beginners: Can start with simple presets from the Warp pop-up menu to understand how the grid responds to manipulation. Correcting minor perspective issues in photos is a great starting point.
- Graphic Designers: Can use Warp for creative text effects, shaping logos, or convincingly placing graphics onto curved surfaces.
- Photographers: Employ Warp for perspective correction, fixing lens distortion, or even creatively altering the appearance of objects in portraits and commercial work.
- Digital Artists: Can leverage Warp and Puppet Warp for character posing, creating dynamic shapes, and adding interesting distortions to illustrations.
Photoshop for iPad Limitations
As of now, the Warp tool is not available in Photoshop for iPad. However, Adobe is continually updating the app and adding new features, so the Warp tool may become available in future updates.
Conclusionary Thoughts on Warp Tool Mastery
Mastering Photoshop's Warp tool, including its variations like Perspective Warp and Puppet Warp, opens up a vast realm of creative and corrective possibilities. By understanding the interplay of control points, grids, and different tool modes, users can achieve sophisticated image manipulations. Always remember to work non-destructively by utilizing Smart Objects and layer duplication to ensure flexibility and preserve your original work. Experimentation is key; the more you practice, the more intuitive these powerful deformation tools will become.