Designing and creating visually appealing content often hinges on the meticulous selection and application of typography. For users of Adobe Photoshop, a robust and versatile design tool, the ability to incorporate a wide array of fonts is not just a convenience but a necessity. Whether you're a seasoned professional working with specific brand guidelines, a hobbyist exploring creative expression, or a beginner just starting their design journey, understanding how to add fonts to Photoshop can significantly elevate your projects. This guide will walk you through the various methods of acquiring and integrating new typefaces into your Photoshop workflow, ensuring your creative vision can be fully realized.
The Power of Typography: Why Custom Fonts Matter
The fonts available by default within any software are often a starting point, but the true potential for unique and impactful design lies in the ability to expand beyond these built-in options. Learning how to add fonts in Photoshop is a necessity for designers, allowing you to search beyond the confines of built-in Adobe Fonts. Whether you're adding your own custom font design or working with specific brand fonts for a client, it's important to know how to insert them quickly to bring your creative vision to life. Thankfully, it's typically a painless process, allowing you to add your custom font choice in a matter of minutes. Once you know how it's done, it's just a matter of searching for your perfect match.

Leveraging Adobe Fonts: Seamless Integration
For users within the Adobe ecosystem, Adobe Fonts offers a streamlined and integrated solution for expanding your typographic palette. When you add fonts from Adobe Fonts, they will appear in the font menus of all your desktop applications, such as Photoshop, Illustrator, InDesign, Microsoft Office, and iWork. Fonts are added on your computer through the Creative Cloud desktop application. The process begins by browsing the extensive library of fonts available. You can refine your search by using tags or filters to narrow down the list of fonts to those that best suit your project's aesthetic. When you find a font you like, clicking on it will take you to its family page, where you can explore different weights and styles. Once the fonts are added, they will seamlessly appear in the font menu of each application, presented alongside all of your locally installed fonts.
While you can add as many fonts as you'd like, it's recommended to keep your added fonts list relatively short to optimize application performance. It's also important to note that Adobe Fonts that have not been used in several months may need to be reinstalled for use in non-Adobe applications. You can quickly reinstall these fonts from the Creative Cloud desktop application by clicking the "Install" button next to the font name in your "Added Fonts" list.
Adobe Fonts - Easy | Adobe Creative Cloud
Sourcing and Installing Fonts from Online Libraries
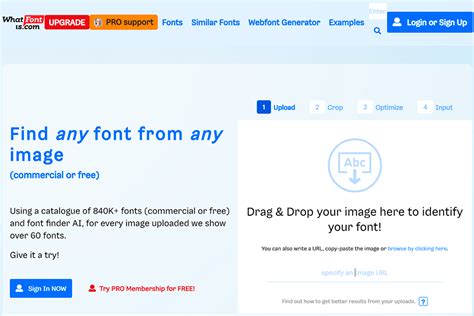
Beyond Adobe Fonts, a vast universe of online font libraries exists, offering an almost limitless selection of typefaces for download. Many of these platforms provide both free and paid options, catering to various budgets and project needs.
Browsing and Downloading Fonts
The first step to adding fonts to Photoshop from external libraries is to browse your chosen online library to source a font that suits your project. Most established sites offer filtering options, allowing you to narrow your search by parameters such as the type of font (serif, sans-serif, script, display, etc.), weight, style, or even intended use. When you find a font you like, you'll typically click a download button.
Locating and Unzipping Font Files
After downloading, the next step to add fonts in Photoshop is to locate the font file in your computer's Downloads folder. Font files are often distributed in a compressed .zip format. If the folder is zipped, you'll need to double-click on it to access the contents. If you downloaded multiple fonts, they will each usually reside in their own separate folder. Once extracted, you'll find the actual font files, which commonly have .ttf (TrueType Font) or .otf (OpenType Font) extensions.
Installing Fonts on Windows
For Windows users, there are several straightforward methods to install fonts, making them available not only in Photoshop but across all applications on your computer.
Direct Installation: Open your Downloads folder and find the font file you just downloaded. If the folder is zipped, right-click and select "Extract All" to access the contents. Fonts will download on an individual basis, so there will be multiple folders if you downloaded multiple fonts. Right-click on the font file (e.g.,
yourfont.ttforyourfont.otf) and select "Install." This makes your font available across all applications on the computer, not just Photoshop.Control Panel Installation: Alternatively, you can access the Fonts folder through the Windows Control Panel. Click the Start Menu, then navigate to "Control Panel," followed by "Appearance and Personalization," and finally "Fonts." You can then drag and drop the extracted font files directly into this folder.
Once the font is installed, open Photoshop. Scroll down the Character tab or the font dropdown menu in the Options bar, and you should now find your desired font in the list. Select the font, and use the Type tool to add it to your project.
Installing Fonts on macOS
The process for installing fonts on a Mac is similarly user-friendly.
- Locate and Unzip: As with Windows, unzip the downloaded font file if necessary. Confirm that the file has a
.ttfor.otfsuffix. - Font Book: macOS includes a built-in application called Font Book, which manages all your installed fonts. Double-click the font file, and a preview window will pop up. Click the "Install Font" button within this window. The font will then be added to your system and become available in Photoshop and other applications.
If you had Photoshop open while installing your new font, you might need to restart the program to see your new font in action. Close Photoshop and reopen it. Scroll through your list or start typing the name of your newly installed font in the Character tab.
Installing Fonts on iPad
Adding fonts to Photoshop on an iPad requires an extra step because they need to be installed via an iOS configuration profile. While it's possible to create one on a Mac, there are apps available in the App Store that will allow you to download fonts to the iPad and package them into a configuration profile that you can then install.
If you've created a document using fonts added from Adobe Fonts on your computer or laptop, you may find that these fonts aren't available by default when you open the document on your iPad. In this scenario, you'll likely encounter a message prompting you to 'Replace Missing Fonts' or 'Transform With Missing Fonts.'
To resolve this, ensure you have the latest iPadOS version installed. Then, download the Adobe Creative Cloud app from the App Store. Open the app, sign in to your Adobe account, and tap 'Fonts' at the bottom of the screen. This will allow you to sync your Adobe Fonts to your iPad.
Understanding Font Licensing: A Crucial Consideration
While free font libraries may seem like an inexhaustible resource to add fonts to Photoshop, it is critically important to consider the licensing issues associated with the fonts you install. Since every font is regarded as its own piece of software, it is bound by licensing agreements when you install it onto your computer. Each font comes with a specific license, which you can usually check on the End-User License Agreement (EULA) that accompanies any font you download.
A desktop license typically permits you to install a font onto your computer and use it in any application. This is generally fine for personal projects. However, problems can arise when you intend to add a font to Photoshop for use in commercial work. Even if a font is advertised as a free download, it may still have restrictions regarding commercial use. In a similar vein, it's possible that someone may upload a font and describe it as 'free' without the original designer's permission.
When working for clients, it is imperative that you thoroughly check the font license and purchase any necessary licenses if needed. Your client is unlikely to be pleased if they receive a strongly worded letter from the owner of the font, demanding compensation or cessation of use.
Open-Source Licensing and Commercial Use
The easiest way to navigate these licensing complexities is to opt for open-source licensing. Open-source fonts are free to download and use, provided you adhere to the specific terms of the license, which often involves not reselling the font and occasionally giving credit for its use.

Font File Formats: OTF vs. TTF
The two most common font file formats you will encounter when you want to add fonts in Photoshop are TTF (TrueType Font) and OTF (OpenType Font).
- TTF (TrueType Font): This is an older format that uses glyph tables to define the appearance of its characters. While it remains a viable and widely supported option, it has certain limitations compared to newer formats.
- OTF (OpenType Font): This is a more modern and versatile format that uses glyphs alongside Compact Font Format (CFF) tables. This architecture offers the potential for smaller file sizes and greater flexibility, supporting advanced typographic features such as ligatures, stylistic alternates, and swashes. Although OTF fonts are becoming more popular and are generally preferred for professional use, TTF still remains a viable alternative, and it is often easier to create than OTF.
It's worth noting that Photoshop and other Adobe applications no longer support older PostScript Type 1 fonts, so ensure you are working with TTF or OTF files.
Exploring Font Resources and AI Text Effects
There is a vast range of online font libraries where you can download fonts to add to Photoshop and other design software. Many of them offer a range of free fonts as well as paid-for options. Some popular and reputable sources include:
- Google Fonts: A comprehensive collection of open-source fonts that can be used privately or commercially.
- MyFonts.com: Known for its extensive selection of high-quality commercial fonts.
- Font Squirrel: Offers a curated collection of free fonts for commercial use.
- DaFont: A popular site with a wide variety of free fonts, though careful attention to licensing is required.
Adobe Firefly AI Text Effects
While you cannot directly generate fonts with Adobe's Firefly AI model, you can generate text effects that can closely resemble custom fonts up to a certain point. These effects cannot be written with or reused like a traditional font but can be incredibly useful if you need a one-off word or a short phrase in a unique text style for a specific design piece.
The Firefly Text Effects tool is not available with a Photoshop plan alone; you will likely need an Adobe Express Premium Plan. The process involves navigating to the Text Effects section in Adobe Express, entering the text you wish to display, and adding prompts to describe the desired look. You can also upload images as a reference for the style. You can adjust settings to modify the strength and visual intensity of the effect. Once you are satisfied, you can generate and download your stylized text as a PNG file, which can then be dragged into Photoshop as a layer. Remember, this is not a font but a rendered image of text.
Applying Artistic Effects to Text
Once you have added your desired font and are working with text in Photoshop, you may wish to apply artistic effects. To do this, you may need to rasterize the text first. Rasterizing turns the text layer into a bitmap pixel-based image, allowing you to apply filters and effects that are not possible on live text layers. Be aware that once text is rasterized, it can no longer be edited as text (i.e., you cannot change the font or spelling). To rasterize text, select the text layer in the Layers panel and go to Type > Rasterize Type or right-click on the text layer and choose "Rasterize Type."
Conclusion: A World of Typographic Possibilities
Learning how to add fonts in Photoshop is a fundamental skill that unlocks a world of typographic possibilities for your creative projects. By understanding the integrated solutions like Adobe Fonts, exploring the vast resources of online font libraries, and being mindful of font licensing, you can ensure your designs are not only visually striking but also legally sound. Whether you're a professional designer or an enthusiastic hobbyist, mastering font integration will undoubtedly enhance your ability to communicate effectively and express your unique creative vision. Remember to explore, experiment, and most importantly, have fun with your designs!