Procreate's Brush Studio is a powerful environment that allows artists to sculpt digital tools capable of replicating traditional media or forging entirely new artistic experiences. At the heart of this customization lies the ability to fine-tune a multitude of attributes, transforming a basic brush into a highly specialized instrument. This tutorial will demystify the intricate settings within Procreate's Brush Studio, using the popular "Syrup Brush" as a prime example to illustrate how its characteristics can be adjusted to achieve specific artistic outcomes. From the fundamental stamping of a brush shape to the nuanced interactions of grain and color dynamics, understanding these 14 adjustable attributes unlocks a universe of creative possibilities for both custom and default Procreate brushes.
The Foundation: Shape and Stroke Path
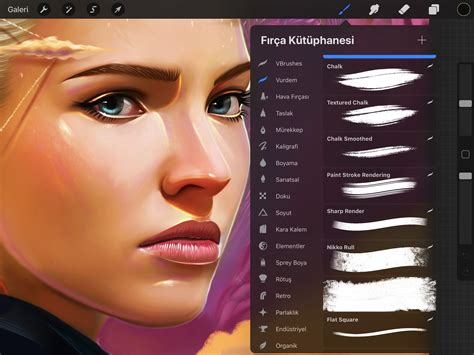
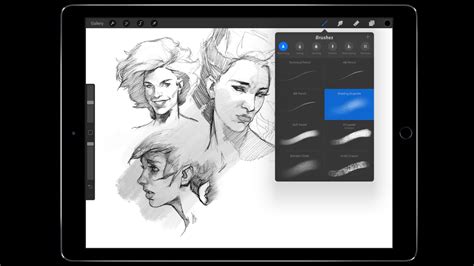
At its core, a Procreate brush is defined by its shape and how that shape is applied to the canvas. The Shape Source is the fundamental form of your brush tip. You can see the shape of any brush when you tap your finger or Apple Pencil on the canvas. Dragging this shape creates a stroke. A smooth circular shape will create a smooth even stroke, while an irregular patchy shape creates a rougher stroke. You can adjust the shapes in existing Procreate brushes or load your own. Tap Import to import a new shape from a photo or file. The Source Library offers many unique shapes to use as the basis of your brushes. Scroll through the collection to browse a shape you want to use, or use the Search box to search for a particular shape type.
A stroke forms by ‘stamping’ the brush shape over and over again along a path. The Stroke Path settings dictate how these stamps are laid down. Spacing controls how many times your brush shape ‘stamps’ itself along the path. When you add a lot of space, you will begin to see the brush as a series of shapes along the path with gaps between them. Pushing the Spacing slider up allows you to see the shapes as individual stamps rather than blurred together into a stroke. Spacing Jitter adds variability to your Spacing value, making the space between stamps larger and more ‘random’ with higher values.
Controlling Stamp Behavior: Jitter and Rotation
Beyond simple spacing, the orientation and placement of each stamp can be manipulated. Jitter Lateral controls how much the brush stamps will shift perpendicular to your stroke. Jitter Linear controls the jitter of the stamp, but in the same direction as the stroke itself. Both Jitter Lateral and Jitter Linear can be controlled by the pressure and tilt values of Apple Pencil, and additionally barrel roll with Apple Pencil Pro.
The rotation of the stamp is also a key element. By default, your shape will ‘stamp’ in the same direction without rotating. Scatter can be used to randomize its rotation each time it stamps. Rotation can be adjusted in relation to the direction of your stroke. When set in the middle to 0%, shape direction remains static no matter which way your stroke travels. Set to the far right of the slider at 100%, your shape will rotate to follow the rotation of your stroke. With Relative to stroke switched on, the shape will always start in the same position at the start of your stroke.
Azimuth detects the radius of the Apple Pencil’s tilt as it travels through the stroke. It does this to determine which way the shape stamps should tilt, creating an effect like a calligraphy pen. The option to add Barrel roll and azimuth control to your input style options allows for precise and intuitive control of your stroke's direction.
Furthermore, you can set the shape to stamp more than once at each point, creating up to 16 stamps each time. This is best seen when used in combination with Scatter. Count varies the number of times the stamp your shape applies at a point. With a Count jitter of 0%, the Count will remain the same for each stamp. For instance, if you have a Count of 10 and a Count jitter of 100%, it will randomly stamp your shape between 1-10 times. Alternatively, if you set Count jitter to 0%, it will stamp a count of 10 shapes every time. You can also randomize the rotation of your shape when your stroke begins by dragging the green node around the edge of the circle.
Adding Texture and Depth: Grain
Grain is the texture that sits inside your brush shape. While the shape acts as a container for the grain, the grain acts like a paint roller. You can create a new grain from any image with the powerful Grain Editor. Tap the Edit button in Grain Source to open the Grain Editor and access the Source Library. This lets you import and edit images to turn them into tiling textures for your brushes.
The Grain Source can be set to Moving or Texturized. Set your grain to move with the stroke for a more streaky and blurred effect. Using the metaphor of grain being a paint roller, when set to Moving the roller is locked in place. Moving and its various adjustment options create brush-like applications with grain. Set your grain to stay as a static texture ‘behind’ your brush stroke for a crisp and clear effect. Using the metaphor of grain being a paint roller, when set to Texturized the roller is unlocked. Texturized and its various adjustment options create consistent textures with grain.
The Scale slider affects the size of the grain texture. Setting the slider all the way to the right, to Cropped, keeps the texture size fixed, no matter how large or small you make your brush while painting. Setting the slider all the way to the left, to Follow Size, means the grain will scale along with your brush size. Movement determines how the grain texture interacts with your stroke direction, with options to smear the grain image based on directional stroke changes, lock grain rotation, or have it follow stroke direction. Offset Jitter randomizes where your texture places down each time you make a new brushstroke to create a more organic effect. With brushes designed to lay down a pattern, like the Grid brush, turn off Offset Jitter to keep the pattern consistent. Blend Mode controls how the grain texture blends with the underlying color of the brush. Contrast sets the minimum level of contrast in a texture, beyond which the brush can no longer go. Flow adjusts the strength of the texture established over the base color of the brush.
Rendering Your Strokes: The Render Mode
Procreate offers many ways to render the brush to the screen, giving you full control over how it renders your brush strokes. These effects are best understood by imagining physical paint on canvas. On the light-rendering end of the spectrum, Light Glaze is like laying down diluted paints. On the heavy-rendering end, Intense Blending is more like laying thick paint onto the canvas. Intense Blending is great for wet brushes that squash and mix colors together.
Other render modes include options that combine the Adobe® Photoshop® rendering style with a caustic approach to rendering color. You can select from a variety of options to adjust the way your strokes interact, controlling how pigment dilutes and how colors mix into each other. This can create a ‘color burn’ effect around the edges of the stroke when you layer brushstrokes. The Threshold setting adjusts how opaque pixels are treated, with lower values making less opaque pixels appear fully opaque and higher values canceling them out.
The Dynamics of Color and Pressure
Color Dynamics allows your brush to shift through different types of color values, including hue, saturation, lightness, and darkness. You can also choose a secondary color and shift between primary and secondary colors with each stroke. Each stamp will deviate from your chosen brush color at random, with the slider controlling the extent of this jitter. Similar adjustments can be made for saturation, lightness, and darkness.
Pressure sensitivity is fundamental to achieving natural-looking strokes. Strokes made with the Apple Pencil generally use pressure to taper strokes, replicating the natural feeling of pencils and paintbrushes. Pressure & Smoothing settings allow for fine adjustments to how the Apple Pencil interacts with your brush. The Pressure Curve allows you to edit settings within an individual brush, as well as global Apple Pencil behavior, by adjusting a graph that dictates how pressure affects attributes like size, opacity, or flow. The Response Speed slider influences how quickly the brush reacts to pressure changes.
Procreate Brush Studio Explained (Finally Understand Every Setting)
Tilt settings, found under the Apple Pencil tab, allow you to control attributes based on the angle of your Apple Pencil. The Angle slider determines when Pencil Tilt starts to affect the stroke. You can also change Opacity settings for Pencil Tilt, or use Gradation to create a gradient from the tip of where your pencil touches the screen to fade off at the base. Size controls the brush size for the tilted stroke, and Size Compression can also be toggled.
Stroke Refinements: Taper and Stabilization
Brush Taper refers to the brush size reduction at the start or end of a stroke. You’ll find the Taper settings under the Taper tab. There are two sets of controls: Pressure Taper (for using the Apple Pencil) and Touch Taper (using your finger). Sliders control the amount of taper at the start and end of the stroke. The Size slider controls the amount of taper applied, while the Opacity slider controls changes to the opacity where there is a taper. The Tip slider controls the shape of the tapered endings, with a "Sharp" setting producing a very pointed end. Tip Animation can be set to off, meaning the taper is applied when you lift your pencil from the canvas.
Stabilization smooths out strokes as you draw them. This can be applied globally or to individual brushes. StreamLine is particularly important for inking and calligraphy, assisting in smoothing out wobbles or shakes in your line. Use the slider to turn Amount up for a smooth and even result. Pressure in this context controls how much the brush's stroke is smoothed by pressure application. Stabilization takes a moving average of a stroke. The higher the Stabilization, the more it averages out the wobbles. Motion Filtering is Procreate’s version of Stabilization, using more advanced algorithms for smoother and straighter strokes regardless of drawing speed. Motion Filtering Expression works in conjunction with Motion Filtering to adjust the brush's thickness and opacity at the beginning and end of your stroke, replicating the natural tapering effect of traditional tools.
Advanced Dynamics: Wet Mix and Color Dynamics
The Wet Mix tab allows for brushes that blend and drag existing colors. Dilution is the primary setting affecting paint amount, with Charge impacting the amount of paint applied. Attack is designed for Apple Pencil use, and the Pull slider works in partnership with Dilution.
Color Dynamics offers a rich palette of customization. You can set your brush to change color, saturation, brightness, and more based on pressure, tilt, or even the color you apply to your Apple Pencil. Each stamp can deviate from the chosen brush color at random, with sliders controlling the degree of this deviation. Similar control is available for saturation, lightness, and darkness, allowing for subtle or dramatic shifts in hue and value.
The "Syrup Brush" Example
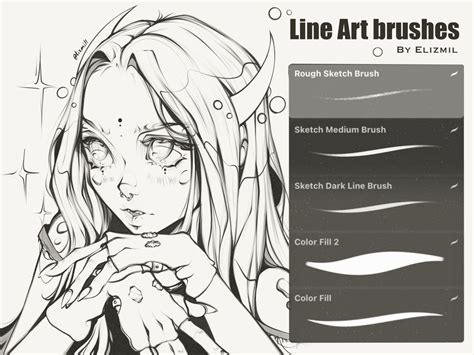
The "Syrup Brush" in Procreate is renowned for its smooth and fluid characteristics, making it a popular choice for line art. It features pressure sensitivity, meaning the harder you press, the thicker the stroke becomes, producing clean, solid, and consistent lines with minimal texture. This ideal behavior is achieved through the careful calibration of many of the attributes discussed above. For instance, its smooth, consistent line is a result of well-balanced Spacing (likely low to avoid visible stamps), a subtle Shape Source (perhaps a soft circle or a slightly irregular shape that doesn't introduce harsh edges), and effective Stabilization or Motion Filtering to ensure fluidity. The pressure sensitivity is directly controlled by the Pressure Curve settings, likely tuned to provide a significant increase in size with moderate pressure. The lack of prominent texture indicates that the Grain settings are either minimal or set to a very subtle blend mode.
By understanding and manipulating these 14 adjustable attributes within Procreate's Brush Studio, artists can move beyond default settings and craft brushes that perfectly suit their individual styles and project needs. Whether aiming for the clean lines of the Syrup Brush or exploring entirely new textural territories, the power to sculpt digital tools lies within these detailed settings. Experimentation is key, and with each adjustment, you unlock a deeper understanding of how Procreate brushes come to life.