Adobe Photoshop is an indispensable tool for anyone aiming to craft professional, custom t-shirt designs. Its extensive capabilities, ranging from intricate layer management and sophisticated masking techniques to precise color adjustments and creative filter applications, empower users to translate their visions into tangible, eye-catching apparel. This guide serves as a comprehensive walkthrough for creating stunning t-shirt designs, suitable for both personal projects and commercial ventures, transforming beginners into confident experts.
Why Choose Adobe Photoshop for T-Shirt Design?
Adobe Photoshop stands as a premier software choice for t-shirt design due to its unparalleled power and flexibility. It is extensively utilized within the graphic design for apparel industry, celebrated for its precision, extensive feature set, and adaptability. Whether your goal is to create custom designs for personal enjoyment, to promote a brand, or to launch a new clothing line, Photoshop equips you with the necessary tools to achieve polished, professional outcomes.
Key Photoshop Advantages for Apparel Graphics:
- Layer Control: Facilitates the organized management of diverse design components, including layers, shapes, and text elements, allowing for non-destructive editing and easy modification.
- Custom Brushes and Filters: Enables the addition of unique textures, patterns, and special effects to enhance the visual appeal and depth of your designs.
- Precision Editing: Offers granular control over color, contrast, sharpness, and other image attributes, ensuring a professional finish.
- Template Support: Allows for the use of pre-made t-shirt design templates, significantly accelerating the workflow and aiding in visualization.
- High-Quality Output: Guarantees print-ready designs with accurate color reproduction and scalable formats, crucial for professional printing.
Photoshop provides the flexibility needed to create truly unique t-shirt designs, whether you are working on a project for a corporate event, a fashion brand, or for personal expression.
Getting Started with T-Shirt Design in Photoshop
Embarking on your t-shirt design journey in Photoshop involves setting up your workspace correctly and understanding fundamental design principles.
1. Setting Up Your Canvas for Printing
Before you begin designing, it's crucial to configure your canvas to match the specifications required for t-shirt printing. This ensures that your final design will be sharp, vibrant, and accurately reproduced.
- Resolution: Aim for a resolution of 300 PPI (pixels per inch). This high resolution is essential for crisp, clear prints that avoid pixelation.
- Color Mode: For professional printing, it is best to set your Color Mode to CMYK. This mode more accurately represents the colors that printing presses can reproduce, ensuring better color matching than RGB, which is primarily for digital displays. However, for direct-to-garment (DTG) printing, RGB might be preferred by some printers, so it's always best to confirm with your specific print provider.
- Canvas Size: A common and versatile canvas size for most t-shirts is 12x16 inches. This provides ample space for a variety of designs, from small logos to larger graphic elements.
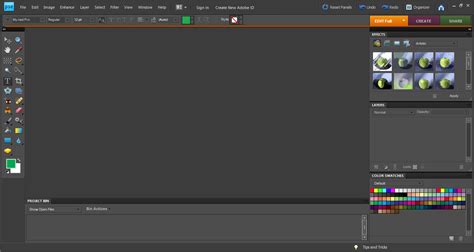
To set up your canvas, open Photoshop, navigate to "File" in the menu bar, select "New," and then input these settings.
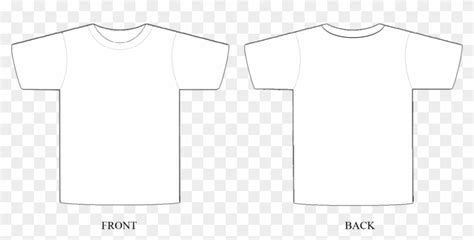
2. Utilizing T-Shirt Design Templates
Employing a t-shirt template within Photoshop can be a significant time-saver and provides a realistic preview of how your artwork will appear on fabric. Numerous free and premium templates are available for download online. Once acquired, open the template in Photoshop. This template will serve as your base, allowing you to visualize your design's placement, scale, and overall impact on the garment.
3. Sketching and Conceptualizing Your Idea
Effective designs often originate from a simple sketch. You can use Photoshop's brush tools to create rough outlines and explore different concepts directly on your canvas. If you have a hand-drawn sketch, you can scan it and import it into Photoshop as a new layer, providing a starting point for your digital design.
Your Brand, Bold and Brilliant: Create custom t-shirts with striking designs to make your brand unforgettable. Ideal for promotional events, employee gifts, and team spirit.
Crafting Your T-Shirt Design in Photoshop
With your canvas set up and your concept in hand, you can begin to build your t-shirt design using Photoshop's powerful tools.
Adding Text and Fonts
Typography plays a vital role in t-shirt design, conveying messages and adding aesthetic appeal.
- Select the Type Tool: Activate the text tool by pressing "T" on your keyboard.
- Choose a Font: Select a font that complements your design's theme. For instance, bold sans-serif fonts are suitable for modern designs, while elegant script fonts can add a touch of sophistication.
- Adjust Spacing: Utilize the Character panel to fine-tune letter spacing (kerning) and line height (leading). Experiment with various fonts, sizes, and alignments to discover the optimal configuration for your design.
Incorporating Graphics and Images
Images can significantly enhance a Photoshop t-shirt design.
- Import Your Image: Drag and drop your image file directly into your Photoshop project, or use "File > Place" from the menu bar.
- Remove Backgrounds: Employ tools like the Magic Wand, Lasso, or Quick Selection tool to isolate your subject from its background. For optimal results, high-quality images with transparent backgrounds are preferable.
- Resize and Position: Use the Transform tool (Ctrl+T or Cmd+T) to adjust the image's size and placement. When resizing, hold down the "Shift" key to maintain the image's proportions and avoid distortion.

Utilizing Shapes and Layers
Shapes and layers are fundamental to building a well-structured and editable design.
- Add Shapes: The Shape tool allows you to create basic forms like circles and rectangles, as well as custom paths for more intricate elements.
- Organize Layers: Name and group your layers logically. This organization is crucial for managing complex designs and making future edits.
- Layer Styles: Apply layer styles such as drop shadows, gradients, or strokes to add depth and visual interest to your design elements.
Refining Your T-Shirt Design
Once the core elements of your design are in place, refinement is key to achieving a professional and print-ready output.
Color Adjustments and Palettes
Accurate color representation is paramount for successful t-shirt printing.
- Hue/Saturation Adjustment: Modify individual colors to achieve the precise tone you desire.
- Levels and Curves: These tools offer powerful control over brightness, contrast, and the overall tonal balance of your image.
- Color Picker: Carefully select colors that harmonize with each other and align with your design's theme. Classic combinations like black on white or bold complementary colors (e.g., blue and orange) are often effective. Subtle pastel palettes can lend elegance, while neon shades can make a design pop.
Applying Filters and Textures
Filters and textures can imbue your design with character and depth.
- Filters: Experiment with filters such as Blur, Sharpen, or Posterize to create unique visual effects.
- Textures: Overlay textures like fabric, grunge, or paper to simulate real-world material appearances. Blending modes can be used in conjunction with textures to achieve diverse aesthetic outcomes.
Using Masks and Clipping Paths
Masks and clipping paths provide precise control over how design elements interact and are displayed.
- Clipping Masks: These are invaluable for constraining an image or shape to the boundaries of another layer, such as a text layer or a custom shape. This allows for creative integration of graphics within text or other vector forms.
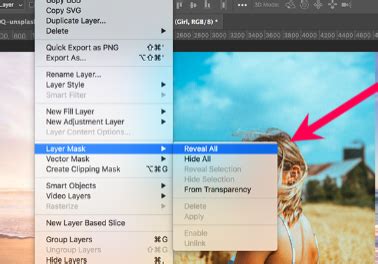
- Layer Masks: Layer masks enable you to selectively hide or reveal parts of a layer using black and white brushes. Black conceals, white reveals, and shades of gray create semi-transparency, offering a non-destructive way to edit and blend elements.
Preparing Your Design for Printing
The final stage involves preparing your artwork in a format that your chosen printing method can effectively utilize.
Outputting for Screen Printing and Digital Printing
Different printing methods have specific file requirements.
- File Formats:
- PNG: Ideal for designs with transparent backgrounds, preserving intricate details and gradients, especially for Direct-to-Garment (DTG) printing.
- PDF or EPS: Preferred for vector graphics, ensuring scalability and sharp lines, which are crucial for screen printing.
- Resolution Check: Maintain a resolution of 300 PPI throughout your design process to prevent pixelation. For screen printing, vector formats (PDF, EPS) are inherently scalable. For digital printing, high-resolution PNGs are typically recommended.
- Export Settings: Use "File > Export > Save for Web" (or the newer "Export As" option) to optimize your file for digital printing. This process allows you to fine-tune compression and file size while maintaining quality.
Color Modes for Printing
- CMYK: Generally recommended for professional printing as it closely matches printer ink colors.
- RGB: Often preferred for digital displays and sometimes for DTG printing due to its wider gamut of vibrant colors.
Always consult with your printer to determine their preferred color mode and file specifications to ensure the best possible print outcome.
Tips for Professional T-Shirt Designs
Achieving a professional look for your t-shirt designs involves attention to detail and adherence to best practices.
- Use High-Quality Images: Always start with high-resolution graphics to ensure clarity and detail in the final print. Low-resolution images will appear pixelated and unprofessional.
- Keep It Simple: Clean, uncluttered designs are often more visually appealing and easier to print. Avoid overwhelming the viewer with too many elements.
- Test Print: Before committing to a large print run, create a test print. This allows you to verify color accuracy, check alignment, and ensure the resolution is as expected, preventing costly mistakes.
- Involve Your Audience: If possible, gather feedback on your design from your target audience. This can provide valuable insights for refinement.
Place Logo on T-shirt - Photoshop Tutorial
Frequently Asked Questions: T-Shirt Design in Photoshop
1. What resolution is best for t-shirt printing?
A resolution of 300 PPI is generally considered ideal for t-shirt designs, ensuring crisp and detailed prints.
2. Can beginners use Photoshop for t-shirt design?
Absolutely! Photoshop's intuitive tools and the abundance of online tutorials make it accessible for users of all skill levels. Beginners can start with resources from Adobe, YouTube channels dedicated to Photoshop training, or online learning platforms like Udemy or Skillshare. Starting with simple designs and gradually progressing is a recommended approach.
3. Are there free templates for t-shirt design in Photoshop?
Yes, numerous websites offer free t-shirt design templates. These templates are invaluable for visualizing your artwork on a t-shirt mockup before finalizing your design.
4. How do I ensure my colors print accurately?
Utilize the CMYK color mode and consult with your printer about their specific color profiles. Always request a physical proof before proceeding with the full print run.
5. Can I create custom graphics in Photoshop?
Indeed! Photoshop provides a wide array of tools, including brushes, shapes, and text tools, that allow you to craft entirely original designs. Combining layers and effects offers limitless possibilities for personalization.
Creating Vintage Style T-Shirt Graphics
For those interested in a specific aesthetic, creating vintage-style logos is a popular application for t-shirt graphics. This involves combining antique illustrations with visually engaging text styles and layouts.
Setting Up Your Document for Vintage Designs
- Document Size: Common dimensions for the printable front of a t-shirt are 12x14 inches.
- Resolution: Set the resolution to 300ppi for optimal print quality.
- Color Mode: For print, CMYK is recommended, even if your design uses a limited color palette like white and red.
Incorporating Vintage Illustrations and Text
- Source Assets: Utilize high-quality vintage illustrations, often available in vector formats (EPS) which can be scaled without loss of quality.
- Color Overlay: Apply color overlays to illustrations, specifying precise CMYK ink values for predictable print results.
- Typography: Experiment with various fonts and styles, such as the Trade Gothic font family, to achieve a vintage feel. Tools like "Type on a Path" are useful for integrating text along curved lines or shapes.
- Layout and Hierarchy: Carefully arrange text elements, using different sizes, weights, and styles to establish a visual hierarchy. Employ guides and alignment tools to ensure elements are centered and balanced.
- Decorative Elements: Add decorative shapes, lines, or borders to enhance the vintage aesthetic. Duplicating layers and paths can efficiently create symmetrical or repeating elements.
- Vintage Effects: To further enhance the vintage look:
- Rounded Corners: Rounding the corners of fonts can simulate a "bleeding ink" effect.
- Noise Filters: Applying a "Median" filter from the Noise menu can subtly roughen edges, mimicking aged printing.
- Textures: Incorporate textures like "Washed and Worn" to simulate the appearance of cracked and flaking ink from years of use. Applying these textures via layer masks to grouped design elements is an effective method.
By carefully combining these elements and applying specific effects, you can create compelling vintage-style brand logos that look authentic and appealing on t-shirts.
Advanced T-Shirt Design Techniques
Beyond the basics, mastering advanced techniques will elevate your t-shirt designs to a professional level.
Image Manipulation and Compositing
Photoshop excels at image manipulation, allowing you to combine multiple images, retouch flaws, and create entirely new visuals. Techniques like cloning, healing, and advanced masking are essential for seamless compositing.
Layer Masking and Blending Modes
As mentioned earlier, layer masks offer non-destructive editing, enabling precise control over visibility. Blending modes (e.g., Multiply, Screen, Overlay) dictate how layers interact with each other, creating sophisticated visual effects and integrating elements seamlessly.
Non-Destructive Editing Workflows
Adopting non-destructive editing practices, such as using adjustment layers, smart objects, and layer masks, ensures that your original image data remains intact. This allows for greater flexibility and easier revisions throughout the design process.
Final Output Considerations
Ensuring your design is production-ready involves understanding the nuances of different printing processes.
Direct-to-Garment (DTG) Printing
DTG printing is ideal for intricate designs, small-batch orders, and vibrant, multi-color graphics. It involves printing ink directly onto the fabric. For DTG, high-resolution PNG files with transparent backgrounds are often preferred to maintain detail and clarity.
Screen Printing
Screen printing is a more traditional method, often cost-effective for large runs of designs with limited colors. Vector graphics (PDF, EPS) are typically used to ensure sharp, scalable designs that can be accurately transferred to screens.
Consultation with Printers
It is always advisable to consult with your chosen printer regarding their specific requirements for file formats, color profiles, and resolution. This collaboration ensures that your design translates effectively from digital to physical product.
By following this comprehensive guide, you can confidently create professional, eye-catching t-shirt designs using Adobe Photoshop, transforming your creative ideas into wearable art.