Krita, a powerful and free open-source painting program, offers a suite of tools designed to enhance the creative process for artists of all levels. Among its most celebrated features is the Symmetry Tool, which allows for the creation of intricate and balanced artwork with remarkable ease. This guide delves into the various aspects of Krita's symmetry capabilities, from its fundamental application to advanced techniques, while also exploring other beneficial features that make Krita a compelling choice for digital artists.
The Allure of Krita: Why Choose This Digital Canvas?
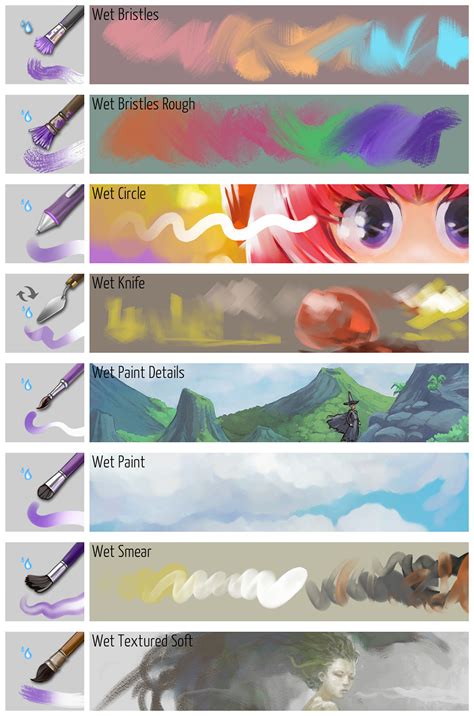
Krita's appeal lies in its robust feature set, catering to both beginners and seasoned professionals. The software is particularly lauded for its brush engines, which provide a vast array of customizable tools. This extensive library of brush presets, often created by artists for artists, offers immediate creative potential. The ease with which one can select and utilize these brushes, often with a simple click, streamlines the workflow. Furthermore, Krita's commitment to being free and open-source means it's accessible to everyone, fostering a vibrant community of users and developers. This accessibility is crucial, especially when considering the cost of professional art software. The fact that Krita comes with great public domain presets matters a lot to many users, as it provides a solid foundation without the complications of restrictive licensing.
Unlocking Creative Potential with the Symmetry Tool
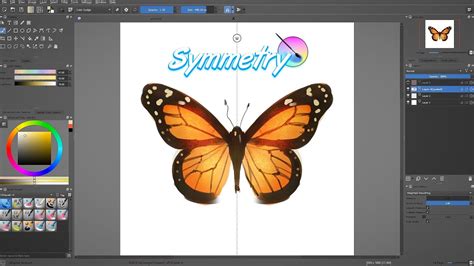
The Symmetry Tool in Krita is a game-changer for artists looking to create symmetrical designs, patterns, or characters. This tool operates on the principle of mirroring actions across one or more axes. By enabling symmetry, any stroke made on one side of the canvas is automatically duplicated on the other side, according to the selected symmetry type. This is incredibly useful for tasks such as drawing mandalas, symmetrical creature designs, or even for achieving perfect balance in portraits.
Activating and Configuring Symmetry
To activate the Symmetry Tool, users can typically find it within the "Tool Options" or a dedicated "Symmetry" docker. The tool offers various modes, including:
- Vertical Symmetry: Mirrors strokes across a central vertical axis.
- Horizontal Symmetry: Mirrors strokes across a central horizontal axis.
- Radial Symmetry: Creates mirror images around a central point, often used for kaleidoscopic effects. This is akin to Krita's Multi-brush mode, which can be used to create kaleidoscope-like drawings.
- Mirror Symmetry: Combines vertical and horizontal mirroring.
- Kaleidoscope Symmetry: Offers more complex radial mirroring, allowing for multiple mirrored segments.
Users can adjust the number of axes and their positions to precisely control the symmetry effect. This level of customization ensures that the tool can be adapted to a wide range of artistic needs.
Practical Applications of Symmetry
The Symmetry Tool is not just a novelty; it's a powerful productivity booster. For instance, when drawing a character's face, enabling vertical symmetry means you only need to draw one eye, one side of the nose, and one side of the mouth, and the other side will be generated automatically. This saves significant time and ensures perfect bilateral symmetry, which can be challenging to achieve freehand. For abstract art or pattern creation, radial symmetry can produce stunning, intricate designs with minimal effort. Even a simple 5-minute doodle can look significantly more polished and intentional when symmetry is employed, as demonstrated by early experiments with the tool, even when using a mouse.
Navigating Krita's Brush System
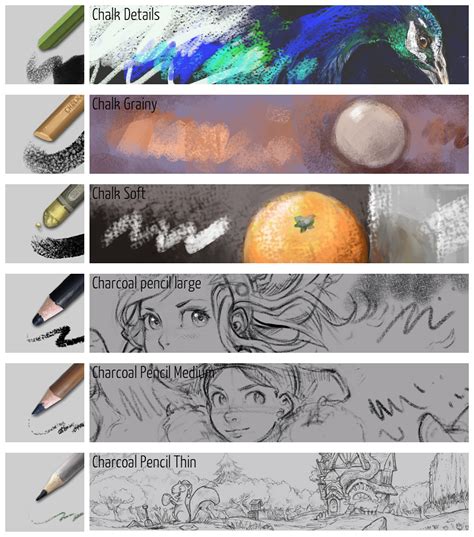
Krita boasts an impressive array of brush engines, each offering unique characteristics and customization options. The "brush engines" are the underlying technologies that define how a brush behaves, from its shape and texture to its dynamics and blending capabilities.
Brush Presets: A Ready-Made Arsenal
Fortunately, Krita comes equipped with a wealth of excellent default brush presets. These are often created by professional artists and are designed to be immediately usable. Selecting a brush is as simple as clicking on its icon in the Brush Presets docker or the brush preset selector in the top toolbar. The availability of these presets, many of which are in the public domain, is a significant advantage, providing artists with a diverse toolkit without the need to hunt for third-party resources or worry about licensing restrictions.
Customizing Your Brushes
Beyond the defaults, Krita allows for extensive brush customization. Users can dynamically resize the brush size using keyboard shortcuts (e.g., bracket keys) or by adjusting settings in the Tool Options. To save a favorite brush or a customized version, one can simply click "Save to Palette" in the top toolbar and assign it a name. If you find yourself frequently using a particular brush or a modified version, saving it to your Brush Palette ensures quick access.
Brush Tip Types: Autobrush vs. Predefined Brush
Understanding the difference between "autobrush" and "predefined brush" is key to mastering Krita's brush system. A "predefined brush" typically refers to a brush that uses a fixed shape, such as a generic round or square tip. These can be useful for quick fills or blocky effects. An "autobrush," on the other hand, often implies a more dynamic brush that can respond to pressure, tilt, or other input, creating more organic and varied strokes. For instance, a commenter once praised a background created with "cheap'ol predefined brushes," highlighting that even these simpler brushes can yield good results when used effectively, though they might lack the nuance of more advanced brush types.
Texture and Dynamics: Adding Depth and Life
Krita's brush engine allows for the addition of texture to brushes, starting from version 2.5. This means you can combine predefined brush shapes with custom textures, adding a layer of realism or stylistic flair. For example, while there might not be "snake scales" among the default textures, users can import their own to achieve specific effects.
Furthermore, Krita offers a comprehensive set of "Dynamics" options for its pixel brushes. These dynamics control how brush parameters (like size, opacity, flow, or color jitter) change based on factors such as pen pressure, speed, or fade. While a deep dive into all dynamics options could fill entire tutorials (and indeed, many such YouTube tutorials exist), understanding their existence is crucial for unlocking the full potential of Krita's brushes.
Sketch Brush and Smudge Brushes
The "Sketch Brush," adapted from Project Harmony, is a popular choice for drawing details and hair shading due to its controlled opacity and texture. It's a good example of how specific brushes are optimized for particular tasks.
Krita's smudge brushes also possess interesting properties. Depending on their configuration, they can function as pure smudge tools, blending colors together, or as paint brushes with added smudge effects. The "basicmixsoft" preset is an example that can be used to blend colors by drawing small circles over them, effectively creating a "smudge" effect. This can be a faster way to achieve color blends compared to traditional methods, though artists are often warned against over-smudging colors.
Mastering Color and Layers in Krita
Color selection and layer management are fundamental to digital art, and Krita provides intuitive tools to handle both.
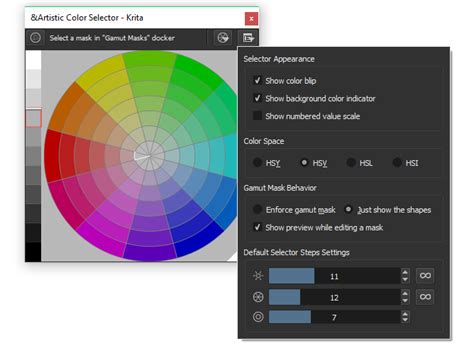
Color Selection and Management
The color selector docker, typically found on the left side of the Krita interface, offers various ways to pick and manage colors. Beyond the primary foreground and background color swatches, Krita can display multiple color selectors, allowing for quick access to different color palettes or recently used colors. Toggling between foreground and background colors is easily done with the 'X' key, a small but incredibly useful shortcut, especially when switching between painting and erasing.
Working with Layers
Krita offers a robust layer system, with "Paint Layers" and "Group Layers" being particularly important.
- Paint Layers: These are your standard layers where you apply brush strokes and colors.
- Group Layers: These allow you to organize multiple layers into a single folder, making complex projects more manageable.
The "Composition dock" is a powerful feature that saves layer visibility states. This is invaluable when working with multiple layer groups, each potentially having different combinations of greyscale and color effect layers. You can save different "compositions" (e.g., a greyscale version, a colored version, a version with specific effects) and switch between them easily.
Advanced Layer Techniques: Multiply and Overlay Modes
Multiply Layers: Setting a lineart layer to "Multiply" mode at the very top of your layer stack is a common and effective technique. This mode allows the dark lines of the lineart to show through while making the white areas transparent, enabling you to color directly underneath without affecting the lineart itself.
Overlay Layers for Coloring: For those who, like the author, struggle with color choices, a practical approach is to work in grayscale first, using multiple layers for different elements. Once the grayscale underpainting is complete, you can duplicate the greyscale layer, lock its transparency (indicated by a checkered box in the layer docker), and then fill this new layer with colors. Alternatively, creating a new layer with "Overlay" mode on top and painting colors onto that layer can effectively colorize the greyscale artwork. Gradients also work exceptionally well with this method.
Erase Mode: Krita's "Erase mode" is a unique and efficient tool. When applied to a layer, anything painted with the erase brush essentially creates holes in that layer, revealing the layers below. This functions similarly to a mask but is often faster for direct editing. An "Erase layer" can be set as the top layer within a layer group, and anything drawn on it will erase corresponding parts in all the layers below it within that group.
Workflow and File Management in Krita
Streamlining your workflow and managing your files effectively are crucial for any digital artist. Krita provides clear options for starting new projects, saving your work, and exporting it for various purposes.
Starting a New File
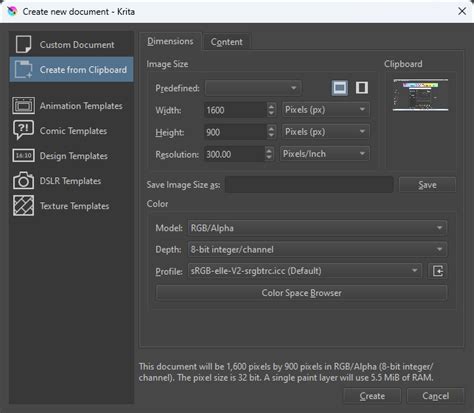
When starting a new file in Krita, the "New File" dialog offers numerous templates and presets. For many users, simply choosing the desired canvas dimensions and resolution and proceeding with the defaults is a perfectly adequate starting point.
Saving and Exporting
Krita's native file format is .kra (Krita document). This format preserves all layer information, masks, and other project-specific data, making it ideal for saving your ongoing work.
When your artwork is complete and you wish to share it online or use it in other applications, it's essential to Export your file rather than simply saving it. Exporting converts your layered artwork into a flat image format (like PNG, JPG, TIFF, etc.), which is suitable for final output. Saving as .kra retains layers, while exporting flattens them.
Interoperability with Other Software
For users who work with other art applications, such as GIMP or MyPaint, saving files in the .ora (OpenRaster Archiving Image) format is recommended. .ora is an open standard that aims to preserve layers and other image data across different compatible applications. However, sharing files directly with vector graphics programs like Inkscape might not always be straightforward and may require exporting to intermediate formats.
It's worth noting that while Krita is remarkably stable, especially on Linux, some users, particularly those on Windows, might encounter occasional bugs. The Windows version, being newer in some aspects, may still be undergoing development. When bugs are discovered, reporting them to the Krita developers is a valuable way to contribute to the software's improvement. Users can find download links, including older versions like "Download Krita 2.5" (or the latest available), on the official Krita website.
Beyond Symmetry: Enhancing Your Workflow
While the Symmetry Tool is a standout feature, Krita offers other tools that can significantly improve your artistic process.
Smooth Lines with a Mouse
Drawing smooth lines with a mouse can be challenging. Krita addresses this by allowing you to increase the "drag" setting in the Tool Options for your brush. Increasing this value essentially adds a delay or smoothing effect to your input, making it easier to achieve fluid lines even without a graphics tablet.
Full-Canvas Mode for Screen Space
Lacking screen real estate, especially on laptops, can be a hindrance. Krita's "Full-canvas mode" (often toggled with the 'Tab' key) hides all the toolbars and docks, giving you the maximum amount of space to view and work on your canvas. This is invaluable when detail work is required or when simply wanting a more immersive drawing experience.
Krita How to Draw Outside Canvas
Multi-brush Mode for Complex Patterns
As mentioned earlier in the context of radial symmetry, Krita's "Multi-brush mode" is another powerful tool for creating intricate, repeating patterns. This mode allows you to paint multiple instances of your brush stroke simultaneously, creating effects similar to kaleidoscopes. Itâs a fantastic way to generate complex backgrounds or abstract designs rapidly.
Keyboard Shortcuts and Customization
Krita is highly customizable, including its keyboard shortcuts. The ability to add or remove shortcuts from menus empowers users to tailor the software to their specific workflow. Essential shortcuts, like toggling foreground and background colors with 'X' or entering Erase mode with 'E', significantly speed up the artistic process.
By understanding and utilizing the diverse features within Krita, from the transformative Symmetry Tool to its flexible brush system and efficient layer management, artists can unlock new levels of creativity and productivity. The continuous development and strong community support ensure that Krita remains a leading choice for digital art creation.