Photoshop offers a powerful toolkit for digital artists to create a wide array of visual effects, and the allure of fire is a perennial favorite. Whether you're aiming for the smoldering ashes in a post-apocalyptic scene, the flickering candle in a spooky house, or a roaring fire in a cozy wintertime retreat, Photoshop can bring your fiery visions to life. This tutorial delves into various techniques for generating realistic and dynamic fire effects, from subtle embers to all-consuming infernos, catering to both novice users and seasoned professionals.
The Foundation of Fire: Working with Layers and Basic Flames
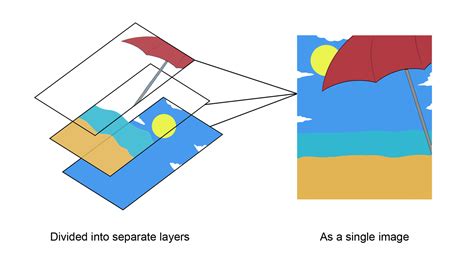
As with most special effects, the key to creating convincing fire in Photoshop lies in working with layers. Think of each individual flame or spark as a new layer. This approach allows you to naturally build flames on top of one another, creating depth and complexity for the most realistic effect.
To begin, open your desired image in Photoshop. The first step is to create a new layer. This blank canvas will be where you draw your first flame. While you can freehand flames, Photoshop offers dedicated filters to expedite the process. Once you have your base shape, you can utilize the "Flame" filter. Within the Filter drop-down menu, navigate to "Flame" and select "One Flame Along Path." This dialog box provides control over your flame's characteristics, allowing you to adjust its color, opacity, and turbulence to achieve the desired look.
To expand your fire, the principle remains the same: add a new layer for every new flame. Once you've defined the path for a flame using the Pen tool, you can repeatedly apply the flame effect by tapping CMD+F (on Mac) or CTRL+F (on Windows). This iterative process allows for the organic growth and spread of fire across your composition.
Nondestructive Editing: The Power of Adjustment Layers
A crucial aspect of professional digital art is nondestructive editing. This means you can make changes, experiment, and even discard modifications without permanently altering your original image. This flexibility is invaluable when fine-tuning complex effects like fire. In Photoshop, adjustment layers are your primary tool for nondestructive editing.
To create an adjustment layer, locate the "New Adjustment Layer" icon at the bottom of the Layers panel and select the type of adjustment you need. Alternatively, you can go to Layer > New Adjustment Layer and choose from the available options. Adjustment layers allow you to modify the color and tone of your image without directly impacting the underlying pixels. Within the Adjustments panel, clicking on the icon for the desired adjustment type (such as Levels or Curves for tonality and color changes) will apply it as a separate, editable layer. This ensures that your original image remains intact, preserving it for future use or revisions.
Crafting a Fiery Subject: Integrating a Model and Fire Elements
For more advanced effects, such as placing a model within a fiery scene, a systematic approach is required. Let's consider a scenario where you want to create a superhero-esque image with a model engulfed in flames.
Begin by creating a new document in Photoshop, perhaps measuring 1,920 x 1,200 pixels. In the Background layer, apply a Layer Style (Layer > Layer Style) with a Gradient Overlay. Set the blending mode to Normal, opacity to 100%, and style to Radial, increasing the scale to 150% for a dramatic effect.
Next, import your chosen model image. You can source images from stock photography sites like Shutterstock or use a similar photo of your own. Utilize the Pen tool (P) to create a precise path around the model, allowing you to isolate them from their original background. Duplicate the model image onto a new layer. Then, using a large, soft brush, paint over a layer mask to subtly erase parts of the arm, creating the illusion of the flame's interaction.
To enhance the fiery glow on the model, duplicate the 'model arm' layer. Navigate to Filter > Other > High Pass. This filter helps to define edges and can be used to create subtle glowing effects. Further enhance this by duplicating the 'model' layer again, naming this new layer 'model glow'. Apply Filter > Stylize > Glowing Edges. Within this 'model glow' layer, carefully delete the rest of the body, leaving only the arm illuminated by the simulated fire. This will serve as the highlight for your fire effect.
Building the Fire: Smoke, Glow, and Realistic Flames
To achieve a truly convincing fire effect, you need to consider not just the flames themselves but also the accompanying elements like smoke and glow.
Create a new layer named 'model mask'. Apply Filter > Render > Clouds, ensuring that black and white are set as your foreground and background colors, respectively. Go to the Paths palette and load the path you created earlier for the model. Delete the rest of the body in the 'model mask' layer, leaving only the hand. Then, go to Layer > Layer Styles and select Color Overlay. Choose an orange hue, change the blending mode to Linear Dodge, and set the opacity to 88%. This will create a subtle orange glow around the hand, suggesting the proximity of intense heat.
To simulate smoke, add another layer on top of the others, naming it 'smoke'. Apply Filter > Render > Clouds again, ensuring black and white are the foreground and background colors. To add color and depth to the smoke, select Layer > New Fill Layer > Solid Color. Click on the layer to open the Layer Style dialog box. For the colors, use a combination of orange and a very dark orange, setting the style to Radial and keeping the scale at 100%. This creates a foundational smoky texture that can be further refined.
Now, let's introduce the actual flames. You'll need to source a suitable flame image, either by purchasing one or using a similar photo of your own. Begin by copying parts of the flame image and pasting them over the model’s flaming arm. The blending modes in Photoshop are critical here. The "Screen" blending mode is particularly effective for fire, as it makes pure black elements completely invisible, allowing the fiery textures to blend seamlessly.
To refine the fire's appearance, you might need to adjust its brightness and contrast. Use Image > Adjustments > Levels. By moving the dark slider to the right, you can further darken the background elements of the flame image, making the fire itself stand out more dramatically.
Blending Modes - Photoshop for Beginners | Lesson 5
Advanced Fire Techniques: Fireballs and Blending Modes Mastery
For more dynamic fire elements, such as a fireball, you can employ similar techniques. Source a suitable fireball image and set its blending mode to "Screen." Again, using "Levels" (CTRL/CMD + L) to adjust the dark slider can help integrate the fireball more effectively by removing unwanted dark backgrounds.
The true power in blending fire images lies in mastering Blending Modes. As mentioned, "Screen" is excellent for fire as it discards black, but "Color Dodge" can also produce vibrant and intense fiery effects. When using "Color Dodge," you might need to add a Layer Mask to the fire layer. Fill this mask with black to make the entire layer invisible, then use a soft brush with a low flow to paint with white, revealing the fire only where you intend it to appear. This gives you precise control over the fire's placement and intensity.
When in doubt, adding more fire can often enhance the realism. Duplicate your fire layers, adjust their position and scale, and experiment with different blending modes to build a complex and layered fire effect.
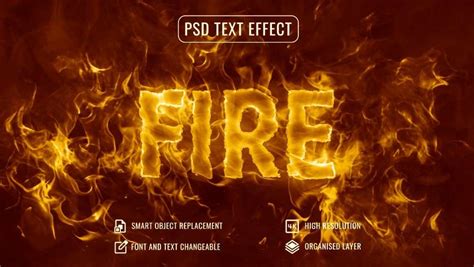
Fire Text Effects: Igniting Your Typography
Creating text that appears to be on fire is another popular application of Photoshop's fire effects. This often involves a combination of filters, layer styles, and careful masking.
Start by creating your canvas and setting up a suitable background gradient. For a textured background, you can use the Clouds filter (Filter > Render > Clouds) and set its blending mode to "Overlay."
To make your text appear to emerge from the background with a fiery glow, create a new layer group for all your text-related layers. Duplicate your text layer and place it at the bottom of the group. Set its color to black and apply a Gaussian Blur (Filter > Blur > Gaussian Blur). Rasterize the text if prompted. Then, Control-click on any of the text layers to create a selection, return to the black blurred layer, and hit Delete. This will leave you with a shadow-like effect. Duplicate this shadow layer and merge it with the first to intensify the effect. Apply a gradient layer mask to make the shadow fade out smoothly.
Next, make the top part of your text glow. Set the glow layer's blending mode to "Soft Light." Duplicate the text layer again and place it at the very top. Apply a slightly contracted selection (Select > Modify > Contract) and add a layer mask to fade it out. Duplicate this glow layer and blur it slightly for a more diffused effect. Merging these glow layers can further enhance the fiery intensity.
The final step is to add the actual flames to the text. Open your flame image in Photoshop. Navigate to the Channels tab and select the channel with the highest contrast (usually the Red Channel for fire). Control-click this channel to create a selection of the flame pixels. Paste this selection onto your main image and strategically place it over the text. Duplicate these flame layers and arrange them to engulf each letter, creating the illusion of burning text.
Enhancing Realism: High Pass, Glowing Edges, and Texture
To further refine your fire effects, several advanced techniques can be employed. The High Pass filter (Filter > Other > High Pass) can be used to sharpen details and create subtle glowing edges. Applying it to a duplicated layer and then adjusting the blending mode can enhance the luminosity of your flames.
The "Glowing Edges" filter (Filter > Stylize > Glowing Edges) is another powerful tool for creating the ethereal light emitted by fire. By carefully isolating the areas where you want this glow to appear, you can add a realistic luminescence to your fiery elements.
Adding textures can also significantly enhance the believability of your fire. Create a new layer and apply the Clouds filter, then set the layer's blending mode to "Overlay." This will introduce subtle variations and depth to your flames, making them appear less flat and more organic. You can also use custom texture brushes to paint directly onto your fire layers, adding finer details and imperfections that contribute to realism.
Beyond Manual Creation: Leveraging Stock Assets and Actions
While understanding the manual creation process is fundamental, Photoshop also offers resources to expedite your workflow. Numerous stock photos and PSD files are available online, specifically designed for creating fire effects. These pre-made assets can be a great starting point or a valuable addition to your own creations.
Consider using fire photo overlays, which are essentially images of fire that you can blend into your scene using blending modes and layer masks. Many of these come with high resolutions, ensuring quality even when scaled. Some products even offer automated solutions where you simply brush over your photo, and the effect is applied.
Furthermore, Photoshop Actions can automate repetitive tasks. You can find or create actions that perform a series of steps, such as applying filters, adjustment layers, and blending modes, to quickly generate a fire effect. This is particularly useful for applying consistent fire effects across multiple images or for saving time on complex projects.
The Art of Blending: Seamlessly Integrating Fire
Ultimately, the success of any fire effect in Photoshop hinges on seamless integration. This involves paying close attention to light sources, shadows, and how the fire interacts with its environment.
When choosing your base image, look for one that already has a natural light source that complements the fire you intend to add. It's always easier to work with an existing light source than to try and recreate one from scratch.
Pay attention to the color temperature of your fire and ensure it aligns with the ambient lighting of your scene. Use adjustment layers to subtly shift the colors of surrounding elements to reflect the warmth of the fire. Shadows are equally important. The heat from a fire casts shadows, and incorporating these will ground your effect in reality.
By combining manual techniques with readily available resources and a keen eye for detail, you can master the art of creating stunning and believable fire effects in Photoshop, bringing a dynamic and captivating element to your digital artwork.