Photoshop templates are invaluable tools for designers, marketers, and businesses seeking efficiency and consistency in their visual content. These pre-designed files, often in the native PSD format, streamline the creative process by providing a structured foundation for various projects, from business cards and CD/DVD covers to more complex marketing materials. Understanding how to properly open, edit, and save these templates is crucial for leveraging their full potential, especially when integrating them into specialized design platforms. This guide delves into the intricacies of Photoshop templates, covering their fundamental structure, common usage scenarios, and advanced considerations for compatibility with web-to-print solutions.
Unpacking the Photoshop Template Package
When you acquire a Photoshop template, typically delivered as a zipped package, you’ll find a collection of files. The primary file is often a .PSD file, which is Adobe Photoshop's native format. This file can usually be opened by simply double-clicking it. If a .PSD file is not immediately available, a .PDF version may be provided. To open a PDF template in Photoshop, navigate to File > Open from the top menu, select the PDF file, and the Import PDF window will appear. After reviewing and confirming your settings in this window, click OK to proceed.
Working with Template Layers: Preserving Design Integrity
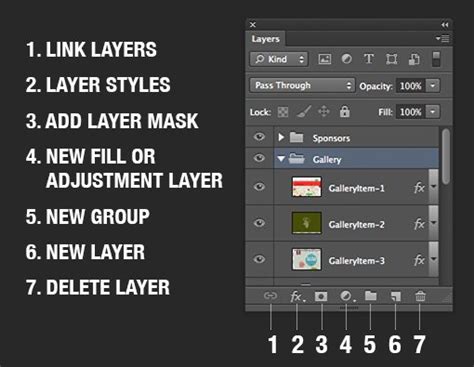
Once a template is open in Photoshop, you'll encounter various layers. A particularly important aspect of template usage is understanding how to work with these layers effectively to avoid corrupting the original design or essential guides. The information within the PDF template is typically housed on "Layer 1." It is critically important to create a new layer before you begin making any design modifications. This practice ensures that you are not inadvertently designing directly on the layer containing the template guides or original artwork, which could lead to unintended consequences during the printing or export process.
Integrating Your Artwork and Images
The next step in customizing a template involves placing your own artwork and images. This is where the creative personalization of the template truly begins. When you place your content, whether it's photographs, illustrations, or graphic elements, it's vital to ensure that you do not flatten your template guides as part of your artwork. If the guides are flattened into your artwork, they will become a permanent part of your design and will print on your finished piece, which is almost never the desired outcome. Always maintain the template guides on their own separate layers or ensure they are not merged with your final design elements.
Saving Your Customized Template for Output
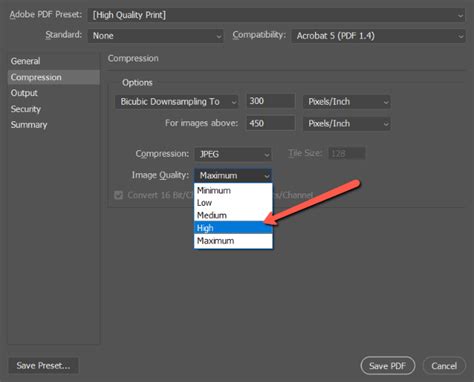
After you have successfully placed your artwork and images and made all necessary adjustments, the process of saving your work begins. From the top menu, select File > Save As.... In the Save As window, you will enter or review your desired file name and choose a suitable location on your computer to save the file. Crucially, for professional printing and compatibility, you should select Photoshop PDF as your format. Click the Save button to proceed to the Save Adobe PDF window. Here, it is recommended to select [PDF/X-4:2008] as your Adobe PDF preset. This preset is widely recognized for ensuring print-ready files with proper color management and compatibility. Finally, click the Save PDF button to finalize the process.
Photoshop Templates and Web-to-Print Platforms: Bridging the Gap
For businesses utilizing web-to-print solutions, such as Customer's Canvas, understanding the nuances of Photoshop template compatibility is paramount. Customer's Canvas can import templates directly from PSD files, converting them into its internal JSON-based .st format. However, it's essential to recognize that the internal Customer's Canvas format does not encompass all the functionalities of a native PSD file, and vice versa. Therefore, when creating PSD templates specifically for such platforms, it is important to keep the capabilities and conventions of Customer's Canvas in mind from the outset. Arbitrary PSD files cannot simply be fed into Customer's Canvas; they often require editing and preprocessing to ensure seamless integration.
Designing for Compatibility: PSD Structure and Content
The Customer's Canvas Design Editor works with multi-layer PSD files that contain a variety of elements, including images, texts, shapes, and smart layers. For optimal compatibility, the color format of your PSD file should be either RGB, CMYK, or Grayscale. Customer's Canvas supports both Point and Paragraph text layers, which can be oriented either vertically or horizontally.
Point Text layers have a single position that dictates where the text is located, influenced by the selected alignment mode (left, center, or right). Paragraph Text layers, on the other hand, define boundaries for the text. A key detail to remember is that if a user edits a Point Text layer, it's possible for the text to break into multiple lines by pressing the Enter key.
Consider the creation of a business card template as an example. A typical business card template might comprise three core elements: a background image, a multiline text box, and a logo. If the printing resolution is set to 300 DPI and the business card dimensions are 3x5 inches, a suitable background image would have dimensions of 900x1500 pixels. For text, a Point Text layer can be created by selecting the Type Tool on the Tools panel and clicking where the text should be placed.
How to set up a Business Card document in Adobe Photoshop
Managing Template Behavior with Markers
To open a template within the Design Editor, it needs to be placed in the \assets\designs\ folder and a product initialized using the template name. A significant feature for web-to-print designers is the ability to manage the template's behavior within the designer interface. This includes locking certain elements, such as layer positions, to prevent users from moving them, while still allowing editable content like text strings to be modified. Standard Photoshop formatting alone is not sufficiently flexible for this level of control.
This is where a system of "markers" comes into play. These are special symbols that you add to a layer's name in Photoshop. The Design Editor interprets these markers to manage permissions for each element. For instance, to configure a template so that the background image and text position cannot be changed by the end-user, you can use these markers. To mark a background as a non-editable image, you would double-click its layer name in Photoshop and append <LC><OID_f> to it. The exact position of the marker within the layer name (beginning, end, or middle) does not affect its functionality. Similarly, you can lock the text position using this method.
Troubleshooting and Optimizing Existing PSD Files
Creating PSD files from scratch with compatibility in mind is straightforward. However, the challenge often arises when dealing with pre-existing PSD files created by designers unaware of these specific integration requirements. Photoshop CC 2020 introduced the Enhanced Warp Tool, which can sometimes cause issues. If you've used the warp transform on smart objects, particularly for 3D preview mockups, you might encounter problems related to unusual color spaces or extra channels.
A common solution for such issues is to convert your image to RGB or CMYK and remove any extraneous channels. Furthermore, it is advisable to avoid certain Photoshop options that can lead to compatibility problems. Instead, try flattening layers that use these options into a standard image layer. Alternatively, you can create an alpha channel using a Layer Mask.
For layers that need to be fixed or non-editable, it's best to convert visual effects into separate image layers. This often becomes a necessity when a template contains a large number of layers, especially image layers, which can increase complexity and processing time.
A highly recommended practice for optimizing complex templates is to merge all non-editable layers together. For example, if you are creating a template for employees of a specific corporation, you might merge the background, the company name, and the logo into a single layer.
After merging, review your image layers. Check if they extend significantly beyond the visible area of the template. If only a small percentage, say 10%, of a layer is visible, there's often no need to load the entire layer, which can improve performance. Regarding text layers, consider consolidating multiple single-line text layers into a single multiline Point Text layer. In most scenarios, users find it more intuitive to fill out a single text block, and the Design Editor can process these fields more efficiently.
If, after implementing these optimizations, your PSD file continues to display incorrectly or causes issues within the web-to-print platform, it is advisable to contact the technical support team, providing them with the problematic PSD file for further assistance. This collaborative approach ensures that you can overcome any technical hurdles and fully utilize the power of Photoshop templates.