Time-lapse photography offers a captivating way to visualize the passage of time, transforming slow, imperceptible changes into dynamic visual narratives. Whether it's the celestial ballet of stars across the night sky, the gentle unfurling of a flower, the dramatic sweep of a sunset, or the bustling energy of a cityscape, time-lapse captures change in a way that our natural perception often misses. This article delves into the practicalities of creating time-lapse sequences, with a specific focus on leveraging the powerful capabilities of Adobe Photoshop.
Understanding the Fundamentals of Time-Lapse
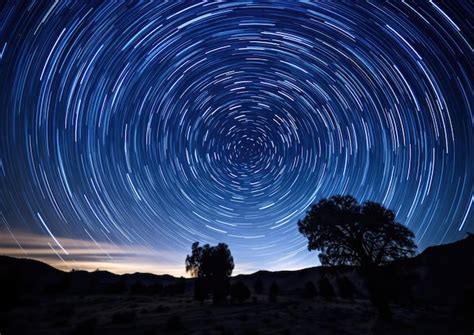
At its core, time-lapse photography is a cinematography technique where the frequency at which film frames are captured is significantly lower than that used for playback. Essentially, we are manipulating time, compressing hours, days, or even months into a few seconds or minutes of engaging video. The best way to truly appreciate the power of time-lapse is to witness compelling examples. While short clips are common, compilations that truly grab attention and inspire contemplation about the world around us offer a deeper experience, transcending mere editing effects to become profound visual statements.
For those already equipped with a DSLR camera, the journey into time-lapse photography is often within reach, requiring little more than existing gear and a willingness to experiment. The key lies in capturing change. However, the transition from individual still images to a fluid video sequence necessitates careful planning. Issues like image resolution, storage capacity, and the speed of data transfer become critical. Poor planning can abruptly cut a scene short or lead to frustrating "Card Full" messages just as a pivotal moment unfolds.
A simple yet crucial recommendation for aspiring time-lapse creators is to shoot in the highest resolution RAW format that your camera's card capacity, write speed, and your time-lapse plan will allow. RAW images are invaluable for post-production, enabling non-destructive adjustments and corrections. High-resolution files also provide the flexibility to crop and introduce simulated camera movement, such as panning, tilting, or zooming, within the sequence during editing. For newcomers, the initial focus should be on experimenting with diverse subjects and capturing change, rather than striving for technical perfection. A few fun test sequences will undoubtedly fuel the passion to explore more advanced techniques.
Essential Shooting Techniques for Time-Lapse
Successful time-lapse creation begins with meticulous attention to shooting details. The primary goal is to ensure consistency across all captured frames to avoid jarring visual interruptions.
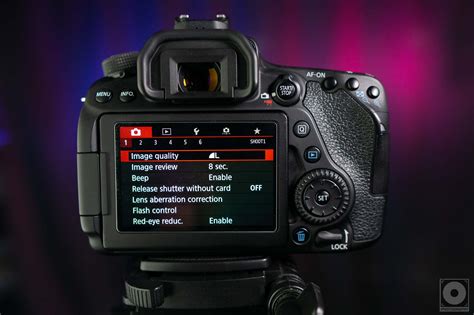
Exposure Control and Flicker Prevention:One of the most significant challenges in time-lapse photography is controlling exposure to minimize or eliminate flicker. Flicker, the unwanted fluctuation in brightness between frames, can severely detract from the viewing experience. Achieving consistent exposure relies on full manual control of your camera settings. This means setting the aperture, shutter speed, and ISO manually and locking them in place. If your manual exposure skills are a bit rusty, it's essential to practice and become comfortable before embarking on a long time-lapse shoot.
Shutter Speed and Motion Blur:Another crucial exposure consideration is motion blur. When time-lapse images are played back rapidly, the slight blurring present in each individual photograph blends together, contributing to a smoother, more fluid appearance of the entire sequence. As a general guideline, aim to keep your shutter speed under approximately 1/100th of a second. This balance between sharpness and blur is key to achieving a visually pleasing result.
Intervalometer and Frame Rate:To capture a time-lapse, you'll need to shoot a long series of photos with a specific time delay between each shot. This is typically achieved using an intervalometer, either built into your camera or as a separate accessory. The intervalometer automates the shooting process, ensuring consistent spacing between frames. The total number of frames captured, divided by the desired frames per second (FPS) for your video, determines the final length of your time-lapse. For example, shooting 100 frames and setting the playback to 20 FPS will result in a 5-second video.
File Management:Before initiating the editing process, ensure all your captured images are organized into a single folder. It is highly recommended to have them all set as JPGs and to have performed any necessary adjustments to their appearance. If the original resolution of your images is quite large, you will need to adjust them down to a more manageable size. You can use tools like Adobe Bridge to renumber image sequences if there are any gaps in the numbering, which is crucial for Photoshop to correctly interpret the sequence.
Assembling Your Time-Lapse in Adobe Photoshop
Adobe Photoshop, often known for its powerful still image editing capabilities, also offers robust tools for creating time-lapse sequences. This method is particularly accessible for photographers who may not have dedicated video editing software.
Importing Image Sequences:To begin assembling your time-lapse in Photoshop, you'll need a recent version of the software. Start by choosing to create a new file. From the "Film and Video" category, you can select a preset that matches your intended output, such as 1080p, and click "Create" to open an empty canvas.
The next step is to import your image sequence. Navigate to Layer > Video Layers > New Video Layer from File. Browse to your folder containing the image sequence and select the first frame. Ensure there are no gaps in the numbering of your files. If renumbering is necessary, Adobe Bridge can be utilized. With the first frame selected, click "Open." Photoshop will load the entire sequence as a new video layer onto your canvas.
Photoshop Tutorial | QUICK TIP | Basic Frame by Frame Animation
Utilizing the Timeline Panel:To view and manage your video layer, go to the "Window" menu and open the "Timeline" panel. This panel is the central hub for editing your time-lapse. When Photoshop imports an image sequence, it stitches the files together at a specified frame rate, effectively doing much of the initial work for you.
The dialogue box that appears upon opening the image sequence allows you to select the desired frames per second (FPS) for your video. Remember the earlier consideration regarding the number of frames and desired playback speed to determine the final video length. After setting the FPS, click "OK." You will see one image in the main panel, and at the bottom, the "Timeline" tab will display your sequence.
Editing and Exporting:Within the Timeline panel, you can make further adjustments. While Photoshop offers less granular control over the time-lapse compared to dedicated video editing programs like Adobe After Effects or Premiere Pro, it is highly effective for compiling sequences, especially for landscape photographers or those new to time-lapse.
If you need to renumber your images, you can use Adobe Bridge as mentioned previously. The techniques described here are compatible with various Photoshop releases, including the latest CC and older CS versions. Extended versions are not required, as even the Standard version of CS6 can handle video editing.
Once you've set your desired frame rate and made any necessary adjustments in the Timeline, you can export your time-lapse video. Choose File > Export > Render Video. This dialogue box will allow you to select the save destination, the video format (e.g., MP4), and other relevant options. Render the video, and once it's finished, it will be saved to your computer files. The process is remarkably straightforward.
Advanced Techniques and Further Exploration
While Photoshop provides a solid foundation for time-lapse creation, several advanced features can elevate your projects.
Adding Motion:To introduce dynamic movement into your time-lapse, you can convert your video layer into a "Smart Object." Right-click on the video layer in the Layers panel and select "Convert to Smart Object." This unlocks options to add motion, such as zoom, pan, or rotate effects, directly within Photoshop.
Enhancing with Effects and Music:Photoshop also allows you to apply various effects and transitions to your time-lapse. You can further enhance your video by adding music or sound effects, transforming your sequence into a more immersive experience. The software offers a wide array of adjustments and edits, encouraging exploration and experimentation.
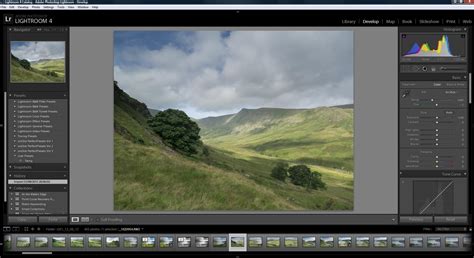
Post-Production with Lightroom:For a more streamlined and powerful post-production workflow, consider integrating Adobe Lightroom. After capturing your RAW images, you can process them in Lightroom, applying consistent edits to brightness, contrast, exposure, and color corrections across all frames. Use the "Copy Settings" (Ctrl+Shift+C) and "Paste Settings" (Ctrl+Shift+V) functions, or enable "Auto Sync," to apply these adjustments uniformly. This ensures a cohesive look throughout your time-lapse.
After editing in Lightroom, you can export the images and then import them into Photoshop for the final assembly as described earlier. For those seeking more advanced control and higher quality output, investing in Adobe Premiere Pro and After Effects, along with specialized tools like LRTimelapse, is highly recommended.
Conclusion: Practice and Experimentation
Creating time-lapse videos can be a seamless and enjoyable process with the right tools and techniques. Whether you're using Lightroom, Photoshop, or other software, mastering time-lapse photography enhances your content and showcases the beauty of passing time in a unique way. The journey from capturing individual frames to rendering a compelling video is one of continuous learning. Practice your edits in your free time; it's the most effective way to improve your skills and become proficient in creating stunning time-lapse content for any photography endeavor.
If you find yourself without suitable images for practice, numerous online platforms offer free stock images and videos that can be downloaded for editing exercises. However, the most rewarding approach remains shooting your own sequences. Utilizing a DSLR camera, an intervalometer, a tripod, and a quality lens (a wide-angle lens is often ideal for capturing expansive scenes) will yield the best results. Embrace the process, experiment with different subjects and techniques, and don't be afraid to push the boundaries. Ultimately, if you are achieving the results you desire, you are on the right track.