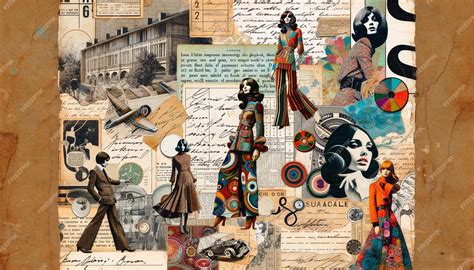
Photographers and designers alike are often striving for a vintage or retro look in their photos. While there are countless methods to achieve this nostalgic feel, a few key characteristics define the vintage aesthetic. Understanding these elements is crucial for effectively employing vintage Photoshop overlays and achieving an authentic, aged appearance.
The Core Characteristics of Vintage Photography
At its heart, vintage photography evokes a sense of history and timelessness. This is achieved through several distinct visual cues:
- Color Tones: Vintage photos frequently exhibit color palettes that lean towards either a blue or a red hue. Another common characteristic is a "cross-processed" look, where the colors appear shifted in an unusual, often intensified, manner, reminiscent of experimental film development techniques. This can manifest as muted tones, a distinct color cast, or even a slight shift in saturation.
- Grain and Texture: A tangible element of vintage photography is the presence of noise or grain. This texture, often achieved through the use of overlays or specific filters, mimics the physical characteristics of film. It adds a tactile quality and a sense of authenticity, making the image feel less sterile and more organic.
- Vignetting: The edges of vintage photos often display a subtle darkening, known as vignetting. This can be a natural consequence of older lens limitations or camera settings, but it's also frequently introduced intentionally in post-processing. Vignetting serves to draw the viewer's eye towards the center of the image, enhancing focus and creating a more intimate feel.
Beyond the Basics: Exploring Different Vintage Styles
The term "vintage photography" encompasses a broad spectrum of styles, each with its own unique appeal and historical context.
- Black and White Photography: As film was initially only available in black and white, converting a modern digital photo to monochrome automatically imbues it with a retro vibe. This approach strips away the distractions of color, focusing attention on form, light, and shadow.
- Sepia Toning: The soft, reddish-brown tint characteristic of many vintage photos is known as sepia. This effect is a result of an older developing process for black-and-white film that also helped to prevent photo decay. It imparts a warm, aged, and melancholic quality.
- Tintypes: One of the oldest photographic processes, tintypes are made on thin sheets of metal coated with photosensitive chemicals and developed in a darkroom. These plates produce distinct black-and-white images, often with a darkening vignette around the edges and a subtle metallic tint.
- Polaroid Instant Photos: Popular in the 1970s, Polaroid cameras captured and printed photos rapidly with special film. The distinctive white border and the camera's limited settings resulted in photos with a more spontaneous, less-perfect feel, often with unique color shifts and a softer focus.
- Imperfect Scans and Prints: In the early days of photography, photo scans and prints were not always as pristine as they are today. Imperfections such as scratches, dust, tracking errors, or degraded film could introduce an element of visual randomness, contributing to an authentic, aged look.
Achieving the Vintage Look in Photoshop: A Step-by-Step Approach
Photoshop offers a powerful suite of tools to recreate these vintage characteristics. While the provided information details one specific method for creating a "film frame" and applying textures, the underlying principles can be adapted to various vintage effects.
Creating a Retro Film Frame and Adding Textures
This tutorial outlines a method for constructing a retro film frame, incorporating textures and text for a complete vintage presentation.
- Setting Up the Canvas: Begin by creating a new document in Photoshop. This will serve as the base for your film frame.
- Constructing the Film Frame:
- Utilize the Rectangle Tool (U) to create a long, thin rectangle shape layer. Set its dimensions (e.g., 450 px width, 4000 px height) and fill it with a neutral color like #e5e5e5. Position this layer to align with the left edge and vertical center of the canvas. This will form the outer edge of the film strip.
- Next, create a rounded rectangle shape layer using the Rectangle Tool (U) again. Define its dimensions (e.g., 255 px width, 150 px height) and a radius (e.g., 25 px). Fill this with black (#000000). Duplicate this layer (Control-J) and position the copy below the original. These will serve as the inner boundaries of your film frame.
- To create the film's sprocket holes, you'll need to make selections of these black rounded rectangles. Control-click on the thumbnail of a rounded rectangle layer to create a selection. Then, Control-Shift-click on the thumbnails of any other temporary layers you've created for this purpose. Select the "Frame layer" (which would be the main frame shape) and go to
Layer > Layer Mask > Hide Selection. This will mask out the selected areas, revealing the frame beneath. - For a textured film grain effect, create a new layer named
Frame_Texture. Convert this layer to a Smart Object for non-destructive editing. ApplyFilter > Noise > Add Noise, setting the Amount to 5%, Distribution to Uniform, and checking Monochromatic. You can then adjust the blending options of this noise filter, for example, setting its Opacity to 75%. A Gaussian Blur can also be applied with an Opacity of 50% to soften the grain slightly.
- Adding Text Elements:
- Employ the Horizontal Type Tool (T) to add text. Choose a font that complements the vintage aesthetic, such as "Retro Grade," and set the font size (e.g., 75 px), alignment (e.g., Left), color (e.g., #808080), and tracking (e.g., 100). Type your desired text, such as "Retro Film Frame." You can create multiple text layers for different elements.
- Integrating Your Photo:
- Select the Background layer. Create a new rectangle shape layer with dimensions suitable for your photo placeholder (e.g., 2550 px width, 4000 px height) and fill it with white (#ffffff). Align it to the right edge and vertical center of the canvas.
- Go to
File > Place Embeddedand select your chosen photograph. Resize the image to fit within the placeholder layer. - To add a film grain effect to the photograph itself, go to
Filter > Noise > Add Noise, using similar settings as for the frame texture (e.g., 5% Amount, Uniform distribution, Monochromatic).
- Incorporating Screen Elements and Borders:
- To add borders to your film frame, select the Photo layer. Use the Line Tool (U) with a specified Stroke Solid Color (e.g., #000000) and Stroke Width (e.g., 4 px). Draw lines to form the corners of the frame. Duplicate these lines (Control-J) and use the Free Transform tool (Control-T) to rotate and position them for the remaining corners. You can then adjust the stroke color of these border elements to create contrast, for instance, setting the top two to #bfbfbf and the bottom two to #ffffff.
- Add further text elements using the Horizontal Type Tool (T). You might use a countdown sequence like "-3…2…1…0…1…2…3+" with a contrasting color (e.g., #ffffff) and the "Retro Grade" font.
- Creating a Film Grain Overlay:
- Create a new layer at the top of your Layers panel and name it
Film Overlay. Set the foreground color to black (#000000) and go toEdit > Fill, selecting Foreground Color. - Apply
Image > Adjustments > Levels, setting the Shadow Input Level to 15 and the Highlight Input Level to 105. This will create a base for your grain. - Create another new layer. Set the foreground color to black (#000000) and fill it. Apply
Filter > Blur > Motion Blurwith an Angle of 90° and a Distance of 50 px. - Change the Blending Mode of this motion-blurred layer to
Screenand set its Opacity to 50%. - Select both of these layers (Control-click on Layer 1) and merge them (Control-E). Use Free Transform (Control-T) to scale this merged layer up, for example, to 250% of its original size. Finally, change the Blending Mode of this
Film Overlaylayer toScreen. This creates a dynamic film grain effect that can be applied to any image.
- Create a new layer at the top of your Layers panel and name it
- Adding a Paper Texture:
- Import a paper texture image using
File > Place Embedded. Resize it to cover the entire canvas. - Double-click this texture layer to open it in a new document. Desaturate it by pressing
Control-Shift-U. Save the changes (Control-S) and close the document to see the desaturated texture applied to your main image.
- Import a paper texture image using
Realistic Film Grain in Photoshop
Advanced Techniques for Vintage Effects
Beyond the specific film frame tutorial, Photoshop offers numerous adjustment layers and filters to achieve a wide range of vintage looks.
Color Tone Adjustments
- Gradient Maps: The Gradient Map adjustment layer is a powerful tool for altering color tones. It maps the colors of your image to a gradient. You can start with a basic black and white gradient for desaturation, then add subtle color stops to introduce a soft tint. The left side of the gradient controls the shadows, the middle represents mid-tones, and the right side affects highlights. Experiment with different presets or create custom gradients to achieve specific color casts (e.g., a warm sepia, a cool blue, or a desaturated pastel).
- Tip: To add a touch of color while maintaining a vintage feel, keep the added color very soft.
- Photo Filters: Similar to applying a physical filter to a camera lens, the Photo Filter adjustment layer can quickly add a color wash to your image. Options like "Sepia" or warming filters can instantly impart an aged look.
- Curves and Levels: These fundamental adjustment layers offer precise control over tonal range and contrast. Flattening contrast by adjusting the curves or levels can mimic the less sharp, more subdued look of older photographs. You can also use them to fine-tune the intensity of color casts.
- Hue/Saturation: While a simple desaturation to -100 will create a black and white image, the Hue/Saturation adjustment layer can also be used with the "Colorize" option ticked to apply a specific tint and control its intensity. This offers a more targeted way to add color tones.

Texture and Noise Application
- Adding Noise: As demonstrated in the film frame tutorial, the
Filter > Noise > Add Noisefunction is essential for replicating film grain. Using uniform distribution and the monochromatic option provides a realistic film-like texture. - Placing Texture Overlays: High-resolution texture images, such as those found in "Photocopy Noise" or "metal dumpster" packs, can be placed over your main image. Experiment with blending modes like
Screen,Overlay, orSoft Lightto integrate the texture seamlessly. Adjusting the layer's opacity allows for subtle or pronounced textural effects.- Screen Blending Mode: This mode hides black areas and lets lighter parts of the texture show through, which is excellent for overlaying grain or textured paper.
- Overlay Blending Mode: This mode increases contrast and saturation, making textures appear more prominent and adding a worn, aged quality.
- Creating Custom Brushes: For a more organic feel, you can create custom brushes from scanned textures of old paper, fabric, or other surfaces. These brushes can then be used to paint in textures or create distressed edges.
Vignetting Techniques
While vignetting can occur naturally, it can also be added creatively in Photoshop:
- Lasso Tool and Adjustment Layers: Select the area around the edges of your image using the Lasso Tool with a low feather setting. Create a Curves or Levels adjustment layer. On the layer mask of this adjustment layer, white reveals the effect, and black conceals it. By filling the mask with black and then painting with a white brush on the edges, you can create a custom vignette.
- Inner Shadow Layer Style: For a more automated approach, you can apply an "Inner Shadow" effect from the layer styles. Adjust the distance, choke, and size to create a darkening effect around the edges of your image or specific elements.
Simulating Specific Vintage Styles
- Sepia Toning: As mentioned, the Photo Filter set to Sepia is a quick method. Alternatively, use a Gradient Map with a sepia gradient or a Hue/Saturation layer with Colorize enabled, setting the Hue to a reddish-brown and adjusting Saturation.
- Cross-Processing: This effect often involves manipulating color channels and contrast. Experiment with Curves to shift specific color ranges, or use a combination of adjustment layers like Color Balance and Selective Color to create unusual and intensified color shifts.
- Worn and Faded Look: Combine desaturation, reduced contrast (using Levels or Curves), and subtle noise. Adding textures with lowered opacity and blending modes like
Overlaycan further enhance the worn appearance. Tattered edges can be simulated using brushes or by applying a layer mask with textured brushes.
Considerations for Different Audiences
The process of creating vintage effects in Photoshop can be approached at various levels of complexity.
- Beginner: For those new to Photoshop, starting with adjustment layers like Photo Filter and simple noise addition is a good entry point. Using pre-made actions or overlays can also provide quick and satisfying results. Focus on understanding the basic characteristics of vintage photos â color, grain, and vignetting â and how to apply them.
- Intermediate: Intermediate users can delve deeper into Gradient Maps, Curves, and Levels for more nuanced color and tonal control. Experimenting with different blending modes for textures will yield more sophisticated results. Creating custom film grain overlays can also be a valuable skill.
- Advanced: Advanced users can combine multiple techniques, create complex texture composites, and even develop their own custom brushes and actions for highly specific vintage looks. Understanding color theory and the historical context of different photographic eras will inform more authentic and compelling results.
Ultimately, the goal is to imbue a modern photograph with the character and soul of a bygone era. By understanding the fundamental visual elements of vintage photography and leveraging the versatile tools within Photoshop, you can transform your images into timeless pieces that evoke nostalgia and tell a story.