Wedding photo editing refers to enhancing and retouching photographs taken during a wedding ceremony or related events. It involves various techniques and adjustments to improve the overall appearance and quality of the images, making them more visually appealing and memorable. A little retouching can be all it takes to transform an already stunning wedding album into an absolute masterpiece. The trick is to make sure that you don’t go over the top with your retouching efforts. Wedding photo editing aims to deliver high-quality, visually stunning images that capture the beauty and emotions of the wedding day. It helps to preserve the memories and create a lasting keepsake for the couple and their loved ones.
The Importance of Wedding Photo Editing
Wedding photo editing allows for enhancing the overall appearance of the images. It involves adjusting the colors, exposure, and composition to make the photos more visually appealing. Editing can help bring out vibrant colors, correct lighting issues, and create a cohesive look across the wedding album. Wedding photo editing can address any imperfections or distractions in the photos. It involves retouching techniques to remove blemishes, soften skin tones, whiten teeth, and reduce the appearance of wrinkles. These adjustments can help the subjects look their best and ensure that the focus remains on the couple and the critical moments of the day.
Skilled editing can highlight key moments, emotions, and details captured in the photographs. By selecting and arranging the best images, editing can create a narrative that reflects the couple’s unique journey and the event’s atmosphere. Editing wedding photos allows for consistent post-processing across the entire collection. This ensures that the images have a unified look and feel, reflecting the style and vision of the photographer. Professional editing can elevate the quality of the photos, making them stand out and creating a polished end result. Editing provides an opportunity for personalization and artistic expression. It allows photographers to add creative effects, experiment with different styles, and create a unique look for each wedding album. Editing can help evoke a specific mood, enhance the couple’s personalities, and create images that truly resonate with the clients. Overall, wedding photo editing plays a crucial role in transforming raw images into stunning and memorable photographs that beautifully capture the essence of the wedding day.
Key Factors in Wedding Photo Editing
Wedding photo editing involves various factors that enhance the overall look and feel of wedding photographs. Some of the key factors considered during wedding photo editing are:
- Color Correction: Adjusting the photographs’ colors ensures accurate representation and creates a cohesive visual style.
- Exposure and Contrast Balancing: Balancing the exposure and contrast levels ensures that the details in both bright and dark areas are visible and the overall image has an excellent tonal range.
- Composition Adjustment: Adjusting the composition by cropping or resizing the image removes distractions and creates a visually pleasing layout.
- Retouching Imperfections: Removing blemishes, skin imperfections, or any unwanted objects from the photos to create a polished and flawless appearance.
- Sharpening and Noise Reduction: Enhancing the image sharpness to bring out the details and reducing any digital noise that may be present, especially in low-light situations.
- White Balance Adjustment: Adjusting the white balance to ensure accurate color representation and remove any color casts caused by different lighting conditions.
- Creative Effects: Applying creative filters, vignettes, or other effects to enhance the mood or aesthetic of the photographs.
- Consistent Editing Style: Maintaining a consistent editing style throughout the wedding photo collection to create a cohesive and unified look.
It’s worth noting that the specific editing factors may vary based on the photographer’s style, the couple’s preferences, and the overall theme or mood of the wedding.
Popular Software for Wedding Photographers
Wedding photographers often use various photo editing software to enhance and edit their images. Some popular choices among wedding photographers include:
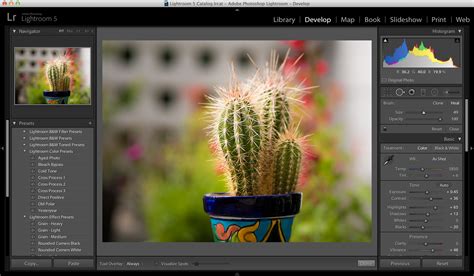
- Adobe Lightroom: This software is widely used by photographers, including wedding photographers, for its comprehensive editing capabilities and efficient workflow management. Lightroom allows photographers to organize, edit, and enhance their photos, apply presets, make adjustments to exposure, color, and tone, and perform non-destructive editing.
- Adobe Photoshop: Photoshop is another widely used software among photographers, including wedding photographers. It offers advanced editing features and allows for precise image retouching, manipulation, and compositing. Photoshop is handy for more complex editing tasks or when photographers must make detailed adjustments to specific photo elements.
Understanding Editorial-Style Wedding Photography
Editorial-style wedding photography is a genre of wedding photography that draws inspiration from editorial fashion photography. It aims to create images that resemble those in magazines or editorial spreads. This style of photography emphasizes storytelling, creativity, and artistic expression.
In editorial-style wedding photography, the photographer takes on a more active role in directing and posing the couple and other subjects involved in the wedding. They often use fashion-inspired poses, lighting techniques, and unique angles to capture visually striking images with a high-end editorial look. This style typically involves attention to detail, such as capturing close-up shots of intricate wedding details, including the dress, shoes, jewelry, and decor. The photographer may also focus on capturing candid moments and emotions throughout the day, highlighting the couple’s love story and the overall atmosphere of the wedding.
Post-processing plays a significant role in editorial-style wedding photography. The photographer may use various editing techniques to enhance the images’ mood, colors, and overall aesthetic, giving them a polished and editorial feel. This could involve adjustments to lighting, contrast, saturation, and the use of creative filters or effects. Editorial-style wedding photography is often sought after by couples who appreciate a more artistic and fashion-forward approach to documenting their wedding day. It can result in stunning and visually captivating images beyond traditional wedding photography and provide a unique perspective on the couple’s special day.
Essential Photoshop Techniques for Wedding Photography
Now that you have Photoshop complete, let’s begin learning some Photoshop tricks for editing your wedding photos. These hacks will assist you in making the most spectacular wedding photos that will also relax your work.
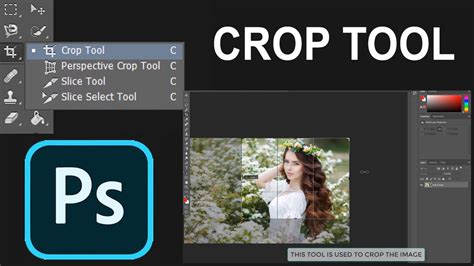
1. Cropping for Improved Composition
Cropping is a very modest and seemingly minor Photoshop trick in the photo editing process. However, it creates a world of change in improving a picture’s arrangement. To crop in Photoshop, you need to track the steps below. Pick the crop tool from the toolbox. Select your chosen feature ratio by clicking on the drop-down menu. Choose from Free, Original Ratio, or any of the Preset options. You can also arrive at your favored dimensions in the text arenas besides the menu. After that, drag the photos’ corners or edges to attain your desired crop. Click the check icon to surface the crop.
2. Duplicating Layer Masks for Efficiency
Use this Photoshop trick to save time, like when you have to make a copy of a mask from one adjustment layer to another. Just hold down the CTRL key on a PC. Click on the layer mask to drag it to the adjustment layer in the query. It will form a copy of the layer mask without rebuilding it again.
3. Enhancing Images with Blend Mode Layers
Assembling layers of solid colors using Blend Modes can change an image. It will severely recover an idea that needs to be better uncovered, bland, or missing in dynamics. You can add a fullness layer, raise warmth, and highlight.
- To add saturation: Click Command/CTRL + Shift + N for a new layer. Fill the layer with black. Fix the blend mode to Color Burn. Take the Fill fraction down to 15%.
- To add warmth: Enhance a new layer and fill it with orange. Fix the blend mode over to Color Burn. Cover the Fill to 15%.
- Add some color back in the highlights: Add a new layer, and seal it with blue. Fix the blend mode to Color Dodge. Cover the Fill to 10%.
4. Dehazing with the Camera Raw Filter
This is the purpose of the Camera Raw Filter. It is typically used when introducing RAW images from a camera into Photoshop for dealing out. This function enhances the discerning saturation of the picture. To access it, click Command/CTRL + Shift + A on the keyboard. Or go to Filter > Camera Raw Filter from the main menu. This unlocks a new window. At the bottom right, you’ll see a slider control called Dehaze. This is one of our favorite Photoshop tricks since Dehaze adds contrast and saturation, without going overboard.
How to edit Wedding Event Photos FAST & EFFICIENT using Lightroom, Photoshop & Actions
5. Adjusting Brightness and Contrast
Use a Brightness/Contrast Change Layer to raise dynamics or recover the meaning of an image. Make use to lighten or darken the image. To use this Adjustment Layer, click the icon at the bottom of the Layers palette. It says - Make a new fill or adjustment layer. Then select Brightness/Contrast from the drop-down list. You can preserve the original image by using adjustment layers. By regulating the sliders, you can modify the settings for the adjustment layer in the Properties window.
6. Creative Curves Adjustment Layer
In the Curves adjustment, you regulate points on the arc line to touch the image’s tonal range. The S-shaped curve controls classic tonal tweaks. It boosts contrast and color saturation. To do this differently, add a curves adjustment layer. Modify the blend mode to Soft Light and decrease the Fill to approximately 55%. This gives a relative boost to color and contrast. We ensure you’ll love this Photoshop trick if you try it!
7. Mastering Dodge and Burn
Create a separate layer and change the blend mode to Overlay. Now, fill the layer with 50% gray. Name this layer “Dodge and Burn.” The Dodge and Burn tools are your common method for creating selected areas of an image lighter or darker. Dodge is for lightening a space, and the Burn tool is for darkening a room. Use a soft brush and fix Exposure to between 6-12% to paint back in the areas you don’t want to be affected (or want less affected) by the Dodge or Burn Layer you created.
8. Utilizing Layer Comps for Comparisons
Layer Comps refers to Photoshop as complex Photoshop tricks. It is a valuable leader for before and after comparisons. This has five phases, from straight out of the camera to the final image. Adobe has an obvious explanation of how this works here!
9. Stamp Visible for Non-Destructive Editing
Using layers will help create a great way to control image editing without affecting the original image. Use Stamp Visible. When you use Cmd+Shift+Alt+E for Ctrl+Alt+Shift+E on a PC, it saves all the layers in a Photoshop file and generates a merged copy on top of them.
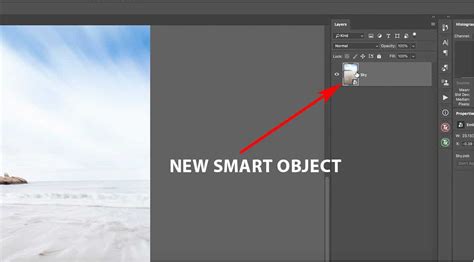
10. Placing Images as Smart Objects
You can search the ‘Place’ command under File > Place. This function can automatically introduce the image as a Smart Object. This is great for resizing the image without any degradation.
11. Advanced Retouching with the Patch Tool
If you haven’t tried the Patch Tool, you are missing out on one astonishing Photoshop process used mainly for fine-tuning. It is the purpose of the Healing Brush Tools in Photoshop. You can now try the Patch tool to pick things you want to be removed from an image and fill them using the Content-Aware on a new empty layer. Make sure to choose Sample All Layers.
12. Transform and Warp Tools
- CMD/CTRL + T = Transform: This is a countless Photoshop trick for resizing if you’re working on many images in the exact text. Click on any component in your frame and use CMD/CTRL T. This will transport a draggable corner on the image, and you can size regulate by dragging in or expanding the corners.
- Warp Tool: The Warp tool is countless for fine-tuning an image component if you want to reduce something within the image or the image as a whole. This works mainly if you are working on composites. First, Select All (CTRL/CMD A) to select the whole image. Go to: File > Transform > Warp. Then adjust the image using the draggable corners in your selected area.
13. Using Vignettes for Focus
Vignettes are one of the first-born Photoshop features, but it never goes out of style! By forming a vignette, you attract the viewer’s eye inward toward the center of the image and away from its environment. This raises focus on the subject. You can also use an essay with the Arcs changes to improve the sentimental look.
14. Opening a Second Window for the Same Document
This Photoshop trick will get you moving much faster! While correcting imageries to eliminate dust and blemishes, you may find it essential to zoom in. You have to zoom back out to comprehend how the image looks and then zoom back in to recommence your retouching. Instead, you can open a second window for the same document. You can expose another window by Window > Arrange > New window for a new filename.
Streamlining Your Wedding Photography Workflow
Improving your editing workflow is an important part of improving your photography. Properly culling your wedding photos is probably the most important step to improving your wedding photography editing workflow. Every photo you eliminate from your keepers is going to save you time. Say you spend on average 30 seconds editing each photo. If you had 1200 photos, editing would take you about 10 hours. But if you can cull those down to say 400 keepers, you’d only need 3 hours and 20 minutes!
Culling the wedding photos normally takes about 30 minutes to an hour, depending on whether the wedding had 1 or 2 photographers. Once the photos are culled down to about 400-600, organize the raw photos in folders marked “selects” and “rejects” - This way you know where to find the original raw files if you ever need them.
The next step in the wedding photography editing workflow is importing the selected keeper photos. Apply basic copyright info and a develop preset during import. If working on an older laptop, build smart previews during import. Smart previews are like little mini versions of your raw files that Lightroom can create so that your computer has an easier time editing them versus full-res files. Applying a base preset during import to all the photos is a good practice. Once importing is complete, see how that base preset looks across photos from different times during the day. If it looks great, keep going.
One of the most important things about editing a wedding day (or any photoshoot) is making sure that the images are consistent in the way they look and feel. This can be especially tricky when you have multiple cameras photographing the wedding. The most important part of an effective wedding photography editing workflow is starting with the big, broad changes and then slowly working your way towards more detailed adjustments. If you get the big stuff right across all your images, then all that you’ll need to do individually is small stylistic tweaks.
The easiest way to do this is with the camera calibration tool. Using the Library view in Lightroom, you can sort your photos according to camera. Find a photo taken with each camera at approximately the same time/location/lighting. Adjust the one you think is less accurate until the colors match. Once you think you’ve got this right, you can test it by pasting those settings on a different set of photos and comparing. Getting this right from the start and applying these settings across ALL the photos right away will save hours of tinkering and trying to match photos one at a time!
Start by finding a moment during the day that both cameras captured. Compare the 2 photos to see how far off the cameras are from one another in time. Select ALL the photos from the camera that needs the time changed. Enter the amount of time you need to adjust by. Lightroom will change the capture times. Now, double-check that everything is correct.
At this stage, you already have a basic preset applied to your photos, so editing the bride and groom preps comes down to making the individual adjustments necessary for each photo. The goal is to make wedding photography edits as simple and transparent as possible. For many, it is more about removing distractions and correcting imbalances than it is about ADDING to the photo. Occasionally, you might need to hop over into Photoshop if an important photo needs any major corrections. In general, try to avoid this as much as possible.
The workflow process for editing the wedding ceremony photos is very similar to the bride & groom preps. A favorite Lightroom wedding editing technique is to use a radial filter with the feather up all the way, the contrast down around -20, and the whites pushed up maybe +10. This combination of effects makes for an exceptionally subtle “spotlight” that can be used to place emphasis on the subject or make a certain part of the image brighter without looking edited.
Group and Family Photos
The most important part of getting great group wedding photos and family photos is setting it up right in the first place. Family photos almost ALWAYS happen after the ceremony at the brightest, least flattering lighting of the day. Putting subjects IN FRONT of the sun is often a good strategy. Find a dark background to put your subjects in front of. Take 8-10 photos of EVERY group.
Couple's Portraits
The approach here is to do your best to remove distracting and unflattering elements from the photo - in experience, this makes for the most organic, least “edited” looking results. You’ll wind up with much more organic moments, and the couple will enjoy the process so much more if they’re actually interacting & being real! Follow the same lighting tips as with family photos during an afternoon photoshoot. This is often best done by planning to sneak the couple away for 10-20 minutes during dinner.
Reception and Nighttime Photos
Editing wedding photos of the reception or nighttime wedding photos is often the trickiest part of the process. If you’re lucky enough to have an outdoor reception with good natural light, then the process is pretty simple. The top tip for editing night photos or high ISO wedding photos is to focus on getting it as clean as possible in camera in the first place. Bring lighting equipment to the event so you’re prepared. A simple bounce flash is often all it takes to get great results.
Once you have the photos and you’re editing the reception, you'll often check and see if one of the nighttime presets you have work better for the lighting conditions. From there, it’s really a one-photo-at-a-time process. Because lighting can vary so drastically around the reception room, getting white balance and exposure properly dialed in is the most important (and trickiest) part.
Finalizing and Delivering Images
After the edits are complete, it's time to take a break! Your eyes have been looking at the same photos for hours, and over time you can go a little crazy / lose the ability to see when things no longer look the way they’re supposed to. For a second editing pass, use the loupe view of the library module. After the second editing pass and making sure everything is good to go, it’s time to export the photos!
Many photographers create an online gallery through services like Pixieset, which can generate all the different file size options for the client. For exporting, all you have to do is export the full-res files. Keeping the original file name is often preferred.
Once all wedding photos are exported, create an online gallery using your account at a service provider. For photographers who rely on prints for their income, it's recommended to do an in-person meeting when your clients first see their photos so you can sell them on prints in person.
The only bonus step would be submitting the photos for publication - For which it is highly recommended to use a service like twobrightlights.com - Simply upload your favorite 50ish photos to a gallery on twobrightlights and you can select multiple publications for submitting with the click of a button.
tags: #wedding #photography #photoshop