The Adobe Photoshop Frame Tool offers a streamlined and intuitive approach to integrating images within defined shapes, particularly beneficial for users seeking a straightforward method, especially those new to Photoshop. This tool acts as a container, automatically masking any image placed within its boundaries. A key advantage of using the Frame Tool is that the incorporated image is converted into a Smart Object. This conversion ensures that the image can be edited and transformed without any degradation in clarity or resolution, preserving its original quality. Furthermore, images automatically resize to precisely fit the dimensions of the frame, simplifying the composition process.

Creating and Utilizing Frames
The fundamental operation of the Frame Tool is designed for ease of use. To begin, select the Frame Tool from the toolbar. Once selected, the Options Bar at the top of the screen will display various shape options for your frame. For understanding the basic functionality, it is advisable to start with a simple rectangular shape. However, the principles discussed here are applicable to all available shapes, including the more advanced custom shapes introduced in Photoshop 2025.
After selecting your desired shape, you will draw it onto your canvas. Simply click and drag to define the dimensions of the frame, and release your mouse button to finalize its creation. In the Layers panel, a new layer will appear, designated as a "frame layer." This layer features two thumbnails: a thumbnail on the left representing the frame itself, and a thumbnail on the right that will display the content placed within the frame. Typically, the frame thumbnail will be selected, indicated by a white border around it.
Frame Tool - Toolbar Explained & Demonstrated [Photoshop Tutorial for Beginners]
Placing Images into Frames
Once a frame is created, the next step is to populate it with an image. There are several methods to achieve this. You can navigate to File > Place Embedded or File > Place Linked and select your desired image from your computer. Alternatively, if you have assets organized in your Library panel, you can simply drag and drop an asset directly onto the frame in your canvas.
Regardless of the placement method, the image will automatically appear within the content thumbnail of the frame layer in the Layers panel. A crucial indicator of this process is the presence of a Smart Object icon in the lower-right corner of the content thumbnail. This icon signifies that Photoshop has intelligently converted your placed image into a Smart Object, preserving its editability.
Editing and Transforming Content Within Frames
A common requirement is to adjust the size or position of the image within its frame. This is where the Contextual Task Bar becomes invaluable. Ensure that the content thumbnail on the frame layer is selected (not the frame thumbnail itself). Within the Contextual Task Bar, locate and click the "Transform image" icon. This action will reveal the Free Transform bounding box and handles around your image. You can then drag these handles to resize the image. By default, the aspect ratio of the image will be locked as you resize, preventing distortion.
The Contextual Task Bar offers additional options for managing the image within the frame:
- Fill frame proportionally: This option resets the image size to fit proportionally within the frame, ensuring it fills the space without cropping or distortion.
- Fit frame to content: This command resizes the frame itself to perfectly encompass the entire image, effectively adjusting the container to match the content.
Swapping and Replacing Images
Replacing an existing image within a frame is a straightforward process. With the content thumbnail selected on the frame layer, click the "Replace image" button in the task bar. You will be presented with two options: "Generate image" and "Import image." "Generate image" leverages Photoshop's AI capabilities to create new imagery based on prompts, while "Import image" allows you to select a new image from your local files.
Leveraging Custom Shapes (Photoshop 2025 and later)
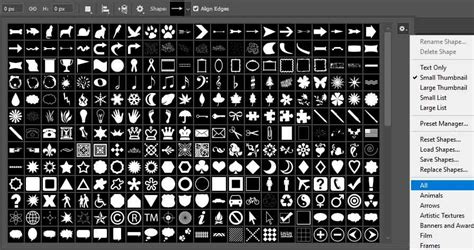
A significant enhancement in Photoshop 2025 is the Frame Tool's capability to utilize any of Photoshop's custom shapes. This dramatically expands the creative possibilities, allowing for frames in a multitude of forms beyond the standard rectangles, ellipses, and polygons. Photoshop offers a wide array of built-in custom shapes, though not all are loaded by default.
To access these additional shapes, you need to load them from the Shapes panel. The Shapes panel typically opens with several pre-grouped categories, such as "Wild Animals," "Leaf Trees," "Boats," and "Flowers." You can expand these groups to view the individual shapes within them. Further categories like "2019 Shapes" and "All Legacy Default Shapes" may also be available, providing a vast library to choose from. Once loaded, any of these custom shapes can be selected and drawn onto the canvas using the Frame Tool, serving as a unique container for your images.
Advanced Positioning and Manipulation
Beyond resizing the content within the frame, you may also need to reposition both the frame and its contained image on the canvas. To achieve this, hold down the Shift key on your keyboard. While holding Shift, click on the thumbnail on the frame layer that is not currently selected. This action will select both the frame and its content simultaneously. You can then click and drag on the canvas to move the entire element - frame and image together - to your desired position. This ensures that the relationship between the frame and its content is maintained during repositioning.
Limitations and Considerations
While the Frame Tool is exceptionally easy to use, it's important to acknowledge its limitations, particularly regarding advanced effects. One such limitation is the relatively constrained options for adding stylistic elements like strokes directly through the Frame Tool's interface. However, workarounds exist. For instance, to add a stroke color, you can hover your mouse cursor over the image within the frame. The cursor will transform into an eyedropper icon, allowing you to sample a color directly from the image. This sampled color can then be applied as a stroke, with the stroke width adjustable in the task bar.
It is also worth noting that while the Frame Tool is the easiest way to place an image into a shape, it might not always be the most flexible or powerful method compared to other Photoshop techniques like using clipping masks with vector shapes. However, for beginners or for rapid prototyping, its simplicity and efficiency are unparalleled. The automatic conversion to Smart Objects and the seamless resizing capabilities make it an indispensable tool for many common design tasks.
The Frame Tool is a testament to Photoshop's ongoing development, aiming to simplify complex tasks and make powerful features accessible to a wider range of users. Its integration with custom shapes in recent versions further solidifies its role as a cornerstone for efficient image placement and layout design within the Photoshop ecosystem.