Photoshop's Horizontal Type Tool is a cornerstone for any designer, offering the ability to seamlessly integrate text into visual compositions. Whether you're labeling an image, crafting a compelling slogan, or designing a full-fledged graphic, understanding the nuances of this tool is paramount. This tutorial delves deep into its functionalities, from basic text insertion to advanced manipulation, ensuring you can harness its full potential.
Introducing the Horizontal Type Tool
The Horizontal Type Tool, often simply referred to as the Type Tool, is your primary gateway to adding text directly onto your Photoshop canvas. Its fundamental purpose is to insert text horizontally, flowing from left to right. This tool is incredibly versatile, allowing for both single lines of text and structured paragraphs. Unlike some other tools, the Type Tool enables direct on-image text editing, making the workflow intuitive and efficient.
The core difference between the horizontal and vertical type tools lies solely in the direction of text flow: horizontal adds text left-to-right, while vertical adds it top-to-bottom. Photoshop's type rendering is based on vector principles, meaning text is stored in a scalable format. This ensures that your text remains fully editable and can be resized to any dimension without loss of quality.
Creating Point Text vs. Paragraph Text
Photoshop offers two primary modes for text input: Point Text and Paragraph Text. Understanding the distinction is crucial for effective text placement and formatting.
Point Text: For Quick Labels and Short Phrases
Point Text is ideal for single lines of text, such as titles, captions, or short phrases. To create Point Text, you simply select the Horizontal Type Tool from the toolbar and click once on your image where you want the text to begin.
In recent versions of Photoshop, clicking to add text automatically inserts "Lorem Ipsum" placeholder text. This placeholder is conveniently highlighted, allowing you to immediately start typing your desired content, which will replace the "Lorem Ipsum." It's worth noting that "Lorem Ipsum" is placeholder text with no inherent meaning in any language; it's purely for layout preview. If you find it distracting, you can disable this feature in Photoshop's Preferences.
When you add text, it's usually rendered with the current Foreground Color. The Foreground and Background Colors are easily accessible buttons located near the bottom of the Toolbar.
Paragraph Text: For Structured Blocks of Content
Paragraph Text is designed for longer blocks of text, where word wrapping within a defined boundary is necessary. To create Paragraph Text, you click and drag on your image to define a textbox. Once you release the mouse button, placeholder text (Lorem Ipsum) will typically be inserted, unless you've opted to disable this in Preferences.
This textbox acts as a container for your text. As you type, the text will automatically wrap to the next line when it reaches the edge of the box, much like in a word processor. This is particularly useful for creating articles, descriptions, or any content that requires a structured, multi-line format.
Editing and Formatting Your Text
Once your text is in place, Photoshop provides a comprehensive suite of tools for editing and refining its appearance.
Resizing Text
Text is often not the desired size upon initial insertion. In large, high-resolution images, it can sometimes appear exceptionally small. To resize text, it must first be highlighted. If you immediately replaced the placeholder text, it's already highlighted. If not, click and drag within the text to select it, similar to how you would in a word processor.
A highly recommended method for selecting all text on a layer is to double-click the text layer's thumbnail in the Layers panel. This action not only highlights all the text but also automatically selects the Type Tool if it wasn't already active.
With the text highlighted, you have two primary methods for adjusting its size:
- Dropdown Menu: Select a font size from the dedicated dropdown menu.
- Scrubby Slider: Position your mouse cursor over the Scrubby Slider, then click and hold. Dragging the mouse left or right will decrease or increase the font size, respectively. This interactive method offers a fluid way to dial in the perfect size.
Changing Font Color
To alter the color of your text, highlight the text you wish to modify. Ensure both the Type Tool and the relevant text layer are selected.
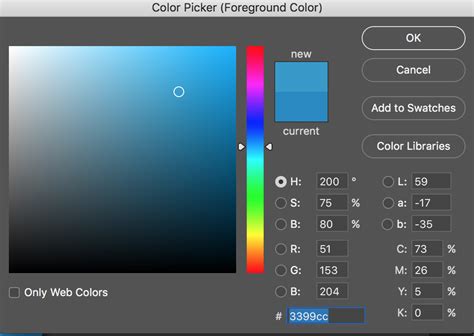
An efficient way to highlight text is, again, to double-click the type layer thumbnail. This selects all text on the layer and activates the Type Tool. With the text highlighted, open the Color Picker by clicking on the color swatch in the Options bar or by accessing it through the Character panel.
Within the Color Picker, you can move your cursor over the image. As you do, the cursor will change to an eyedropper, allowing you to sample colors directly from your image. Clicking multiple times enables you to pinpoint the exact hue you desire. To cancel a color change, click the "No Entry" button in the Options bar.
Font Styles and Families
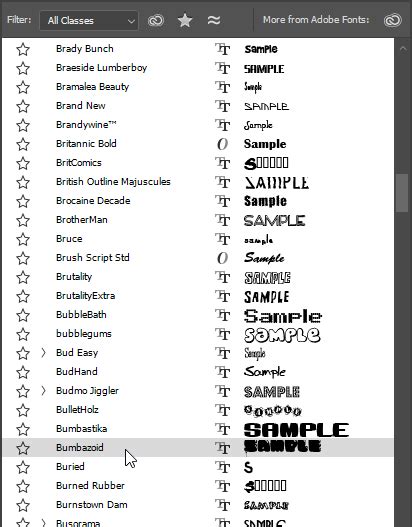
Photoshop supports a vast array of fonts, including Adobe Fonts, Variable Fonts, and your favorite saved fonts. These can be easily accessed and managed through dedicated filters within the Font Family menu.
- Show Adobe Fonts: This option, often highlighted in red in the interface, allows you to quickly access and activate fonts from Adobe's extensive library.
- Show Variable Fonts: Highlighted in green, this feature lets you explore and utilize the dynamic capabilities of variable fonts, which offer a range of weights, widths, and other properties within a single font file.
- Show Favorite Fonts: Marked in pink, this filter provides quick access to your most frequently used or preferred fonts.
The style of a font (e.g., Regular, Italic, Bold) will vary depending on the typeface. This can be selected from a dedicated style dropdown menu.
Anti-aliasing for Smoother Text
Anti-aliasing is a technique used to smooth out the jagged edges that can appear on text, especially at smaller sizes or lower resolutions. Photoshop offers several anti-aliasing options: None, Sharp, Crisp, Strong, and Smooth.
- None: Results in sharp, pixelated edges.
- Sharp: A moderate smoothing effect.
- Crisp: Offers a balance between sharpness and smoothness.
- Strong: Provides significant smoothing, often suitable for graphics.
- Smooth: The most aggressive smoothing option, making text appear very soft.
The choice of anti-aliasing method can impact the perceived clarity and readability of your text, particularly on screen. The "fractional widths" option in the Character panel, usually enabled by default, helps render anti-aliased text using fractional pixel widths for greater precision. However, for very small point-sized text intended for screen display, disabling this option might yield better results.
It's important to note that anti-aliasing options are primarily relevant for Paragraph Text, where text is contained within a defined box, rather than Point Text.

Advanced Text Manipulation
Beyond basic creation and formatting, Photoshop offers advanced features for more creative text applications.
Warping Text
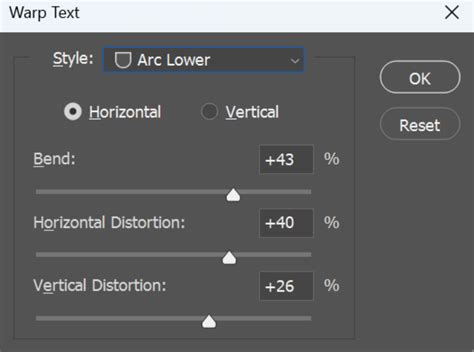
The Warp Text feature allows you to apply various distortions and effects to your text, creating curved, wavy, or otherwise stylized appearances. You can access these options from the Options bar when the Type Tool is active or through the Layer > Type menu. Selecting a type layer and opening the Warp Text dialog box presents a wide array of predefined styles to choose from.
Text on a Path or Shape
Photoshop enables you to place text along the outline of a pen path or within a vector shape. To do this, create a path or shape first. Then, hover the Horizontal Type Tool cursor near the edge of the path or inside the shape. The cursor will change to indicate that you can now add type. As you type, the text will conform to the path's curvature or the shape's boundaries.
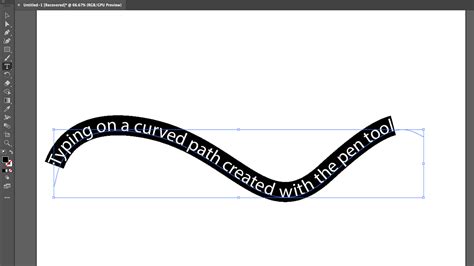
You can then edit the shape of the path or the boundaries of the shape to dynamically alter the text's form. Repositioning text on a path can be done using the Path Selection or Direct Selection tools.
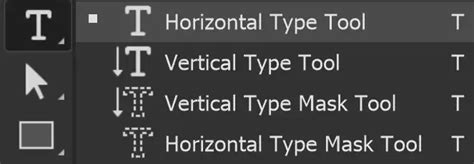
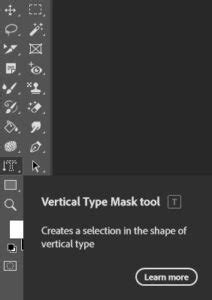
Type Mask Tools
The Horizontal and Vertical Type Mask tools offer a unique way to create selections in the shape of text. Instead of generating a type layer, these tools create a selection outline. This is incredibly useful for creating text-based cutouts or masks.
To create a text selection, select the Horizontal Type Mask Tool from the toolbar, click on your image, and type your desired text. Pressing Enter or clicking the Commit button will transform your text into an active selection.
A highly efficient workflow for creating text selections is to first use the standard Horizontal Type Tool to do all your typographic editing and then convert the resulting type layer into a selection by Command/Control-clicking the type layer thumbnail. This method preserves all the editing flexibility of type layers before committing to a selection.
Tool Presets: Saving Your Settings
The ability to create and save Tool Presets is a powerful feature in Photoshop, and it applies to the Type Tool as well. A Tool Preset allows you to store custom settings for any tool, including specific font choices, sizes, colors, and anti-aliasing preferences.
While presets for brushes are often considered more universally useful, type tool presets can significantly streamline your workflow, especially if you frequently use specific typographic styles. By saving your preferred settings as a preset, you can quickly recall them for future projects, ensuring consistency and saving valuable time.
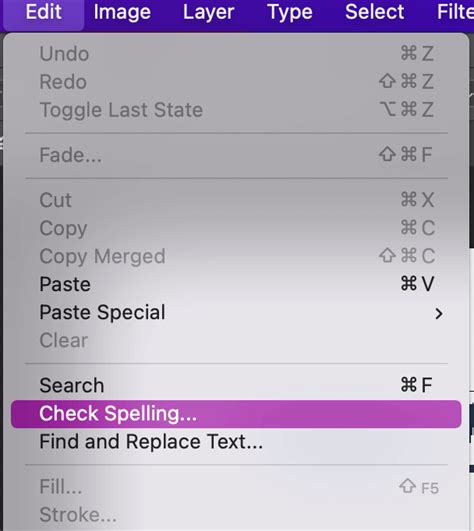
Spell Checking and Hyphenation
Photoshop includes robust multilingual spell-checking capabilities, accessible from both the Edit menu and the Character panel. It can share its linguistic library with other Adobe applications, allowing for consistent spelling checks across the Creative Suite.
The Character panel also provides options for hyphenation, utilizing dictionaries with standard syllable breaks to aid in breaking words correctly within paragraphs. You can select specific language dictionaries to ensure accurate hyphenation and spelling checks tailored to your content's language.
Understanding the Options Bar
When the Horizontal Type Tool is active, the Options bar at the top of the screen displays a range of controls specific to text manipulation. These include:
- Tool Switcher: A shortcut to toggle between Horizontal and Vertical Type tools.
- Font Family: A dropdown menu to select your desired typeface.
- Font Style: Options for styles like Regular, Italic, and Bold.
- Font Size: A numerical input or scrubby slider for adjusting text size.
- Anti-aliasing Options: Selection of smoothing methods.
- Text Alignment: Buttons for Left, Center, and Right alignment within Paragraph Text boxes.
- Font Color: Access to the Color Picker.
- Warp Text: A button to access the Warp Text dialog.
Advanced Type Features and Considerations
Photoshop's type engine is sophisticated, offering features that rival dedicated desktop publishing software.
OpenType Fonts and Features
Photoshop fully supports OpenType fonts and their advanced features. This includes ligatures, stylistic alternates, and contextual swashes, which can add a professional touch to your typography. The Paragraph panel provides comprehensive control over text formatting, justification, and hyphenation, similar to the engine found in Adobe InDesign.
WYSIWYG Font Menus
The Font Family menu in Photoshop utilizes a WYSIWYG (What You See Is What You Get) display. This means that each font name is shown in its actual typeface, allowing you to preview how a font will look before you select it, making the selection process much more intuitive.
Editing Text Layers
Because type is created on its own layer in Photoshop, it remains fully editable. To edit existing text, you can either highlight it directly with the Type Tool or double-click the Type Layer icon in the Layers panel. This non-destructive workflow ensures you can make changes at any stage of your design process.
Layer Styles and Effects
Layer styles, such as drop shadows, glows, and bevels, can be applied to type layers just as they can to image layers. This allows for sophisticated visual effects to be easily incorporated into your text elements, enhancing their impact and integrating them seamlessly with the overall design.

Generative AI and Future Text Capabilities
The landscape of image editing is constantly evolving, and Photoshop is at the forefront of incorporating cutting-edge technologies. Newer versions of Photoshop, such as Photoshop Elements 2026 and later, introduce generative AI features that can revolutionize text-based design.
- Generative Fill: This AI-powered feature allows users to input text prompts and receive fully rendered images or elements in seconds. This is invaluable for creating mood boards, mockups, or simply injecting creativity into design workflows. You can seamlessly add objects like hot air balloons, people, or trees into existing images with remarkably realistic lighting and shadow matching, eliminating the need for complex manual compositing.
- Insert Object: Similarly, the Insert Object feature leverages generative AI to place visual elements into your scene, ensuring they blend naturally with the existing lighting and shadows.
These AI capabilities promise to transform how text and imagery are combined, enabling users to "dream it" and "watch it become art" with unprecedented ease and speed.
Conclusion
The Horizontal Type Tool in Photoshop is far more than just a way to add words to an image. It's a powerful and versatile instrument that, when fully understood, allows for intricate typographic design, creative text manipulation, and seamless integration with other design elements. From the fundamental act of typing to advanced techniques like text on a path and the transformative power of generative AI, mastering this tool is essential for any Photoshop user looking to elevate their design work.
Text Portrait effect - Photoshop Tutorial
tags: #photoshop #horizontal #type #tool