Adobe Photoshop, a titan in the realm of digital imaging, offers a multitude of ways to save your creations. Among these, the PNG (Portable Network Graphics) format stands out, particularly for web designers and graphic artists, due to its exceptional support for transparent backgrounds and semi-transparent images. PNG files are also favored for their lossless compression technique, a characteristic that makes them a preferred choice for logo designers and other applications where image integrity is paramount. While the process of saving a file as a PNG in Photoshop is theoretically straightforward, users can sometimes encounter unexpected hurdles. This guide delves into the various methods for saving as PNG, addresses common troubleshooting issues, and explores advanced techniques for efficient workflow.
The Primary Methods for Saving as PNG
Photoshop provides several distinct pathways to export your work as a PNG file, each offering slightly different controls and workflows. Understanding these options is the first step to effectively utilizing the PNG format.
Utilizing the "Save As" Command
The "Save As" command is a foundational tool in Photoshop for preserving your work. When exporting as PNG, this method offers direct control over file naming and location.
- Step 1: Accessing "Save As": Navigate to the menu bar at the top of your screen and click on "File." From the dropdown menu, select "Save As."
- Step 2: Saving to Your Computer: In newer versions of Photoshop, you may need to select "Save on Computer" to access the traditional "Save As" dialog box. This allows you to choose a specific location on your hard drive for the file.
- Step 3: Selecting the PNG Format: Within the "Save As" dialog box, locate the "Format" dropdown menu. Scroll through the available options and select "PNG."
- Step 4: Configuring PNG Options: After selecting PNG, a "Save Options" dialog box may appear. Here, you can choose between "Smallest file size" and "Largest file size." It's important to note that in some versions of Photoshop, the distinction between these options might not be as pronounced as in earlier iterations, potentially leading to similar file sizes regardless of the selection. You can also choose "None" for compression, though this will result in a significantly larger file.
- Step 5: Saving the File: Click "Save" to finalize the process.
Leveraging the "Export As" Command
The "Export As" command is designed for more streamlined image export, offering a dedicated interface for optimizing images for web and other output mediums. This method is often preferred for its efficiency.
- Step 1: Initiating the Export: Go to "File" in the menu bar and hover over "Export."
- Step 2: Selecting "Export As": Click on "Export As…" from the submenu. This will open a new dialog box dedicated to export settings.
- Step 3: Choosing the PNG Format: Within the "Export As" dialog box, ensure the "Format" dropdown is set to "PNG."
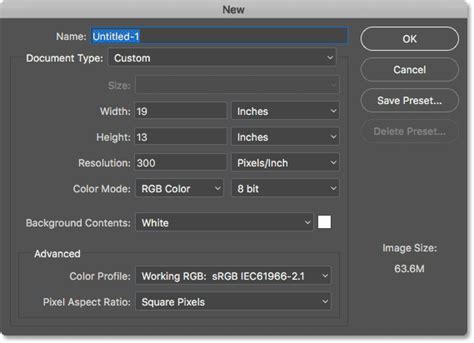
- Step 4: Adjusting Settings: Here, you can fine-tune various settings, including image size, canvas size, and color space. Crucially, you can select the desired bit depth (8 or 16 bits/channel) to control the level of detail. For most web use, 8 bits/channel is sufficient, while 16 bits/channel offers greater color fidelity at the cost of a larger file size. You can also choose whether to embed color profiles.
- Step 5: Exporting the Image: Click the "Export All" button to save the file, or "Export [Layer Name]" if you are exporting a specific layer. You will then be prompted to choose a location and name your file.

The "Save For Web (Legacy)" Command
While newer versions of Photoshop emphasize "Export As," the "Save For Web (Legacy)" command remains a powerful tool, particularly for users accustomed to its detailed controls. This command is specifically tailored for optimizing images for web use.
- Step 1: Accessing "Save For Web": Navigate to "File" > "Export" > "Save for Web (Legacy)…".
- Step 2: Selecting the PNG Format: In the "Save For Web" dialog box, choose "PNG-24" or "PNG-8" from the "Preset" dropdown menu. PNG-24 is generally recommended for higher quality and support for transparency, while PNG-8 can result in smaller file sizes for images with limited color palettes.
- Step 3: Configuring Transparency and Other Options: Ensure that "Transparency" is checked if you need a transparent background. You can also adjust image dimensions, optimize colors, and preview the file size and quality.
- Step 4: Saving the Optimized File: Click "Save…" to select a destination and name for your PNG file.
How To Save For Web In Photoshop (2026 Easy Guide)
Quick Export as PNG
For the most rapid export of a PNG file with default settings, Photoshop offers a "Quick Export" option.
- Step 1: Accessing Quick Export: Click on "File" in the menu bar.
- Step 2: Selecting Quick Export: Hover over "Export" and then click on "Quick Export As PNG."
- Step 3: Saving the File: A dialog box will appear, prompting you to choose a location and name for your PNG file. Simply click "Save." This method uses your pre-configured export settings, which can be adjusted under "Edit" > "Preferences" > "Export."
Troubleshooting Common PNG Saving Issues
Despite the straightforward nature of these saving methods, users may encounter situations where they are unable to save a file as a PNG. These issues typically stem from specific image settings or Photoshop preferences.
1. Incorrect Color Mode
One of the most common reasons for the PNG format becoming unavailable in the "Save As" or "Export As" dialogs is an incompatible color mode. Photoshop will not allow you to save as PNG if your document is in certain color modes.
- The Problem: If your image is in a mode like "Bitmap" or "Indexed Color," Photoshop may restrict PNG export. The PNG format is designed to handle a wide spectrum of colors, and these restricted modes do not align with its capabilities.
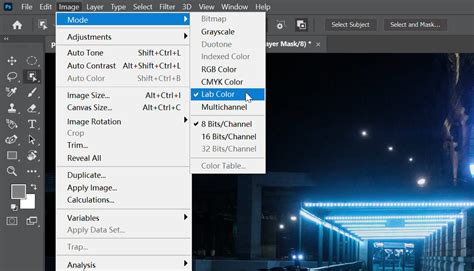
- The Solution: To resolve this, you need to convert your image to a compatible color mode. The most common and recommended modes for PNG export are "RGB Color" or "Grayscale."
- Go to "Image" > "Mode."
- Select "RGB Color." If your image is already in RGB but perhaps has an alpha channel that's causing issues, or if you're working with a very limited color palette, you might consider converting to "8 Bits/Channel" if it's currently 16 bits/channel.
- Once converted, try saving as PNG again.
2. Excessive Bit-Depth
The "bit-depth" of an image refers to the amount of data stored in each color channel, directly influencing the image's quality and color precision. While PNG supports various bit depths, excessively high values can sometimes lead to compatibility issues or unexpectedly large file sizes.
- The Problem: Images set to very high bit depths, such as 32 bits/channel, might not be directly savable as standard PNG files in all Photoshop versions or workflows. The PNG format typically excels with 8 bits/channel (for standard web images) or 16 bits/channel (for higher fidelity).
- The Solution: If you are working with a 32-bit image and need to save it as a PNG, you will likely need to reduce the bit depth.
- Navigate to "Image" > "Mode."
- Select either "8 Bits/Channel" or "16 Bits/Channel." Be aware that switching between different bit depth values in the middle of a job will alter the image slightly, as some of the original data may be lost or reinterpreted. Choose the bit depth that best balances your quality requirements with file size considerations.
- After conversion, proceed with saving as PNG.
3. Configuration Issues and Preferences
Occasionally, the issue might not be with the image itself but with Photoshop's internal settings or preferences. Corrupted preferences or specific export settings can interfere with the saving process.
- The Problem: Custom preferences or a corrupted preference file can lead to unexpected behavior, including the inability to save in certain formats.
- The Solution: Resetting Photoshop's preferences to their default state can often resolve these kinds of glitches.
- To reset preferences: Close Photoshop. Then, hold down
Ctrl + Alt + Shift(Windows) orCmd + Option + Shift(Mac) immediately after clicking the Photoshop icon to launch the application. You will be prompted to confirm that you want to delete the settings file. Click "Yes." - Caution: Resetting preferences will revert all your customizations, including custom shortcuts, workspace layouts, and brush presets, back to their default settings. You will lose the customizations you have made. It's advisable to back up your custom settings before performing a reset if you wish to restore them later.
- To reset preferences: Close Photoshop. Then, hold down
4. Newer Versions and PSD Saving
In some instances, particularly with recent updates to Photoshop, the software might behave differently regarding direct PNG exports, especially if the image contains multiple layers.
- The Problem: Newer versions of Adobe Photoshop may, in some scenarios, encourage or even mandate saving as a PSD (Photoshop Document) first, especially if layers are present and the software is attempting to preserve them. This is because the PNG format, unlike PSD, does not inherently support layers. Saving a Photoshop document as PNG is fundamentally an export operation that flattens the image.
- The Solution: If you find direct PNG saving problematic in a newer version, try these approaches:
- Flatten the Image: Before attempting to save as PNG, flatten your image. This merges all visible layers into a single background layer. To do this, go to "Layer" > "Flatten Image." Then, proceed with "Save As" or "Export As" to PNG.
- Save as PSD First: As a workaround, save your file as a PSD first. This ensures all your layers and editing capabilities are preserved. Then, open the newly saved PSD file and use "Save As" or "Export As" to create the PNG. This two-step process can circumvent specific version-related saving behaviors.
- Check Layer Visibility: Ensure that only the layers you intend to be part of the final PNG are visible. Hidden layers will not be exported.
Understanding PNG Properties and Their Implications
The PNG format's popularity stems from its specific technical attributes, which have significant implications for its use.
Transparency and Semi-Transparency
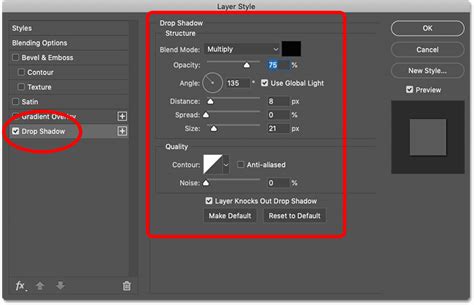
PNG is renowned for its robust support for transparency. Unlike formats like JPEG, which must have a solid color background, PNG can have fully transparent areas. This is crucial for web graphics, logos, icons, and any design element that needs to be placed over varying backgrounds without a visible box or border. Furthermore, PNG supports alpha channel transparency, allowing for semi-transparent pixels. This enables smooth blending and feathering effects, which are impossible with formats that only support binary (fully opaque or fully transparent) transparency.

Lossless Compression
PNG employs a lossless compression algorithm. This means that when an image is compressed into a PNG file, no image data is lost. The original quality of the image is perfectly preserved. This is a significant advantage over formats like JPEG, which use lossy compression, discarding some image data to achieve smaller file sizes. For graphics that require sharp lines, text, or distinct color areas, such as logos, icons, and diagrams, lossless compression ensures that these elements remain crisp and clear, without the artifacts that can plague JPEGs.
File Size Considerations
While lossless compression is beneficial for quality, it can sometimes result in larger file sizes compared to lossy formats like JPEG, especially for photographic images with complex color gradients. However, for graphics with large areas of solid color or limited color palettes, PNG compression can be very efficient. The "Save For Web" and "Export As" commands provide tools to optimize PNG files, allowing users to balance quality with file size by choosing between PNG-8 (with a limited color palette but potentially smaller files) and PNG-24 (with full color support but generally larger files).
Advanced Techniques: Droplets and Actions
For users who frequently perform the same saving or exporting tasks, Photoshop offers powerful automation tools like Actions and Droplets.
Utilizing Droplets for Batch Processing
Droplets are essentially drag-and-drop mini-applications that can execute a series of Photoshop actions. They can exist independently of Photoshop, allowing you to process files by simply dragging them onto the droplet icon.
- Creating a Droplet: You can record a sequence of steps, such as "Save as PNG," into a Photoshop Action. Then, you can convert this Action into a Droplet.
- Go to "Window" > "Actions" to open the Actions panel.
- Create a new Action set and record your desired PNG saving steps (e.g., "Save As PNG" with specific settings).
- Once the action is recorded, go to "File" > "Automate" > "Create Droplet…".
- In the "Create Droplet" dialog box, choose where to "Save Droplet In" (your desired location) and give it a name.
- In the "Play" section, select the Action set and the specific Action you recorded for saving as PNG.
- Using the Droplet: You can then drag any image file or multiple files onto the droplet icon. Photoshop will automatically open the files, execute the recorded action (saving them as PNGs), and save the output to a designated folder. This is an incredibly efficient way to process batches of images without manual intervention.
Recording Actions for Repetitive Tasks
Actions are a fundamental part of automating workflows in Photoshop. By recording a series of steps, you can play them back on any image to achieve the same result consistently.
- Recording an Action:
- Open the Actions panel ("Window" > "Actions").
- Click the "Create New Action" button.
- Name your action (e.g., "Save as PNG - Web Optimized").
- Click "Record." From this point on, every step you take in Photoshop will be recorded.
- Perform your desired PNG saving process (e.g., using "Export As" with your preferred settings).
- Once complete, click the "Stop" button in the Actions panel.
- Playing Back an Action: To apply the recorded action, select the action in the panel and click the "Play" button. Photoshop will then execute all the recorded steps on your currently open image. This is particularly useful for ensuring consistency in file formats and optimization settings across a project or series of images.
Saving as PSD: Preserving Layers and Editability
While the focus of this guide is PNG, it's crucial to understand the role of the PSD (Photoshop Document) format. Saving your work as a PSD is essential if you intend to return to the image later for further editing.
- The Importance of PSD: The PSD format is Photoshop's native file format. It preserves all layers, masks, adjustment layers, text layers, and other editing information. This means you can reopen a PSD file and continue working on it as if you had just left off, with full control over each element.
- How to Save as PSD:
- Click "File" > "Save As."
- Choose "Photoshop (*.PSD)" from the "Format" dropdown menu.
- Select a location and click "Save."
- You can also save to the cloud by selecting "Save to Cloud Documents."
This ability to retain layers is what makes PSD the standard for ongoing design work, while PNG is typically the final output format for web use or when a flattened image is required.
In conclusion, while saving a Photoshop file as a PNG is a fundamental operation, understanding the nuances of different export methods, troubleshooting common issues, and leveraging automation tools can significantly enhance your workflow and ensure optimal results for your digital creations. Whether you're a seasoned professional or a beginner, mastering these techniques will empower you to utilize the PNG format effectively.