Adobe Illustrator, a cornerstone of the Adobe Creative Cloud suite, is renowned for its prowess in crafting vector graphics. While its primary function isn't photo manipulation, it offers several effective techniques for removing backgrounds from images, a task often associated with programs like Photoshop. The optimal method for background removal in Illustrator hinges on the complexity of the image itself. This guide will delve into various approaches, from intricate manual tracing to automated AI solutions, ensuring you can achieve a clean, transparent background for any project.
Adobe Illustrator, identifiable by its distinct yellow icon bearing the letters "Ai," requires a subscription to Adobe Creative Cloud for access. For individual users, a single-app subscription is priced at $20.99 per month, while access to the entire suite of applications comes at $52.99 per month.
Understanding Illustrator's Capabilities for Background Removal
Illustrator's strength lies in its ability to work with vector graphics, which are mathematically defined and infinitely scalable without loss of quality. This makes it ideal for logos, illustrations, and typography. However, it can also be leveraged to isolate subjects from their backgrounds in raster images.
One of the key advantages of Illustrator is its capacity to differentiate between a subject and its background. This is particularly useful when dealing with images where the subject is clearly defined. For vectorized images, this distinction is often inherent in the design.
Navigating the Interface and Basic Tools
Before diving into background removal, it's beneficial to familiarize yourself with some fundamental Illustrator tools. To zoom in on your image, you can click the magnifying glass icon in the toolbar or press the 'Z' key. Clicking on the area you wish to enlarge will bring you closer. The ability to move your canvas is also crucial, especially when zoomed in. Pressing the Space key allows you to pan around the image, making off-screen areas visible.
The Sub-Selection Tool, represented by a white mouse cursor or accessed by pressing 'A', is essential for manipulating anchor points. When an anchor point is selected, two lines with dots, known as "Bezier curve handles," extend from it. These handles allow for precise control over curves and line direction. The Select Tool, identified by a black mouse cursor or accessed by pressing 'V', is used for selecting and moving entire objects.
Method 1: The Pen Tool for Precise Outlining
When dealing with photographs or complex images where an automated solution might not yield perfect results, the Pen Tool emerges as a powerful instrument. This method involves manually creating a precise outline around the subject you wish to preserve.
The Pen Tool allows you to create shapes and outlines with a series of clicks, each click placing an anchor point. The ultimate goal is to meticulously surround the foreground object of your image.
Creating Paths with the Pen Tool
To begin, select the Pen Tool from the toolbar. For straight lines, simply click to place anchor points. To create curved lines, click and drag when placing an anchor point. The direction in which you drag the mouse will influence the curve's direction. The curve will persist as you continue to place subsequent anchor points. If you need to create another straight line or alter the direction of a curve, click on the last anchor point before adding a new one. It's important to note that perfection isn't always immediate; you can adjust curves later.
Once you have created an outline that closely matches your subject, click on the first anchor point to close the shape, forming a complete path. It's important to note that the initial outline doesn't need to be absolutely perfect, as adjustments can be made.
To refine your outline, utilize the Direct Selection Tool (white arrow). This tool allows you to click on individual anchor points and manipulate the Bezier curve handles to perfect the shape of your outline.
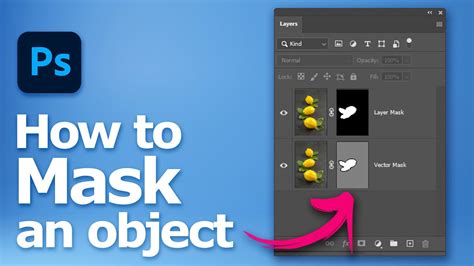
Utilizing Clipping Masks for Background Removal
After creating a precise outline with the Pen Tool, you can use it to mask the background. Select both your image and the created outline. Then, right-click (or Control-click on a Mac) and choose "Make Clipping Mask." This action effectively hides everything outside the boundaries of your outline, thus removing the background.
To visualize the transparency, you can toggle the transparency grid by going to View > Show Transparency Grid (keyboard shortcuts are Shift+CTRL+D for Windows and Shift+Command+D for Mac). This checkerboard pattern indicates transparent areas.
This method is particularly effective for images where the subject has clear, defined edges. The quality of the mask is directly dependent on the precision of your outline.
Method 2: Image Trace for Simpler Graphics
For images that are less complex, such as logos, illustrations, or graphics with solid colors, Adobe Illustrator's "Image Trace" feature offers a more automated approach. This tool converts raster images into editable vector artwork.
Steps for Using Image Trace
- Import Your Image: Open your Illustrator project and import the image you wish to edit.
- Select the Image: Use the Selection Tool (V) to click on the imported image.
- Access Image Trace: Locate the "Image Trace" panel. This can often be found in the control bar at the top of the screen or by going to Window > Image Trace.
- Choose a Preset: From the preset dropdown options in the Image Trace panel, select an appropriate setting. For most photographic images, "High Fidelity Photo" is a good starting point. For simpler graphics, options like "Logo" or "3 Colors" might be more suitable. You can also manually adjust the number of colors using the slider bar next to "Colors" or by typing in a number.
- Expand the Trace: Once you are satisfied with the preview, click the "Expand" button in the control bar at the top. This converts the traced image into editable vector paths and shapes.
- Ungroup and Delete: The expanded image is often grouped. To select individual elements, you'll need to ungroup them. Right-click on the expanded image and select "Ungroup." Now you can select the background elements using the Selection Tool (V) and press the Delete key to remove them.
This method works best on images with distinct color areas. For photographs with subtle gradients or complex textures, Image Trace may not produce clean results.
Adobe Illustrator Image Trace Tutorial For the Real World
Refining with the Magic Wand Tool
If the Image Trace results in multiple background elements of the same color, the Magic Wand Tool can be invaluable. This tool, represented by a wand icon, allows you to select objects or areas with similar characteristics, such as color, opacity, or stroke weight.
To use it, click on the most representative part of your background. You can customize its tolerance in the toolbar to fine-tune the selection. Once the background elements are selected, press the Delete key.
Method 3: Leveraging Transparency Grid for White Backgrounds
When you're working with an image that has a plain white background, Illustrator offers a straightforward method to remove it.
- Show Transparency Grid: To clearly distinguish transparent areas, go to View > Show Transparency Grid (Shift+CTRL+D or Shift+Command+D).
- Select the Background: Use the Direct Selection Tool (white arrow) to click on the white background areas you want to remove. If the background is a solid color, a single click might suffice.
- Delete: Press the Delete key.
This method is efficient for images with a uniform white background. If the white is part of the subject or has subtle variations, other methods might be more appropriate.
Method 4: AI-Powered Background Removal Tools
For the quickest and most effortless background removal, especially for photographs, consider utilizing AI-powered tools. While not directly within Illustrator's core functionality for complex photo editing, these external tools integrate seamlessly into a workflow.
Adobe Express: A User-Friendly Solution
Adobe Express offers a free AI background remover that can instantly eliminate distracting backgrounds from photos. Simply upload your image to the tool, and it will automatically remove the background, making it transparent.
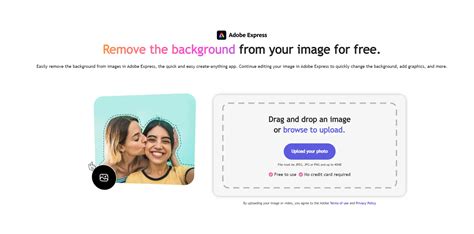
The resulting background-free image can then be downloaded and imported into Illustrator for further design work. Adobe Express also provides a vast library of royalty-free stock images and templates, allowing you to easily replace the removed background with new visuals or create entirely new compositions. This tool is accessible on both desktop and mobile devices, making it a versatile option for users on the go.
remove.bg: An Online Alternative
Similarly, remove.bg is a popular online tool that allows for automatic background removal in seconds. You can drag and drop or upload your image, and the AI will process it, providing a transparent background image for download.
These AI tools are particularly beneficial for marketers and designers who need to create high-quality content rapidly. They require no design skills to operate and are an excellent starting point for transforming photos into versatile design elements.
Saving Your Transparent Image
Once you have successfully removed the background, it's crucial to save your image in a format that supports transparency.
- PNG (.PNG): This is the preferred format for web images that require transparent backgrounds. PNG files are high-quality and can support millions of colors, making them ideal for both photos and graphics with transparency.
- TIFF (.TIF): TIFF is another high-quality format that supports transparency. It's often used in print workflows. When saving as EPS, you can choose TIFF for the preview and ensure transparency is enabled.
- PDF (.PDF): While PDF can support transparency, it's more commonly used for document sharing.
Formats like JPEG (.JPG) do not support transparent backgrounds. If you save a transparent image as a JPEG, the transparent areas will typically be filled with white.
When saving your work, consider saving it as an Adobe Illustrator (.AI) file as well. This preserves all your editable layers and paths, allowing you to revisit and make changes later.
For vector-based designs intended for broad compatibility, saving as an EPS (.EPS) file is a widely adopted practice. This format is compatible with almost all graphic applications and word processing programs. When saving to EPS, ensure you select an appropriate format for the preview and confirm that transparency is enabled.
Expert Insights and Workflow Enhancements
Shari Fairclough, a Social Media & Graphic Design Expert, emphasizes the versatility of Adobe Express for product launches, highlighting its ability to create fast, high-quality content. She notes that the AI background remover in Adobe Express makes the subject the focal point, allowing for seamless integration into various backgrounds and visual projects.
For those seeking to streamline their workflow, specialized hardware like TourBox can offer an excellent operational experience, similar to using a gaming controller, providing quick access to tools and functions.
While Illustrator is a powerful tool for vector graphics, it's worth noting that for complex photo manipulation tasks like background removal, programs such as Adobe Photoshop or free alternatives like GIMP might be more specialized. However, as this guide demonstrates, Illustrator is certainly capable of achieving excellent results with the right techniques.
By mastering these diverse methods for background removal in Adobe Illustrator, you can enhance your design projects, create compelling visuals, and ensure your subjects stand out against any backdrop.
tags: #adobe #illustrator #remove #background