Photoshop's Refine Edge tool is an indispensable feature for photographers and graphic designers aiming for precise selections, particularly when dealing with intricate details like hair, fur, or transparent elements. While Photoshop offers a suite of automatic selection tools, they rarely achieve perfection, leaving users to manually clean up edges. This is where the Refine Edge tool shines, acting as a sophisticated brush that hones in on difficult-to-select areas, effectively masking away unwanted backgrounds and enabling seamless compositing or exposure blending.

The Evolution of Edge Refinement in Photoshop
Historically, the Refine Edge tool was a standalone dialog box that appeared after making an initial selection. However, in more recent versions of Photoshop CC, its functionality has been integrated into the powerful "Select and Mask" workspace. This evolution signifies Photoshop's commitment to streamlining workflows and providing more advanced control over selections. When you initiate a selection using tools like the Quick Selection Tool, Magic Wand, or Lasso, you'll now find the "Select and Mask" option readily available in the toolbar at the top of your workspace. This modern approach consolidates numerous selection refinement controls into a single, intuitive environment.
Understanding the Select and Mask Workspace
Upon entering the "Select and Mask" workspace, you are presented with a range of tools and options designed to fine-tune your selection. On the left-hand side, you'll find the Refine Edge Brush Tool, positioned prominently among other selection aids. On the right, the Properties Tab becomes your control center, housing crucial sliders and options. Before diving into the Refine Edge Brush, it's beneficial to understand the different View Modes. These modes, accessible from the Properties Tab, allow you to visualize your selection against various backgrounds, such as a solid color, a transparent overlay, or even a duplicate of your image, making it easier to spot imperfections.
Key Controls within the Refine Edge Tool
The Refine Edge Brush Tool itself is the primary instrument for meticulously refining the boundaries of your selection. Its efficacy lies in its ability to intelligently analyze pixel data along the edges of your subject.
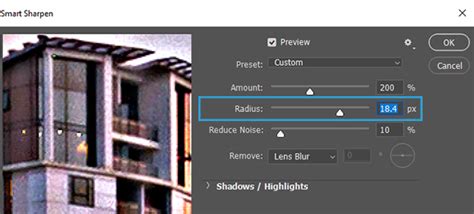
The Radius Slider: This is arguably the most critical adjustment. The Radius slider dictates how far from the initial selection Photoshop should look for edge pixels to refine. A smaller radius is suitable for subjects with sharp, well-defined edges, while a larger radius is necessary for softer or more complex transitions, such as wisps of hair or fur. For general exposure blending of high-contrast images, starting with a radius between 1-3 pixels is often a good practice. For more challenging areas like fine hair, you may need to increase this value significantly.
Smart Radius: This feature is a game-changer when your subject possesses a variety of edge types - some relatively straight and others exceptionally messy. Smart Radius allows Photoshop to dynamically adjust the refinement radius based on the complexity of the edges it encounters, leading to more natural and accurate results across the entire selection.
Decontaminate Colors: This option is invaluable for eliminating color fringing or casts that a colored background might impart onto the edges of your subject. This is particularly useful when working with studio shots where a colored backdrop might subtly spill onto the subject's hair or clothing. When checked, Photoshop attempts to neutralize these unwanted color casts by sampling surrounding pixels.
Output To: This setting determines what happens to your refined selection once you're finished. You can choose to output the selection as a Layer Mask, a New Layer with Layer Mask, or even a New Document, providing flexibility for your subsequent editing steps.
The Art of Painting with the Refine Edge Brush
Once you've selected the Refine Edge Brush Tool and adjusted your initial settings, the process of painting begins. The technique involves carefully brushing over the problematic edges. The general advice is to start from within the subject near the edge and paint outwards, just into the background. This allows the tool to analyze the transition zone effectively. For areas like hair, it's crucial to avoid painting too far into the subject's actual hair strands, as this could lead to unintended transparency. The goal is to guide Photoshop's algorithm to accurately distinguish between the subject and the background.
Refining and Troubleshooting Imperfections
As with any automated tool, even the advanced Refine Edge Brush isn't infallible. It's essential to meticulously check your edges after the initial refinement. This is where critical observation and manual correction come into play.
Manual Adjustments: If you notice areas that have been incorrectly masked out or areas of the background that remain visible, you can switch to the standard Brush Tool within the "Select and Mask" workspace. By setting your brush color to black, you can paint to mask out unwanted areas. Conversely, painting with white will reveal areas that were incorrectly masked. It's also beneficial to change your brush mode to "overlay" when working directly on the layer mask for more nuanced blending.
Using Solid Color Fill Layers for Inspection: A highly effective method for scrutinizing your edges is to create a new Solid Color Fill Layer beneath your subject. This provides a uniform background against which any halos or imperfections around the subject, especially noticeable around hair, will become starkly apparent. If you encounter persistent color casts that "Decontaminate Colors" didn't fully resolve, it's an indication that you might need to revisit that setting or perform further manual cleanup.
Advanced Hair Masking with Channels in Photoshop | PHLEARN
Practical Applications and Workflow Tips
The Refine Edge tool is a cornerstone for various advanced Photoshop techniques:
Compositing: Seamlessly integrating a subject from one image into a different background is significantly simplified with accurate edge selections. The Refine Edge tool ensures that even complex elements like wisps of hair blend naturally with the new environment.
Exposure Blending: When combining multiple exposures of the same scene to achieve a greater dynamic range, you often encounter hard edges between the blended areas. The Refine Edge tool can soften and refine these transitions, creating a more harmonious and natural-looking final image.
Solid Color Backgrounds: For straightforward tasks like replacing a solid background with a different color, the Refine Edge tool makes the process remarkably efficient. Once the subject is isolated, changing the background color is as simple as selecting a new color from the Solid Color Fill Layer's picker.
Workflow Recommendation: For beginners, it is highly advisable to start by practicing the Refine Edge tool on images with subjects isolated against solid, contrasting backgrounds. This provides a less complex starting point and allows you to focus on understanding the tool's core mechanics. As you gain confidence, you can then tackle more challenging scenarios.
The "Magic" and the Mystery of Refine Edge
The term "magic" in relation to the Refine Edge tool is fitting, encompassing both its remarkable power to create masks that would be incredibly laborious to achieve manually, and the occasional confusion that can arise from its sophisticated algorithms. Photoshop's Refine Edge tool operates by analyzing pixel data within a specified radius around an initial selection. It endeavors to create a smooth gradient between black and white in the mask, favoring the dominant pixel types within that radius. This intelligent processing is what allows it to handle complex edges with impressive results.
Beyond the Tool: Practice and Mastery
Ultimately, mastering the Refine Edge tool, like any powerful feature in Photoshop, requires practice. Understanding the interplay of the various sliders and options, and knowing when to apply manual corrections, comes with experience. Zooming in to the pixel level (using the Zoom Tool, activated by pressing "Z") is crucial for detailed inspection and refinement. By consistently applying these techniques and experimenting with different image types, you will undoubtedly improve your selection speed and accuracy, becoming more efficient in your image editing workflow.
The ability to make precise selections is a fundamental skill in digital imaging, and the Refine Edge tool in Photoshop CC stands as a testament to the software's continuous advancements in this area. Whether you are a seasoned professional or an aspiring enthusiast, dedicating time to learn and practice with this tool will significantly elevate the quality and impact of your work.