Adobe InDesign stands as a cornerstone of professional layout and page design, offering a robust platform for creating everything from intricate brochures to comprehensive magazines. However, even the most powerful software can have limitations. This is where InDesign extensions and plugins become invaluable, acting as powerful add-ons that extend the program's functionality, streamline workflows, and unlock new creative possibilities without the need to switch between disparate applications. These software modules, developed by Adobe and a vibrant community of third-party developers, integrate seamlessly into the InDesign environment, allowing designers to perform specialized tasks, automate repetitive processes, and achieve sophisticated effects with greater efficiency and precision.
The Evolving Landscape of InDesign Extensibility
The architecture powering InDesign extensions has seen significant evolution. Historically, plugins were the primary method for extending InDesign's capabilities. Today, these plugins are increasingly powered by the Unified Extensibility Platform (UXP). This modern framework allows developers to leverage contemporary JavaScript (including ES5 and most ES6 features), enabling the creation of more dynamic, responsive, and feature-rich extensions. This shift signifies Adobe's commitment to modernizing its product ecosystem and providing developers with powerful tools to innovate within the Creative Cloud.
Many essential plugins are bundled with InDesign itself and are automatically installed within the "Plugins" folder. These pre-installed modules cover a range of functionalities, from importing and exporting various file formats to automating common tasks and applying special effects. For third-party plugins, if an installer is provided, it is the recommended method for installation, ensuring proper integration and functionality. The flexibility of InDesign's extensibility means that users can incorporate any commercial plugin designed to work with the software, tailoring their InDesign experience to meet specific project demands.
Navigating and Managing Your Extensions
Accessing the vast array of available extensions and plugins is straightforward. Adobe provides a centralized hub through the "Window > Browse Add-ons" menu within InDesign. This feature allows users to discover, acquire, and manage both free and paid add-ons directly from the Creative Cloud application. Once acquired and installed through this workflow, these extensions become readily available within InDesign, typically appearing under the "Window > Extensions" menu or within a designated panel. For those who have downloaded extensions, a convenient way to view them is by navigating to the browse add-ons webpage and utilizing the "View my add-ons" option in the left-hand pane.
For users seeking to troubleshoot issues related to plugins, Adobe Technical Support can offer valuable assistance in isolating and resolving problems. Furthermore, the "Flyout menu" within InDesign panels provides an elegant solution for accessing additional operations without cluttering the user interface, ensuring a cleaner and more focused workspace. Persistent storage capabilities within extensions allow them to save data that remains available across different InDesign sessions or even through version upgrades, ensuring continuity and preserving user settings and preferences.
Streamlining Digital Asset Management with HIVO
A prime example of a powerful InDesign extension designed to enhance creative workflows is the HIVO Adobe InDesign plugin. This integration is specifically engineered to simplify digital asset management for creatives. It offers seamless search, import, and uploading functionalities directly within the InDesign interface, eliminating the need to constantly switch to external Digital Asset Management (DAM) systems.
With the HIVO plugin, users can effortlessly locate, import, and upload media assets, significantly boosting the efficiency of their creative processes. This not only simplifies version control for assets but also allows designers to dedicate more time and focus to their core design work.
Installing and Accessing the HIVO Extension
For customers who have purchased the HIVO integration, the InDesign extension can be downloaded from Adobe Exchange. The installation process is designed to be intuitive:
- Open Adobe InDesign on your computer.
- Navigate to the Extensions menu in InDesign to open the Adobe Exchange, or visit the specific listing page for the HIVO extension on Adobe Exchange.
- Search for the HIVO extension.
- Click the Install button and follow the on-screen prompts to complete the installation.
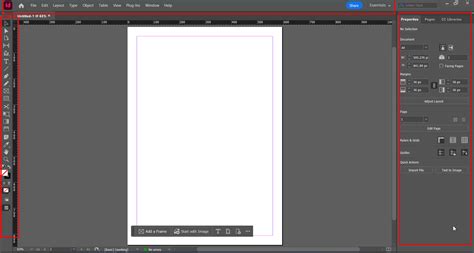
Once installed, the HIVO extension can be accessed by going to the Plugins tab in the top menu and selecting HIVO Connector.
Logging In and Utilizing HIVO Assets
Upon opening the HIVO extension panel, users will find a Login tab. Here, they can enter their HIVO credentials (username and password). For those who have purchased Single Sign-On (SSO) capabilities, a convenient passwordless login option is available.
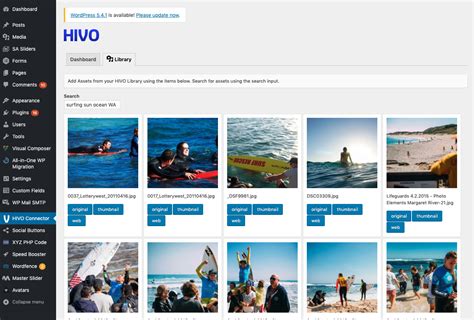
The HIVO Connector allows users to search for assets by browsing through the organized folders within their HIVO library. This direct access within InDesign ensures that the right assets are always at the fingertips of the designer.
Importing and Swapping HIVO Asset Versions
A key feature of the HIVO plugin is its ability to import assets directly from the HIVO library into an InDesign project. Users can locate the desired assets within the HIVO Connector, select the specific version they wish to import, and the asset will immediately appear in their project, ready for use.
Silicon Connector for Box: connect Adobe InDesign to graphic assets stored online.
The ability to easily swap between different asset versions is a significant workflow enhancer. This feature makes it seamless to maintain lightweight InDesign project files by initially using lower-resolution versions of assets. Later, when the project is nearing completion for export or print, users can effortlessly swap these for higher-resolution versions, ensuring optimal quality without bogging down the design file during the initial stages.
To swap between different asset versions:
- Simply click on the image that has been imported into the InDesign project.
- Click on the new version you wish to use, and the connector will automatically swap the versions for you.
Note on Asset Permissions: It's important to understand that user permissions within the HIVO plugin mirror those of the main HIVO platform. When a user logs in through the InDesign extension, they will only be able to view and utilize the assets to which they have been granted access within the HIVO system.
Importing InDesign Pages as Templates in HIVO
HIVO assets are managed as linked URLs within InDesign, meaning the asset itself is not stored directly on your desktop. If any links appear to be missing within an InDesign document, users can click "Download Missing links" in the Document tab to reconnect them. Once the links are re-established, the process of saving InDesign pages as templates in HIVO can commence:
Step 1: Save to HIVO as TemplateClick the "Save to HIVO as Template" button.
Step 2: Configure Image and Color Settings
- Ensure the "Rasterize images in places" option is selected.
- Select the appropriate Print export setting to preserve the CMYK color profile, which is crucial for print accuracy.
Step 3: Complete the Upload ProcessClick "Save to New Template" to finalize the upload.
When saving a template to HIVO, users have two primary choices:
- Save to New Template: This option is ideal for saving the current InDesign page as an entirely new template within HIVO's template library.
- Overwrite Existing Template: Select this if you intend to update an existing template in HIVO with the current version of your InDesign page.
Step 4: View Your Template in HIVO After ImportOnce the processing is complete, click the "Click to View Template" button.Click "Allow" to open the design template in your web browser.
Managing Layers and Publishing Templates on HIVO
After a template is open within the HIVO platform, users can prepare it for broader access by light users. This involves naming, re-ordering, and locking layers to control what elements are editable.
Follow these steps to manage layers:
- Click on the corresponding layer on the main canvas.
- Scroll down to Layer settings.
- Click the lock icon next to the layer name. This action locks all settings for that specific layer, while still allowing it to be editable by designated light users.
- Repeat these steps for all other layers that require similar management.
Note on Hiding Layers: To hide a layer completely and prevent it from being edited by a light user, click the lock icon located at the top of the Layer menu, next to the layer's name.
Publishing the Template
Once the layer setup is finalized, the template can be published:
- Click the Details icon (the fourth icon from the top, located on the right side) and select the 'Edit Details' button.
- Click "Publish Template".
- Set the Category and define the Limit export format options.
To protect the file structure of a published design template:
- Check the box labeled "Prevent adding, moving or deleting of layers." This setting specifically applies to users who have been assigned the "Must use Image Editor Templates" permission by an administrator.
Note on Template Restrictions: For template restrictions to take effect, the administrator must ensure that the "Light User" group has been granted the correct permissions. This involves accessing the permission settings for the Light User group, navigating to the Asset Editor section, and checking the permission labeled "SETTING."
A Curated Collection of Essential InDesign Plugins
While InDesign offers a vast array of built-in tools, specific needs often arise that can be best addressed by specialized plugins. These add-ons can range from enhancing typographic control and automating complex layouts to improving team collaboration and facilitating file conversions. The following is a curated list of some of the most impactful InDesign plugins available, categorized for easier navigation.
Images and Visual Assets
- StockSolo: Integrates with services like Unsplash, allowing users to search for and import stock images directly within InDesign, Illustrator, and Photoshop without leaving their current document. This significantly streamlines the process of finding and using visual assets.
- MagicTints: Utilizes machine learning to convert images and photos to a consistent color palette. It automatically applies a chosen color scheme from one image to any number of others, preserving original contrast and illumination, eliminating the need for external editing or LUTs.
Text, Formulas, Tables, and Figures
- Typefitter (by Typefi): An essential tool for serious type composition, Typefitter automatically identifies and corrects text-related issues such as overset text, short lines, and unbalanced columns, ensuring professional typographic results.
- Text Count (by DTP Tools): Provides real-time word count monitoring within InDesign documents and offers the ability to export comprehensive reports, aiding in content management and adherence to word count requirements.
- Vertical Justification (by in-tools.com): Enhances InDesign's built-in Vertical Justification feature, which is often considered insufficient for professional typesetting. This plugin offers more precise controls and automations for distributing space within text frames.
- Use formulas in Tables (by DTP Tools): The "Active Tables" plugin allows for sorting tables and creating complex formulas within tables, with calculation results also embeddable within text. This is particularly useful for generating price lists, invoices, and other data-driven layouts.
- Mathematic Equation Editors: Several plugins are available to add professional mathematical, scientific, and financial equation editing capabilities to InDesign, catering to academic and technical publishing needs.
- Automatic Figure and Table Numbering (by Virginia Systems): Dynamically numbers figures and tables and simplifies the process of creating and updating cross-references to these elements within a document.
Productivity and Automation
- Import a Word file using automatic semantic structuring (by Jens Tröger): Bookalope uses AI to clean up Word documents, stripping visual styles and exporting semantically structured content directly into InDesign, saving significant reformatting time.
- Multi-Find/Change (by Martinho da Gloria): Offers a powerful interface for creating and executing a series of find-change operations, enabling complex text manipulation and standardization across documents.
- Power Headers (by in-tools.com): Extends InDesign's variable capabilities to automate almost any aspect of document headers, offering extensive customization options for dynamic content.
- Fully-automated Complex Layouts Footnotes in InDesign (by id-extras.com): The "Footwork" suite provides complete control over footnote layout, simplifying the management of complex footnote structures.
- Apply master pages based on paragraph and object styles (by id-extras.com): This add-on links master pages to paragraph and object styles, allowing for dynamic application of master page elements based on document content.
- Link Google Docs with InDesign (by Em Software): "DocsFlow" enables seamless linking of Google Docs and Spreadsheets with InDesign. This allows for independent editing of both the InDesign story and the external document without data loss.
- Link Excel and Word with InDesign (by Em Software): "WordsFlow" provides similar linking capabilities for Microsoft Word and Excel files, facilitating collaborative workflows and efficient content management.
- Reflective Object (by in-tools.com): For documents with facing pages, this plugin automatically applies layout changes to elements positioned relative to the spine across multiple pages, saving considerable manual effort.
- Grid Calculator Pro Edition (by Designers Bookshop): Assists in the rapid creation of professional grid-based layouts, providing tools for precise design structure.
- Group objects in different layers (by DTP Tools): "Power Groups" allows for the grouping of objects across multiple layers, enhancing organizational flexibility.
- Layer Tools (by DTP Tools): A bundle of plugins that facilitate layer management, including exporting selected layers, importing layers from other documents, grouping layers into folders, and recording layer visibility states.
- Combine layer into views (by Axaio): "MadeForLayers" simplifies the creation and editing of documents with regional variations by combining layers into distinct views, streamlining team collaboration and proofreading.
- Blatner Tools (by DTP Tools): A suite of 12 plugins developed by David Blatner, designed to accelerate workflows through various automations for styles, fractions, paging, and more.
- Select All Similar (by Rorohiko): The "LikeFindsLike" plugin introduces the familiar "Select All Similar" functionality from Illustrator into InDesign, enabling quick selection of objects with shared attributes.
Team Productivity and Collaboration
- Annotations (by DTP Tools): Allows for the import of notes and comments from PDF files directly into InDesign, streamlining the feedback and revision process.
- Indicate changes to proofreaders (by Kerntiff Publishing Systems): This plugin adds a customizable red bar to the margin next to any change in a text frame, immediately highlighting modifications for proofreaders.
- History Log (by Rorohiko): Inserts automated logs and timestamps into text frames, documenting file modifications and providing a historical record of changes to an InDesign document.
- History (by DTP Tools): Mimics Photoshop's History panel, allowing users to undo and redo steps, and save different versions of their file, providing a robust safety net for complex editing.
- Frame Reporter (by Rorohiko): Displays critical information about InDesign document frames directly within the workspace, aiding in data management and layout analysis.
- Yearbook creator (by Balfour): A comprehensive solution designed to facilitate the creation of yearbooks using InDesign, offering specialized tools for this niche publication type.
File Conversion and Data Exchange
- InDesign to Markdown (by Rorohiko): Enables the conversion of InDesign documents and books into the Markdown format, useful for web content creation and cross-platform compatibility.
- Convert InDesign document to HTML5 (by Ajar Productions): "In5" converts InDesign layouts directly into HTML5 without requiring any coding knowledge, ideal for creating interactive web content.
- Convert PDF to INDD (by Markzware): "PDF2DTP" (PDF to Desktop Publishing) converts PDF files into editable Adobe InDesign documents, invaluable for repurposing existing PDF content.
- Batch Convert: This extension handles conversions between various file formats, including PDF and Word to InDesign and vice-versa, and can also transform QuarkXPress and PageMaker documents.
Other Specialized Tools
- Create accessible PDF files (by Axaio): "MadeToTag" assists in creating tagged PDF files that comply with the PDF/UA-Standard, ensuring universal accessibility for documents.
- Patterns into InDesign (by Teacup Software): Allows for the creation of patterns based on core templates like Crosses, Lines, and Scallops, adding decorative elements to designs.
- Floating library-palette (by Rorohiko): Provides a floating palette filled with images retrieved from specified folders, enabling easy drag-and-drop functionality for frequently used assets.
- Index Utilities (by Kerntiff Publishing Systems): A collection of scripts and plugins designed to assist in embedding index markers within InDesign documents, simplifying index creation.
- Track your time (by Openhour): "TimeTracker" automatically and privately captures user activity within InDesign, generating on-demand timesheets for project tracking and billing.
- Check files for printing quality (by Markzware): "FlightCheck" is a standalone application that performs pre-press checks on InDesign files and a wide range of other file types, identifying potential printing issues before output.
- Create product catalogs (by 65bit): "EasyCatalog" is a renowned plugin for automating the creation of product catalogs and managing large volumes of data from external sources.
- InDesign Repair for Windows/Mac: Utilities designed to repair corrupt InDesign files, offering a lifeline when document integrity is compromised.
- Create calendars (by Scott Selberg): A plugin that simplifies the creation of personalized calendars in InDesign, offering extensive customization options and multi-language support.
- Barcodes directly into InDesign (by Teacup Software): "BarcodeMaker" creates various types of barcodes directly within InDesign, with options for manual input, Excel data integration, or database connectivity.
- EAN-13 barcodes (by Indiscripts): "BookBarcode" specifically generates EAN-13 barcodes within InDesign.
- iDML app for iOS (by DTP Tools): An iOS application that allows for editing InDesign stories and applying paragraph and character styles on mobile devices.
- Install/remove/update Adobe Creative Suite/Cloud extensions (by Anastasiy): A crucial utility for managing all installed extensions and plugins, streamlining installation, removal, and update processes.
The INDD File Format: The Foundation of InDesign Projects
When working with Adobe InDesign, the primary file format used for saving projects is the .INDD file. This proprietary format is fundamental to InDesign's page design capabilities, encompassing all the elements necessary to create professional brochures, books, magazine spreads, and a myriad of other design projects. Introduced with the first version of Adobe InDesign in 1999, the INDD format has evolved alongside the software and is now an integral part of the Adobe Creative Cloud suite.
The InDesign Document file type is specifically engineered for layout design. INDD files are ideal for multi-page projects and are the preferred choice for creating books, magazines, brochures, flyers, and other print or web items that rely heavily on sophisticated design elements. They are also well-suited for designing e-publications, online newsletters, and presentations. Users of Adobe InCopy often work directly with INDD files to edit content within a pre-formatted page layout.
While INDD files are the native format, their compatibility is largely confined to Adobe InDesign and other Creative Cloud applications. There is no direct functionality to open INDD files in software like Photoshop. However, InDesign offers robust export options, allowing users to convert their INDD files into various formats, including PDF (for print or web), with the ability to select high resolution to maintain file quality. INDD files are a form of vector file, contributing to their scalability and crispness.
Bridging Languages with Translation Extensions
For global projects, language translation is a critical component. While not a plugin in the traditional sense, Redokun offers a streamlined solution for translating InDesign documents. It provides a flexible system adaptable to various workflows, catering to freelance designers and large companies with international teams. Redokun allows for hassle-free translation management, integrating with InDesign to facilitate the localization process.
Another notable translation-focused extension is the Adobe InDesign plugin by Smartling. This paid product allows users to send, preview, and receive translations directly from within Adobe InDesign. It's important to note that some cybersecurity software, such as ZScaler and InfoBlox, may interfere with access to this plugin. Upon authorization, an Authorization window will appear, prompting users to log in to Smartling, with a "Browser Log In" option available for convenience. By default, variants are disabled, and in most scenarios, it is recommended to keep them that way. The "Pending" status indicates current translations.
The decision to adopt InDesign extensions and plugins should be guided by a careful assessment of specific project needs. Identifying tasks that are time-consuming or prone to errors is the first step. Crucially, compatibility with existing InDesign versions and operating systems must be verified. Ease of use is paramount, especially for teams with varying skill levels, ensuring that the chosen tools enhance rather than hinder productivity. Scalability and long-term value should also be considered, alongside pricing and licensing models that align with project scope and budget. After installation, extensions typically appear within the InDesign menu or as dedicated panels, often requiring a restart of InDesign to become fully active.