Adding motion blur to your photographs can transform a static image into a dynamic scene, conveying a sense of speed, action, and artistic flair. Whether you aim to capture the streaks of car lights on a highway, the blur of a runner's legs, or simply want to draw the viewer's eye to a specific subject, Adobe Photoshop offers a versatile suite of tools to achieve these effects. This guide will delve into various methods for creating compelling motion blur, from fundamental filters to advanced techniques, empowering both beginners and seasoned professionals to elevate their imagery.
Understanding Motion Blur: The Essence of Movement
Motion blur is an optical phenomenon that occurs when a moving object is captured with a sufficiently long exposure time, causing it to appear streaked or blurred in the final image. In photography, this is directly related to the shutter speed. A fast shutter speed freezes action, resulting in a sharp, crisp image where details are clearly defined. Conversely, a slower shutter speed allows the camera's sensor to be exposed to light for a longer duration. If an object is in motion during this extended exposure, its movement is recorded as a blur. This "drawn-out" representation captures multiple fractions of a second, creating the characteristic motion blur streaks.
While photographers can intentionally create motion blur in-camera by adjusting shutter speed, Adobe Photoshop allows for the simulation and enhancement of this effect on existing images. This digital approach offers precise control and the ability to apply blur selectively, opening up a world of creative possibilities.
Preparing Your Image for Blur Effects: The Power of Smart Objects
Before diving into applying blur filters, it's crucial to prepare your image for non-destructive editing. The industry-standard practice for this is to convert your image layer into a Smart Object. This conversion wraps your layer in a "smart container," allowing you to apply filters as Smart Filters. Smart Filters are live filters, meaning you can re-edit their settings at any time without permanently altering the original image data. This is particularly beneficial when experimenting with blur effects, as it allows for easy adjustments to intensity, direction, and masking.
To convert your layer to a Smart Object, simply select the layer in the Layers panel and choose "Convert to Smart Object" from the Layer menu, or right-click on the layer and select the same option. You can also click the Lock icon on the background layer to unlock it, which is a prerequisite for some blur operations. Alternatively, for a safe workflow, you can duplicate your background layer (using the shortcut Ctrl+J or Cmd+J, or by right-clicking and selecting "Duplicate Layer") and work on the copy.
Simulating Movement with Path Blur
The Path Blur filter is an excellent tool for creating the illusion of directed movement. It allows you to draw a path along which the blur will be applied, mimicking the trajectory of a moving object. Renowned art director Kathleen Martin demonstrates how to leverage this filter to give subjects the appearance of quickness.
To begin, open your chosen image in Photoshop. Once your layer is unlocked or converted to a Smart Object, navigate to Filter > Blur Gallery > Path Blur. Photoshop will automatically add a default marker with an arrow indicating the direction of movement. You can then manipulate this marker by dragging the arrow to precisely control the direction of the blur. The "Speed" slider in the Blur Tools panel allows you to adjust the intensity of the path blur, effectively speeding up or slowing down the perceived motion. You can also adjust a "taper" value to control how the blur fades along the path.
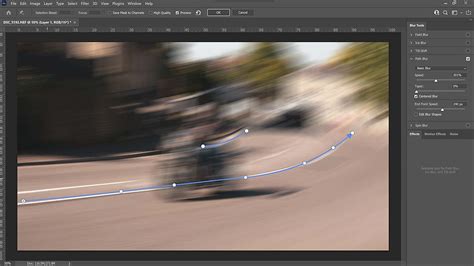
For more complex motion, you can define a custom path. This involves drawing a line with the blur tool, and you can even create curve points to generate new curves within the path. Double-clicking an endpoint reveals red blur shape guides, and Opt/Alt-clicking a curve point can convert it into a corner point, offering granular control over the blur's trajectory.
Advanced Path Blur Controls: Strobe and Shape
The Path Blur filter also offers advanced options for simulating specific types of motion. Under the Path Blur section in the Blur Tools panel, you can choose between "Basic Blur" and "Rear Sync Flash" blur. The latter simulates the effect of a strobe flash, adding a pulsed quality to the motion.
The "Strobe Strength" slider controls the intensity of these strobe flashes. Setting it to 0% results in continuous blur, while 100% displays strobe flashes with no continuous blur between them. This feature is useful for replicating the look of fast-paced action or the streaks of light from multiple sources. Additionally, you can optionally adjust the blur shape guides to further refine the appearance of the motion.
Radial Blur and Iris Blur: Simulating Camera Effects
Radial Blur and Iris Blur are filters designed to mimic optical effects often achieved with specific camera lenses or techniques, such as a shallow depth of field.
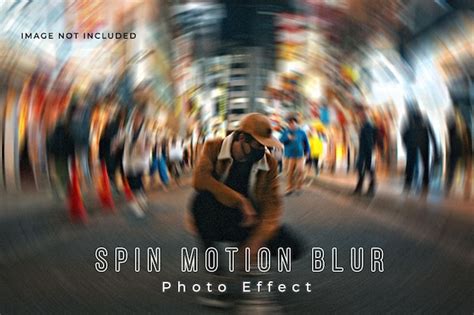
Radial Blur: A Spinning Effect
The Spin Blur effect, a type of radial blur, allows you to rotate and blur an image around one or more points. This can create a sense of rotation or outward expansion. In the Blur Tools panel, under the Spin Blur section, the "Blur Angle" control dictates the amount of blurring, ranging from 0 to 360 degrees. Similar to Path Blur, Spin Blur also offers "Strobe Strength" and "Strobe Flashes" controls to simulate pulsed motion.
Iris Blur: Drawing Focus with Depth
Iris Blur, part of the Blur Gallery, is particularly effective at simulating a shallow depth of field. It allows you to create a focused area within your image, with the blur gradually increasing outwards. This is ideal for drawing the viewer's eye to a specific subject. When you apply Iris Blur, a default pin appears on the image, defining the area of sharpness. You can drag the blur handle to control the extent of the blur and the "fade area." Pressing the 'M' key will reveal the blur mask, clearly showing the sharp area, the fade area, and the fully blurred regions.
Tilt-Shift Blur: The Miniature World Effect
The Tilt-Shift blur effect simulates the unique look produced by a tilt-shift lens, often resulting in images that resemble miniature models. This effect defines a sharp area and then gradually fades to a blur at the edges. Similar to Iris Blur, it provides intuitive on-image controls to specify the area of sharpness and the transition to blur.
Gaussian Blur and Feathering: Softening Edges and Creating Atmosphere
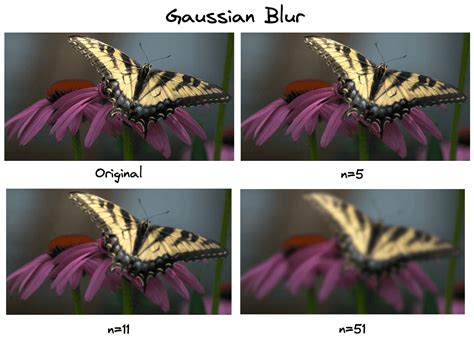
Gaussian Blur is a fundamental blur filter that applies a smooth, bell-shaped blur to an image or selected area. It's a versatile tool for softening details, reducing noise, or creating a subtle atmospheric effect. When applied as a Smart Filter, you can adjust the "Radius" slider to control the intensity of the blur. Increasing the radius leads to a more pronounced blur.
Feathering is a technique closely related to blurring, particularly when used with selections. Feathering softens the edges of a selection, creating a gradual transition between the selected area and the unselected area. This is often used to blend elements seamlessly or to create a soft focus effect around a subject. When making a selection with tools like the Marquee or Lasso tools, you can enter a "Feather" value in the options bar before creating the selection. A higher feather value results in a softer, wider transition. For instance, a feather value of 30 pixels will create a smooth blend over a 30-pixel range.
Gradient Fill Adjustment Layer for Feathered Edges
A sophisticated method for creating feathered edges involves using a Gradient Fill Adjustment Layer. After opening your image in Photoshop and converting it to a Smart Object for non-destructive editing, you can create a new Adjustment Layer by clicking the Create a New Adjustment Layer icon at the bottom of the Layers panel. Select "Gradient Fill." Within the Gradient Fill settings, you can choose a gradient preset (often found in the "Basics" folder) and select the second option from the Radial Gradient icons. This allows you to create a radial gradient that can be used to apply a feathered blur effect. By adjusting the gradient and its blending mode, you can achieve a beautiful, feathered edge that draws focus to the center of the image.
Applying Blur with the Blur Tool
For more localized and brush-based blurring, Photoshop's Blur tool offers direct control. Select the Blur tool from the toolbar, choose a brush tip and strength, and then simply drag over the areas you wish to blur. This is an intuitive way to soften specific parts of an image, such as smoothing skin textures or reducing distracting details.
Enhancing Realism: Adding Noise to Blurred Areas
Sometimes, applying blur effects, especially those from the Blur Gallery, can result in areas that appear synthetic or unnaturally smooth. To counteract this, Photoshop's blur filters include a "Noise" tab within their settings. By adding a controlled amount of noise, you can help the blurred areas blend more naturally with the rest of the image, mimicking the subtle grain found in real photographs.
Within the Blur Effects panel, navigate to the Noise tab. Ensure the checkbox in the top-right corner is selected to enable noise. You can then adjust parameters such as "Amount" (to match the noise level with unblurred areas), "Roughness" (for grain regularity), and "Color" (to control the degree of color noise). The "Highlight" setting can further refine the noise appearance by reducing it in highlighted areas for better shadow/highlight matching.
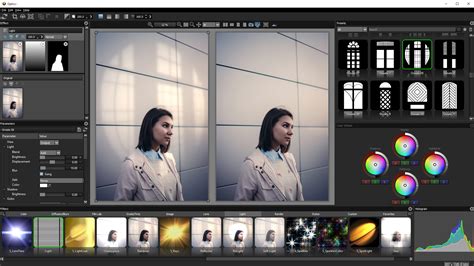
Boris FX Optics: A Powerful Third-Party Solution
For users seeking even more advanced and specialized blur effects, third-party plugins like Boris FX Optics offer a wealth of creative options. Optics integrates effects from the renowned Sapphire package, providing professional-grade tools for motion blur and many other visual enhancements.
To use Optics for motion blur, you would typically install it as a plugin for Photoshop. After opening your image and duplicating the layer, access Optics via the Filter menu (Filter > Boris FX > Optics). Within Optics, you can search for motion blur effects, such as "S_BlurMotion." The plugin offers numerous presets that can be customized with a wide array of sliders and controls in real-time.
A significant advantage of plugins like Optics is their robust masking capabilities. You can easily create layer masks within the plugin to isolate the blur effect to specific objects or areas of your image, offering unparalleled control over the final result.
Creative Applications of Motion Blur
The applications of motion blur in image editing are vast and varied.
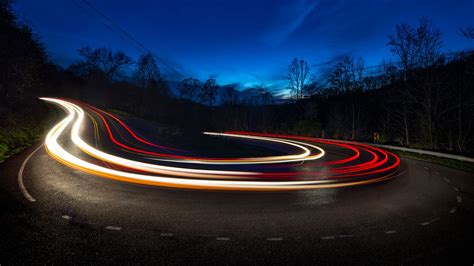
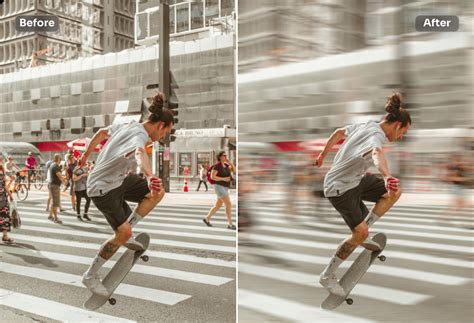
- Amplify Motion: For sports photography, action shots, or images of vehicles, motion blur can dramatically enhance the sense of speed and dynamism.
- Draw Focus: A blurred background, achieved through techniques like Iris Blur or Gaussian Blur with feathering, can isolate a subject and guide the viewer's attention, mimicking the shallow depth of field of professional portrait photography.
- Artistic Expression: Beyond realism, motion blur can be used purely for aesthetic purposes, creating abstract patterns, streaks of light, or a dreamlike quality.
- Background Enhancement: Adding a subtle blur to a background can prevent it from competing with the subject, creating a more pleasing and professional composition.
- Simulating Camera Artifacts: Effects like Radial Blur and Tilt-Shift blur can replicate specific photographic styles, adding a unique character to an image.
By understanding the various tools and techniques available in Adobe Photoshop, from the fundamental Path Blur and Gaussian Blur filters to advanced concepts like Smart Objects and third-party plugins, you can effectively manipulate motion and focus to create truly captivating photographic art. Experimenting with different blur types, their parameters, and selective application through masks will unlock a new level of creative control over your images.