Adobe Photoshop is a powerful tool for graphic designers, and one of its most versatile features is the ability to create and utilize patterns. Patterns in Photoshop are essentially images that can be tiled repeatedly, offering a timeless solution for adding texture, depth, and visual interest to designs. Whether you're aiming for a simple, repeating background or a complex, seamless design, Photoshop provides the tools to achieve professional results. This tutorial will guide you through the process of creating, defining, and applying custom patterns, enhancing your design workflow and unlocking new creative possibilities.
Understanding Photoshop Patterns
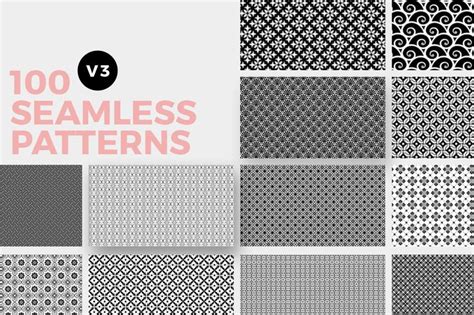
At its core, a pattern in Photoshop is a small image or graphic element designed to be repeated across a larger area. The primary advantage of using patterns is efficiency; they eliminate the need to manually recreate intricate designs or textures. Instead, you create a single "tile" that Photoshop then duplicates seamlessly. This significantly speeds up your workflow, allowing you to focus on other aspects of your design. Furthermore, custom patterns can marry intriguing design elements to your work, adding a unique aesthetic that preset options might not offer. You have the flexibility to create your own custom patterns, utilize the extensive library of preset patterns that come with Photoshop, or download and install additional pattern libraries from various online sources.
Exploring Preset Patterns and the Preset Manager
Photoshop comes equipped with a variety of built-in pattern libraries. To access these, along with any custom patterns you've previously saved, you'll use the Preset Manager. Navigate to Edit > Preset Manager. By default, this window displays preset brushes. To view patterns, change the Preset Type dropdown menu to Patterns. You might notice that not all pattern libraries are loaded by default. To access the bundled libraries, click the triangle icon at the right of the preset type dropdown. This will reveal a menu of preset pattern options, such as "Patterns," "Patterns 2," or "Rock Patterns." When you select a pattern library to load, you'll be prompted whether to replace the current patterns or append them. Choosing Append is recommended, as it adds the new set of patterns to your existing list without overwriting them.

Applying Photoshop Patterns: Diverse Methods
Once your pattern libraries are loaded or your custom pattern is created, you can apply it to your designs in several ways. Each method offers unique advantages depending on your specific needs.
1. The Fill Command: Seamlessly Filling Selections
The most straightforward method to apply a pattern is by using the Fill command. First, create a selection on your canvas using a tool like the Rectangular Marquee Tool. Then, go to Edit > Fill (or use the shortcut Shift + F5). In the Fill dialog window, select Pattern from the Use option. This will enable the Custom Pattern option, where you can choose your desired pattern from the dropdown menu. Press OK to fill the selected area. This method is excellent for applying patterns to entire canvases or specific sections. A key benefit is that the pattern can reside on its own layer, allowing you to modify it or other layers independently without affecting the pattern itself.
2. Pattern Overlay: Styling Layers with Texture
The Pattern Overlay layer effect provides a more flexible way to apply patterns to a specific layer. To access this, double-click on the layer in the Layers Panel to open the Layer Styles dialog. Select Pattern Overlay from the list on the right. Within the Pattern Overlay options, you can choose your desired pattern from the dropdown menu. This method is highly advantageous because layer effects are non-destructive. You can easily hide, show, delete, or tweak the pattern overlay without altering the underlying content of the layer. For fine-tuning the pattern's position, check the Preview option, then click and drag on your canvas where the pattern overlay is applied.
How to Apply Gradient Overlays Using Layer Styles in Photoshop
3. Painting Tools: Applying Patterns with Precision
For more organic and irregular application of patterns, Photoshop's painting tools come into play. Tools like the Paint Bucket Tool and the Pattern Stamp Tool can be configured to use patterns. This approach offers greater control, especially when using a graphics tablet, allowing you to paint patterns onto the canvas with varying degrees of opacity and flow. While it might take more time compared to the Fill command or Pattern Overlay, painting tools provide a hands-on approach for unique textural effects. The Pattern Stamp Tool, in particular, functions like a brush but uses patterns as its "tip."
Creating Your Own Custom Photoshop Patterns
The true power of Photoshop patterns lies in the ability to create your own. The process is straightforward, though it's crucial to remember that patterns must be rectangular. Even non-rectangular shapes will be treated as part of a bounding rectangle.
The Basic Workflow: From Selection to Definition
- Create a Document: Start by creating a new document (
File > New). The size of this document will determine the size of your pattern tile. It's often beneficial to start with smaller dimensions, such as 100x100 pixels or 256x256 pixels, especially when learning. Ensure the background is set to transparent if you don't want a solid background color embedded in your pattern tile. - Design Your Tile: Draw, import, or paste the elements you want to include in your pattern onto this canvas. You can use various tools, add text, or incorporate other images. If you're working with multiple elements, consider merging them into a single layer (
Layer > Merge LayersorCtrl/Cmd + E) before proceeding, especially if you plan to use the Offset filter. - Prepare for Seamlessness (Offset Filter): To ensure your pattern repeats without visible seams, the edges of your tile must seamlessly connect. The
Filter > Other > Offsetcommand is essential here. This filter shifts the contents of your layer by a specified number of pixels horizontally and/or vertically. To make the edges match, you'll typically offset by half the width and half the height of your document. For example, in a 100x100px document, you would use a horizontal and vertical offset of 50 pixels. This process will reveal any mismatches at the edges, allowing you to correct them. - Define the Pattern: Once your tile is designed and ready for seamless repetition, select the entire canvas or the specific area you want to define as a pattern. Go to
Edit > Define Pattern. A dialog box will appear, prompting you to name your pattern. Choose a descriptive name, perhaps including the dimensions, for easy identification later. ClickOK.
Practical Example: Creating a Diagonal Line Pattern
Let's walk through creating a simple yet effective diagonal line pattern:
- Create a Small Canvas: Create a new document, for instance, 3x3 pixels, with a transparent background. Zoom in to 3200% or more to see the individual pixels.
- Draw the Line: Select the Pencil Tool with a 1-pixel hard round brush. Set the foreground color to white. Hold down
Shiftto draw a perfectly straight line from the top-left corner to the bottom-right corner of the canvas. - Define the Pattern: Select all (
Ctrl/Cmd + A), then go toEdit > Define Pattern. Name it something like "3x3 diagonal line" and clickOK. You can now close this small document.
Applying Your Custom Pattern
Now, let's apply this "3x3 diagonal line" pattern:
- Using the Fill Command: Open a new, larger document. Create a new layer. Select this new layer, then go to
Edit > Fill. ChoosePatternand select your "3x3 diagonal line" pattern. ClickOK. You can adjust the layer's opacity or blend mode for different effects. - Using Pattern Overlay: Double-click the layer you want to apply the pattern to (or create a new layer and add a shape). In the Layer Styles dialog, select
Pattern Overlay. Choose your "3x3 diagonal line" pattern. You can adjust the scale, blend mode, and opacity here. TheSnap to Originoption can be useful for resetting the pattern's position if you've moved it. - Using the Pattern Stamp Tool: Create a new layer and select the Pattern Stamp Tool. In the Options Bar, choose your "3x3 diagonal line" pattern. You can then paint with the pattern onto your canvas, controlling the application with brush size, opacity, and flow settings.

Working with Pattern Libraries
Beyond creating individual patterns, you can manage and organize them into libraries.
Installing Photoshop Pattern Libraries
If you download a .PAT file (a Photoshop pattern library), installing it is simple:
- Go to
Edit > Preset Manager. - Click the
Loadbutton. - Navigate to your downloaded
.PATfile and select it. - Click
Load. The patterns will be added to your pattern library.
Creating Your Own Pattern Libraries
To keep your custom patterns organized or to share them with others, you can create your own pattern libraries:
- Open the Preset Manager (
Edit > Preset Manager). - Set the
Preset TypetoPatterns. - Select the custom patterns you want to include in your library by holding down
Ctrl/Cmdand clicking on each one. - Click the
Save Setbutton. - Choose a location on your computer to save the library file (which will have a
.PATextension). This file can then be shared and installed on other computers.
Beyond the Basics: Advanced Techniques and Tools
While the core methods of creating and applying patterns are covered, Photoshop offers further avenues for pattern creation and manipulation.
Using Icons and Vector Elements
You can integrate icons and vector elements into your patterns. Tools like The Noun Project's Adobe Add-On allow you to search and import millions of icons directly into Photoshop. When creating a pattern tile using vector elements, it's often best to start with a square document (e.g., 1000x1000 pixels) with a transparent background. You can then arrange your icons, scale them, recolor them, and even rotate them. Once your arrangement is complete, define it as a pattern (Edit > Define Pattern).
When using vector-based elements within Photoshop, remember that Photoshop itself is a raster program. While you can scale vector shapes within Photoshop, once they are rasterized or incorporated into a pattern definition, they will behave as pixels. For truly scalable patterns, Adobe Illustrator's Pattern Tool (Object > Pattern > Make) offers more robust vector-based pattern creation.
Alternative Software and Online Tools
For those who prefer different workflows or require simpler solutions, other tools are available:
- Adobe Illustrator: Its dedicated Pattern Tool offers advanced vector pattern creation capabilities.
- Procreate (iPad): Features a straightforward canvas tiling feature for easy pattern duplication and repetition.
- Online Tools: Websites like Patterninja, PatternPad, or Adobe Capture provide intuitive interfaces for creating patterns without needing extensive desktop software expertise.
Experimenting with Layer Styles and Gradients
Once a pattern is applied, especially via a fill layer or Pattern Overlay, you can further enhance it. For instance, you can apply gradients to a pattern layer by creating a gradient fill layer above your pattern layer and then creating a clipping mask (Layer > Create Clipping Mask or Alt/Option + Click between layers). This allows the gradient to affect only the pattern layer below. Rasterizing a pattern fill layer (Layer > Rasterize > Fill Contents) also unlocks the ability to apply a wider range of Photoshop's filters and layer effects directly to the pattern itself, offering immense creative freedom.

Conclusion: Unleashing Creative Potential
Mastering Photoshop patterns opens up a vast landscape of design possibilities. From simple backgrounds to intricate textures and complex graphic elements, patterns are an indispensable tool in any designer's arsenal. By understanding the fundamental techniques of creation, definition, and application, and by exploring the various tools and advanced options available, you can elevate your designs and streamline your creative process. The ability to generate custom, seamless repeating textures allows for unique branding, engaging web design, eye-catching print materials, and so much more. The journey into Photoshop patterns is one of continuous exploration, where each new design can lead to an infinite array of repeating possibilities.