Gradients are a cornerstone of modern vector design, offering a dynamic way to add depth, dimension, and visual interest to artwork. Whether you're aiming to create captivating backgrounds, enhance typography, or add subtle shading to vector objects, understanding how to effectively utilize gradients is an essential skill. Affinity Designer, a powerful yet accessible vector graphics editor, provides an intuitive and robust toolset for creating and manipulating gradients, making the process a refreshing change of pace compared to some rival applications. This guide will delve into the intricacies of applying and customizing gradient fills within Affinity Designer, from basic linear gradients to more complex bitmap fills.
The Foundation: Understanding the Gradient Tool
At its core, Affinity Designer's approach to gradients revolves around the Fill Tool, easily accessible via the toolbar on the left side of your screen or by its keyboard shortcut, G. This versatile tool is not limited to solid colors; its true power lies in its ability to apply and modify gradients, patterns, and solid colors alike. When the Fill Tool is selected, the Context Toolbar at the top of the screen becomes your command center, allowing you to choose the gradient type, specify whether to apply it to the fill or stroke, and edit all associated properties.
To initiate the gradient application process, you first need an object to work with. This could be a simple shape like a rectangle or a circle, or even text. Select the object you wish to fill by clicking on it. With the object selected and the Fill Tool active, the Context Toolbar will present you with the crucial "Type" dropdown menu. Here, you can select from a variety of gradient types, each offering distinct visual possibilities.
Exploring Gradient Types in Affinity Designer
Affinity Designer offers a rich palette of gradient types, each with its unique characteristics and applications:
Linear Gradients: The Workhorse of Vector Design
Linear gradients are perhaps the most commonly used and versatile gradient type. They create a gradual blend of colors along a straight line.
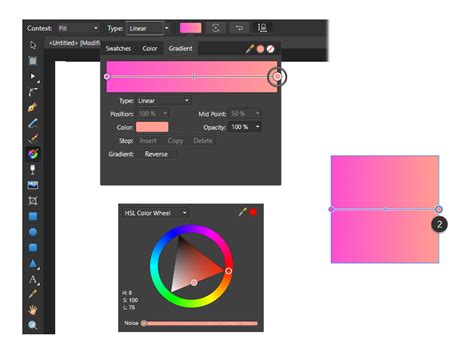
To create a linear gradient background on a rectangle shape, begin by launching Affinity Designer and ensuring you are in the Draw Persona. Next, create a new document. With the rectangle shape selected, click on the Fill Tool in the Context Toolbar and then navigate to the "Gradient" tab. Click on the color swatch. A panel will pop up, allowing you to choose or change your initial color.
In the Gradient Panel, you will notice two gradient points appearing on the edges of a line across the gradient's path. These are known as color-stop points. You can click on a desired color-stop point and then adjust its color using the Color swatch. A panel will pop up, enabling you to choose or modify the existing color.
The thin line at the center of the gradient's path represents the center point of the gradient. Moving this point will shift the gradient's balance, favoring one color over the other. For instance, if you've created a linear gradient spanning horizontally across a square, the start point might be a red center point, and the end point could be a purple outer band. You can click and drag these end points directly on the canvas to adjust the gradient's position and angle.
Radial Gradients: Expanding from the Center
Radial gradients, as the name suggests, radiate outwards from a central point, creating a circular or elliptical blend. This type of gradient is similar to a conical gradient, but the gradient line emerges directly from the center.
To apply a radial gradient, select your object and choose "Radial" from the "Type" dropdown in the Context Toolbar. You will see a central point and an outer edge defining the gradient. You can click and drag the central point to reposition the gradient's origin, and drag the outer edge to adjust its size. Much like elliptical gradients, radial gradients follow a circular path.
Elliptical Gradients: A Stretched Radial Effect
Elliptical gradients are akin to radial gradients but are stretched into an oval shape. They are defined by two gradient lines at right angles, with one line typically being longer than the other, creating an ellipse with color stops.
When working with elliptical gradients, you might notice a "Maintain Fill Aspect Ratio" setting. Enabling this option will lock the proportions of the radial gradients you create, ensuring they remain circular rather than becoming distorted ellipses. To move an elliptical gradient, click and drag the center color stop. To resize it, click on one of the end color stops and drag your mouse.
Conical Gradients: A Sweeping, Clockwise Effect
Conical gradients create a sweeping effect, resembling a cone when viewed from above. The color stops occur along an angle, similar to the sectors a clock's hands would swipe.
When applying a conical gradient, you'll observe color stops positioned along a circular path. You can click on these stops to select them and then choose colors from the HSL Color Wheel in the Color panel. The slider between the gradient points influences the transition between colors. You might notice that two color stops sitting close to each other can look similar, but clicking on them and choosing contrasting colors will reveal their distinct positions along the angle.
Bitmap Gradients: Incorporating Images and Patterns
Bitmap gradients offer a unique way to fill objects with patterns or even entire images. This can be incredibly useful for adding texture, intricate designs, or photographic elements to your vector artwork, particularly for projects like sublimation.
To apply a bitmap gradient, select your object, choose "Bitmap" from the "Type" dropdown, and then navigate to your desired image or pattern file. The image will be applied as a fill. Initially, it might appear strange or not fill the object as expected. The stops on a bitmap gradient are primarily used for resizing and repositioning the pattern; the colors within the image cannot be directly changed through the gradient editor. Use the end stops to resize and reposition the pattern until it fills the canvas or object appropriately.
When using bitmap gradients on vector objects or fonts, you gain access to additional menus: "Extend" and "Quality." The "Extend" menu offers options like "Wrap" (for seamless fills), "Mirror" (mirroring the image at the edges), "Repeat" (distorting the design as if bleeding out), and "Zero" (showing the image as is). The "Quality" setting helps the software better place the gradient using the pixel information from the image.
Advanced Gradient Editing and Customization
Beyond selecting the gradient type, Affinity Designer provides extensive control over the appearance and behavior of your gradients.
Adding and Modifying Color Stops
We can create gradient backgrounds with more than two colors. To introduce a new color-stop point to a gradient line, hover your cursor over the gradient's path until the cursor icon transforms into a plus (+) sign. With the Affinity Designer Fill Tool (G) active, simply click on the path where you wish to add a new stop. You can then click on this new color-stop and assign it a new color from the Color Wheel panel.
The slider between the gradient points plays a crucial role in controlling the transition between colors. By moving these sliders, you can adjust how abruptly or subtly one color blends into another. You can also narrow the transition between colors by bringing the stops closer together.
Adjusting Color Properties
Once you have your color stops in place, you can fine-tune their appearance. Click on a specific color stop to select it, and then access the Color panel (often the HSL Color Wheel) to modify its Hue, Saturation, and Lightness. Hue shifts the dominant color, Saturation controls the intensity, and Lightness determines how dark or light the color is. You can also adjust the Opacity of each color stop, allowing for transparency effects.
The Gradient Panel itself is a powerful tool for editing gradients if you need to specify exact numerical values for position, midpoint, or opacity. However, for most on-canvas adjustments, the Fill Tool provides an intuitive interface.
Controlling Gradient Balance and Position
The thin line at the center of the gradient's path is the gradient's center point. Moving this point will alter the gradient's balance, shifting its emphasis towards one color or the other. You can also click and drag the start and end points of the gradient directly on the canvas to reposition it and alter its angle. To move the entire gradient as a single unit, place your mouse over one of the color stops, and after the directional arrows appear, hold down Ctrl + Click and drag.
Applying Gradients to Text and Strokes
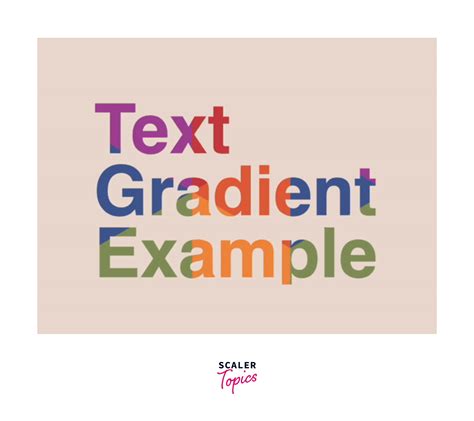
Gradients are not limited to simple shapes; they can dramatically enhance typography. To apply a gradient to text, first type out your text using the Artistic Text tool. Select the text, then activate the Gradient Tool (G) and draw your desired gradient across the text. You can then change the gradient type and adjust its properties as you would with any other object.
How To Add A Gradient To Text In Affinity Designer (2026) (Best Method)
Furthermore, gradients can be applied to strokes, adding a sophisticated outline to your objects. When using the Fill Tool, you can choose whether to apply the gradient to the "Fill" or the "Stroke" using the Context Toolbar. This allows for intricate detailing and visual flair.
When adding a bitmap gradient to text, especially one with significant white space, a stroke can be invaluable for definition. After applying the bitmap gradient and resizing it to reveal enough of the design, select the Move Tool to deactivate the gradient tool. Then, in the Color panel on the right, click on the "Stroke" option to bring it forward and change its color. You can then adjust the "Width" of the stroke in the Stroke panel to create a clear outline, making the text pop.
Affinity Designer vs. Other Applications
Affinity Designer distinguishes itself by making the process of applying and editing gradients exceptionally user-friendly. Unlike some other vector applications where gradient manipulation can feel clunky and unintuitive, Designer allows for direct, on-canvas editing, offering a more fluid and enjoyable workflow. This ease of use, combined with its powerful features, makes Affinity Designer a compelling choice for creators looking to add depth and dimension to their vector designs.
Practical Applications of Gradients
The ability to apply gradients to your artwork is a fundamental aspect of vector design, opening up a world of creative possibilities. Gradients add depth to projects by providing backgrounds for corporate photos, enhancing product mockups, or adding texture to fonts and vector objects. They can create subtle shading effects, making flat objects appear more three-dimensional. Text can be transformed with a colorful combination of gradients for a striking and memorable look. The versatility of gradients means you can shape the color transition precisely to your artistic vision, creating anything from smooth, subtle blends to bold, eye-catching transitions.
By mastering the Fill Tool and understanding the various gradient types available in Affinity Designer, you can significantly elevate the visual impact of your designs, adding a professional polish that truly sets your work apart.