Drawing in Procreate has become a favorite method for creating artwork, offering a versatile digital canvas for artists of all levels. A key technique that can significantly enhance illustrations, adding dimension and a professional polish, is the strategic application of texture. This tutorial delves into effective methods for incorporating texture overlays in Procreate, transforming simple designs into visually rich pieces.
Understanding the Power of Texture in Digital Art
Texture, in the context of digital art, refers to the visual or tactile quality of a surface. In Procreate, it's not about replicating physical surfaces precisely, but rather about introducing visual interest, depth, and a unique aesthetic. Texture brushes are invaluable tools for this purpose. They can mimic the grain of paper, the roughness of charcoal, the subtlety of watercolor washes, or even abstract patterns. The primary benefit of using texture brushes is their ability to add dimension and a professional look to artwork. It's a technique that, while simple in execution, yields a significant impact on the final piece.
Essential Tools for Texture Application
To embark on your texture overlay journey in Procreate, a few key components are necessary:
- The Procreate iPad App: This is the foundational software for all digital art creation within this tutorial.
- An iPad: A compatible iPad is required to run the Procreate application.
- An Apple Pencil: While not strictly mandatory, an Apple Pencil is highly recommended for its precision and control, offering a more intuitive drawing and painting experience. Using a finger is possible, but it limits the nuance achievable in texture application.
Texture Brushes: Your Gateway to Richness
Procreate itself comes equipped with a robust library of built-in texture brushes. These offer a great starting point for experimentation. For those seeking to expand their textural palette, several excellent resources are available. Many artists and designers offer free texture brushes, often found on platforms dedicated to digital art resources. Additionally, some Procreate classes and workshops include exclusive free texture brushes for their students, providing curated options tailored to specific artistic styles. Exploring these resources can unlock a vast array of possibilities for your artwork.
Technique 1: The Clipping Mask Method
One of the most versatile and non-destructive ways to add texture in Procreate is by utilizing a Clipping Mask. This technique allows you to confine a texture to the boundaries of a specific layer without affecting the original artwork.
How it Works:
- Create your Base Illustration: Begin by drawing your illustration on a layer.
- Add a New Layer: Create a new layer directly above your illustration layer.
- Apply Clipping Mask: Tap on the new layer to open its options panel. Select "Clipping Mask." A small arrow will appear next to the layer, indicating that it is now clipped to the layer beneath it.
- Select a Texture Brush: Choose a texture brush from your Procreate library. You can experiment with various brushes to achieve different effects - from subtle grain to bold patterns.
- Paint Your Texture: With the clipped layer selected, begin painting your texture. Whatever you paint on this layer will only appear within the shapes of the layer below it. For instance, if your illustration is a brown house, everything painted on the texture layer will be confined to the shape of that house.
Adding Depth with Texture:
To further enhance depth, consider painting darker textures on areas that would naturally be in shadow or on the upper surfaces, and lighter textures for highlights or areas that catch the light. Referencing a photograph can be incredibly helpful here, allowing you to observe the interplay of light and shadow on real-world surfaces and replicate those effects in your artwork.
The result of this process is an illustration with added dimension and visual interest, all thanks to the carefully applied texture. The beauty of the Clipping Mask is its flexibility; you can always go back and edit the texture on its dedicated layer without altering your original drawing.
Technique 2: The Alpha Lock Method
Alpha Lock is another powerful tool for applying texture, offering a slightly different approach compared to Clipping Masks. While both methods confine texture to specific areas, Alpha Lock operates directly on a single layer.
How it Works:
- Prepare Your Layer: Ensure your illustration or the element you want to add texture to is on its own layer.
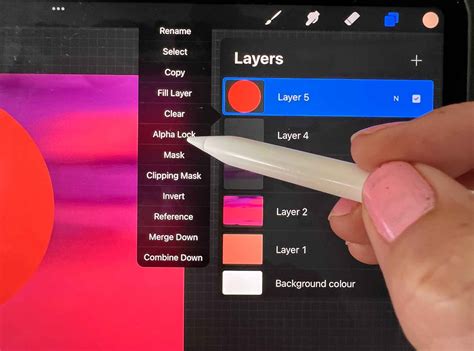
- Enable Alpha Lock: Tap on the thumbnail of the layer you wish to add texture to. A menu will appear; select "Alpha Lock." A checkered pattern will appear in the layer thumbnail, signifying that Alpha Lock is active.
- Select a Texture Brush: Choose your desired texture brush.
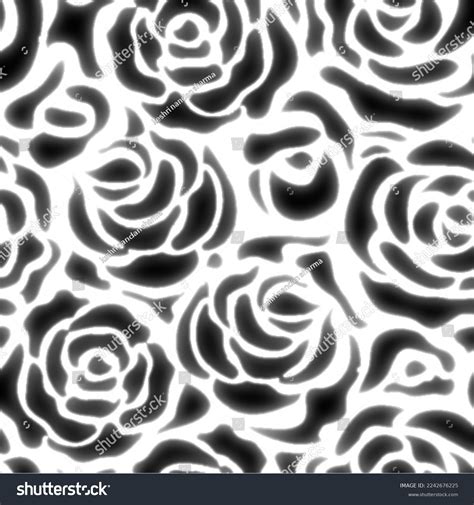
- Paint Your Texture: Now, when you paint on this layer, your strokes will be confined to the opaque pixels already present on that layer. If you painted a flower on this layer, any texture you add will stay within the boundaries of that flower, and won't spill onto the background.
Alpha Lock vs. Clipping Mask: Key Differences
The primary distinction lies in their approach to editing. A Clipping Mask keeps your texture on a separate layer, allowing for easy modification, repositioning, or deletion of the texture at any time. This is ideal for non-destructive workflows. Alpha Lock, on the other hand, "locks" the texture directly onto the layer itself. While this can be more direct for certain effects, it makes the texture more permanent and harder to edit or remove without affecting the underlying artwork. The choice between Alpha Lock and a Clipping Mask often depends on the specific needs of your project and your preferred editing workflow.
Advanced Texture Creation: Beyond Brushes
While texture brushes are a primary method, Procreate offers other avenues for creating rich textures, including patterns, digital overlays, and even scanned textures.
Creating Patterns for Texture:
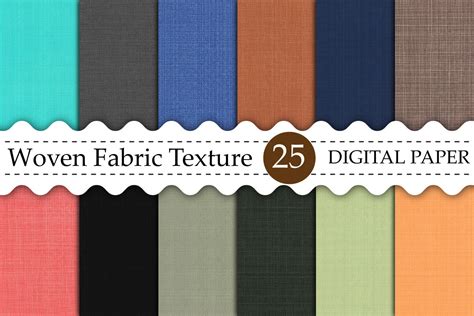
Seamless patterns are incredibly useful for generating consistent texture across larger areas. You can draw a pattern element and then use Procreate's tools to create a repeating, seamless version. This can be particularly effective for intricate details like lace or fabric weaves.
- Example: Crafting a Lace Pattern:
- Start by drawing a small element of your desired lace design.
- Create a new layer and use this element to trace or build a larger pattern.
- Utilize techniques to ensure the pattern repeats seamlessly, such as offsetting and duplicating layers.
- Once your seamless pattern is created, you can scale and position it as needed.
Learn the Secret to Making Perfect Pattern Repeats with Procreate on iPad!
Using Digital and Scanned Overlays:
You can import images of textures - such as paper, fabric, or even scans of physical materials - into Procreate.
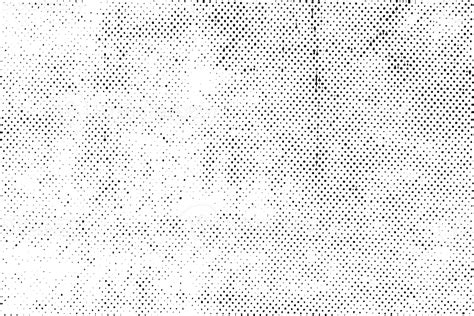
- Source Your Texture: Find royalty-free metallic textures, paper scans, or any other textural image online and save it to your iPad's photo album.
- Import into Procreate: Open your Procreate document, add a new layer, and use the "Insert a photo" option (found under the Wrench tool > Add).
- Position and Scale: Once imported, you can use the transform tools (Selection tool with "Uniform" selected) to resize and position the texture to cover your artwork.
- Blend Modes: Experiment with different layer blend modes (e.g., Multiply, Overlay, Soft Light) to integrate the texture seamlessly with your artwork. The "Multiply" blend mode, for instance, darkens the underlying layers and is often used for shadows and shading, effectively integrating textured overlays.
The Art of Layering and Erasing for Dimension
When working with elements like fabric or complex forms, layering and strategic erasing can create a profound sense of depth and realism.
Building Translucent Effects:
To achieve effects like sheer fabric or layered materials, build up color and form gradually using brushes with lower opacity. This allows underlying colors and shapes to show through, creating a translucent appearance.
- Example: Creating a Tulle Skirt:
- Use watercolor brushes with varying opacity to build up layers of color, creating a translucent effect.
- Introduce subtle color variations (e.g., blues, whites, warm pinks) to add dimension and prevent a flat, stark white appearance.
- Adjust layer opacities to fine-tune the translucency.
Strategic Erasing for Volume and Shape:
Erasing is not just for mistakes; it's a powerful tool for sculpting form and creating visual interest.
- Example: Sculpting Tulle Layers:
- After applying initial layers of color for a skirt, use an eraser with a textured brush to subtly erase edges between perceived layers of tulle.
- Irregularity is key here. Avoid uniform erasing; aim for varied, organic edges to mimic the natural drape and volume of real fabric. This creates a more realistic and dynamic appearance.
Refining Edges and Overlays:
Lining edges with a small brush can provide a crisp finish, especially for elements like lace overlays, giving them a more defined and realistic appearance. When combining different elements, such as a bodice and a skirt, pay attention to how the fabrics would naturally meet. Filling in areas where layers overlap can enhance the sense of depth and realism, suggesting that the fabric is thicker at these junctions.
Conclusion: Unleashing Your Creative Potential with Texture
Adding texture in Procreate is a fundamental technique that can elevate your digital artwork from competent to captivating. Whether you employ the non-destructive flexibility of Clipping Masks, the direct approach of Alpha Lock, or explore the nuances of pattern creation and image overlays, the principles remain the same: experiment, observe, and refine. By understanding how to leverage Procreate's tools and embrace the power of texture, you can imbue your illustrations with a unique character, depth, and a professional finish that truly makes them pop. The journey into texture is an ongoing exploration, with endless possibilities waiting to be discovered within the digital canvas.