Removing unwanted text from an image is a common yet crucial skill for anyone working with visual content. Whether it's a distracting logo, an outdated caption, or simply an element that detracts from the aesthetic, knowing how to cleanly erase text while preserving the integrity of the background is invaluable. Photoshop, with its ever-evolving suite of tools, offers a robust set of techniques to achieve this, ranging from precise manual methods to sophisticated AI-powered features. This guide will delve into the practical aspects of text removal in Photoshop, covering various tools and approaches suitable for different scenarios and Photoshop versions.
The Importance of Text Removal
Unwanted text in images can significantly impact their intended purpose and visual appeal. It can:
- Create Distractions: Irrelevant text can divert the viewer's attention from the main subject of the image, hindering its communicative power.
- Cause Clutter: Excessive or poorly placed text can make an image appear busy and overwhelming, detracting from its composition and overall aesthetic.
- Render Images Inappropriate: Sometimes, text can be offensive or misaligned with the context, making the image unsuitable for its intended use.
- Diminish Aesthetics: Text can overlay image resolutions, potentially making an image appear less attractive. Removing it can enhance the visual appeal and clarity of the photograph or graphic.
Fortunately, Photoshop provides powerful tools to rectify these issues, allowing users to create cleaner, more focused, and visually pleasing images.
Essential Photoshop Tools for Text Removal
Photoshop offers a variety of tools, each suited for different types of text and backgrounds. Understanding when to use which tool is key to achieving seamless results.
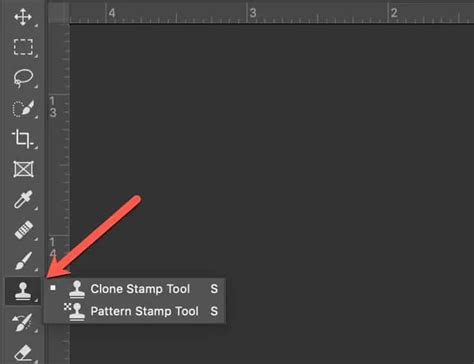
Method 1: The Clone Stamp Tool
The Clone Stamp Tool is a fundamental instrument for image manipulation, allowing you to sample pixels from one area of an image and paint them over another. This makes it exceptionally useful for covering up text by replicating the surrounding background.
When to Use It: This tool excels when the text is situated over a consistent or repeating texture, intricate patterns, or detailed areas where precise control over sampled pixels is necessary. It requires a bit of practice to make the strokes look natural, but it offers excellent control for clean results.
Step-by-Step Guide:
- Select the Clone Stamp Tool from the toolbar.
- Hold Alt/Option and click on a clean area of the image near the text to set your source point (sample pixels).
- Release Alt/Option and carefully paint over the text area.
- Adjust brush size and hardness to match the texture and detail of the background. For softer blends, a harder brush might be less suitable.
- Frequently sample new areas by repeating step 2 to avoid repetitive patterns and maintain a natural look.
- Zoom in to work on fine details and ensure seamless blending of edges.
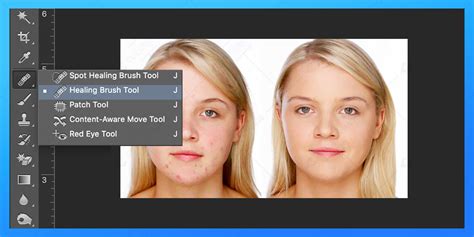
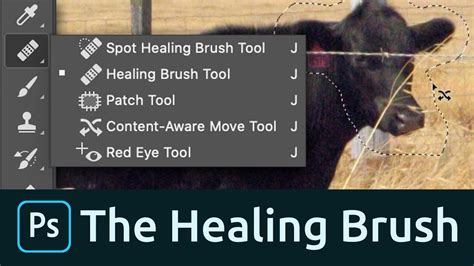
Method 2: The Spot Healing Brush Tool
The Spot Healing Brush is designed for quick fixes and is particularly effective for smaller blemishes or text elements. You simply paint over the unwanted text, and Photoshop automatically analyzes the surrounding pixels to seamlessly fill the area.
When to Use It: This tool is ideal for simple backgrounds with flat colors or subtle textures. It's incredibly fast for removing small labels or stray bits of text without requiring much manual intervention.
Step-by-Step Guide:
- Choose the Spot Healing Brush Tool from the toolbar.
- Set the brush size to be slightly larger than the text you want to remove.
- Paint gently over the text area. Photoshop will automatically sample surrounding pixels and blend them.
- Repeat strokes for larger or more stubborn areas until the text vanishes naturally.
- Use Zoom to verify that the patched area blends seamlessly with the background.
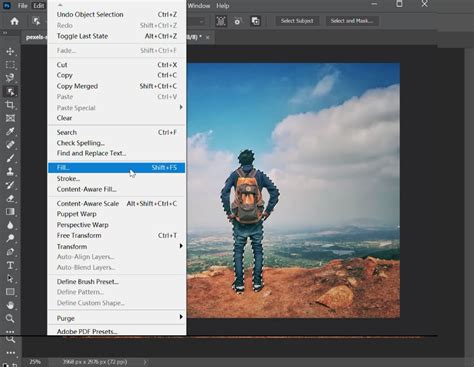
Method 3: Content-Aware Fill
Content-Aware Fill is one of Photoshop's most powerful automated tools for removing objects, including text. You select the area containing the text, and Photoshop intelligently analyzes the surrounding pixels to reconstruct what should be behind the text.
When to Use It: This feature is highly effective for larger text blocks or when the background is not entirely uniform but also not overly complex. It often gets you most of the way there with minimal effort, though manual cleanup with other tools might be necessary for perfect results.
Step-by-Step Guide:
- Use a selection tool (like the Lasso Tool or Quick Selection Tool) to select the text you want to remove. It’s often beneficial to expand the selection slightly beyond the text.
- Go to Edit > Content-Aware Fill.
- Photoshop opens a dedicated workspace showing a preview of the fill.
- Refine sampling areas using the brush tools within the Content-Aware Fill workspace to guide Photoshop on what information to use for the fill. Adjustments to settings can also improve results.
- Click OK to apply the fill.
- Clean up any residual artifacts or imperfectly blended edges with the Healing Brush or Clone Stamp Tool as needed.
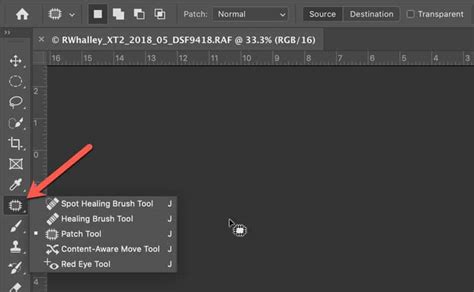
Method 4: The Patch Tool
The Patch Tool offers a blend of selection and healing capabilities. You select the unwanted text, and then drag that selection to a clean area of the image. Photoshop then replaces the selected text with the content from the destination area, attempting to match texture and lighting.
When to Use It: This tool is excellent for maintaining texture patterns and dealing with irregular backgrounds, offering more direct control than purely automated tools. It's particularly useful when you have a clear, similar area nearby to sample from.
Step-by-Step Guide:
- Select the Patch Tool from the toolbar.
- Draw a selection around the text you wish to remove.
- Drag the selection to a nearby clean area that has a similar texture and color.
- Photoshop will replace the text area with pixels from the chosen clean area.
- Deselect and fine-tune any visible seams or imperfections with the Healing Brush or Clone Stamp Tool.
- Repeat for multiple text blocks if necessary, ensuring consistency.
Method 5: The Healing Brush Tool
Similar to the Clone Stamp, the Healing Brush tool samples pixels from a source area. However, it goes a step further by blending the sampled texture with the color, luminance, and transparency of the destination area. This results in a more natural blend, especially on backgrounds with color gradients or subtle lighting variations.
When to Use It: This tool is best for removing text while preserving the subtle transitions of color and texture in the background. It's a good choice when you need to match not just the pattern but also the "feel" of the surrounding area.
Step-by-Step Guide:
- Select the Healing Brush Tool from the toolbar.
- Alt/Option-click on a clean area near the text to sample pixels and their properties.
- Paint gently over the text to replace it with the sampled texture, which will be blended with the background.
- Match source areas frequently to ensure accuracy, especially if the background changes in color or texture.
- Adjust brush hardness and size for detailed work and larger areas.
- Use Zoom to ensure that edges blend seamlessly and imperfections are minimized.
Text Removal Across Different Photoshop Versions
The capabilities for removing text in Photoshop have evolved significantly with each release, offering increasingly sophisticated and automated solutions.
Photoshop CS6
While considered an older version, Photoshop CS6 still possesses the core tools necessary for effective text removal. The Clone Stamp and Healing Brush remain powerful manual options, and the Content-Aware Fill feature in CS6 is robust enough to handle many textured backgrounds.
Step-by-Step Guide (CS6):
- Open your image and duplicate the background layer (Ctrl+J or Cmd+J).
- Use the Lasso Tool to roughly select the text area.
- Go to Edit > Fill, and choose Content-Aware.
- Use the Clone Stamp Tool to refine any areas with inconsistent textures or repeating patterns.
- Apply the Healing Brush for smoother blending around the edges of the corrected area.
- Zoom in and fine-tune until the text is completely concealed.
Photoshop CS3
Photoshop CS3 lacks the advanced automated tools found in later versions. Text removal in CS3 relies primarily on manual techniques using the Clone Stamp and Healing Brush. This requires careful sampling and patience to achieve natural-looking results.
Step-by-Step Guide (CS3):
- Duplicate your working layer to preserve the original image.
- Select the Clone Stamp Tool.
- Alt/Option-click on an area close to the text to sample pixels.
- Carefully paint over the text, constantly resampling from different areas to avoid pattern repetition.
- Use the Healing Brush to soften any hard edges or color mismatches.
- Zoom to 200% or more for precise correction.
- Save your progress frequently.
Photoshop 7.0
Photoshop 7.0 is a very early version, offering minimal automated features. Removing text here is almost entirely a hands-on job using the Clone Stamp and Healing Brush. The absence of Content-Aware Fill means meticulous cloning and healing, bit by bit. Employing Layer Masks can significantly aid in managing reversible edits and maintaining a natural background.
Step-by-Step Guide (7.0):
- Duplicate the image layer to create a backup.
- Use the Lasso Tool to create a rough border around the text.
- Carefully clone pixels from a nearby clean area into the text space.
- Heal and blend edges to ensure natural transitions.
- Utilize Layer Masks where possible to keep edits non-destructive and easily adjustable.
- Check with varying zoom levels for overall consistency.
Photoshop 2020
Photoshop 2020 introduced significant improvements to Content-Aware Fill, including live previews and quicker sampling tools. These features provide users with more precise control when removing text, especially against varied backgrounds.
Step-by-Step Guide (2020):
- Duplicate the background layer.
- Select the text using guided tools like the Object Selection Tool or Lasso Tool.
- Choose Edit > Content-Aware Fill.
- Adjust the fill settings and sampling brush within the Content-Aware Fill workspace to refine the results.
- Confirm the fill operation and close the workspace.
- Polish edges and any visible artifacts with the Healing Brush or Patch Tool.
- Save your final corrected image.
Photoshop 2024
The 2024 version builds upon previous releases with an enhanced Content-Aware Fill, offering greater control, faster real-time previews, and more intuitive edge refinement. Workflow improvements streamline the entire text removal process.
Step-by-Step Guide (2024):
- Duplicate your working layer.
- Select the text area using the Lasso Tool or Quick Selection Tool.
- Open the Content-Aware Fill workspace via the Edit menu.
- Fine-tune the sampling area in the workspace to exclude problematic sections and guide the fill more effectively.
- Preview the fill in real-time and apply when satisfied with the result.
- Touch up any visible artifacts or imperfections with the Clone Stamp or Healing Brush.
- Save your file, considering transparency if relevant.
Photoshop 2026 (and beyond)
Later versions of Photoshop, such as the hypothetical 2026, leverage advanced AI tools to make text removal even more effortless. The improved Content-Aware Fill is smarter, and dedicated tools like the "Remove Tool" can often eliminate text in a single pass, even on complex backgrounds. Neural Filters can also assist in further cleanup if the initial removal isn't perfect.
Step-by-Step Guide (2026):
- Open the image and select the text area using any selection tool (e.g., Lasso, Marquee, Object Selection).
- Activate the Remove Tool or use Edit > Content-Aware Fill for intelligent background reconstruction.
- Adjust sampling areas and fill settings in the overlay panel for optimal blending.
- Utilize Neural Filters for additional cleanup if necessary.
- Refine edges with the Healing Brush or Clone Stamp Tool if any artifacts remain.
- Finalize the image by smoothing out any remaining lighting or texture inconsistencies.
Troubleshooting Complex Scenarios
Even with powerful tools, some images present greater challenges. Here are tips for tackling them:
Dealing with Complex Backgrounds Behind Text
When text is superimposed on busy or intricate backgrounds, automated tools might struggle.
- Rough Selection: Use the Lasso or Quick Selection tool to make a rough selection of the text.
- Content-Aware Fill: Employ Content-Aware Fill, but be prepared for imperfections.
- Manual Refinement: The crucial step is to meticulously fix the areas where Content-Aware Fill faltered. Use the Clone Stamp or Healing Brush to reconstruct the background detail, sampling from various nearby areas to ensure a natural appearance.
Avoiding Image Distortions During Cloning or Healing
A common mistake is over-sampling from a single area, leading to noticeable repetition.
- Varied Sampling: Avoid repeatedly cloning from the exact same spot. Constantly grab samples from different, clean areas adjacent to the text.
- Subtle Application: Zoom in and use a soft brush with controlled opacity or flow. Build up the correction gradually rather than applying large, sweeping strokes. This allows for more nuanced blending.
Handling Shadows and Gradients
Text on areas with shadows or smooth color gradients requires careful attention to detail.
- Small Sections: Work on small, manageable sections of the text at a time.
- Match Direction and Color: Pay close attention to the direction and intensity of shadows and the subtle color shifts in gradients. Sample from areas that closely mimic these characteristics.
- Soft Brushes and Low Opacity: Use soft-edged brushes with low opacity and flow settings. This allows for gradual blending and prevents harsh lines or abrupt color changes.
Preserving Texture and Lighting
The goal is to replace the text without altering the underlying visual integrity of the image.
- Multiple Sampling Points: Sample from several different spots around the text to capture a range of textures and lighting conditions.
- Layer Masks: Use Layer Masks to carefully blend the corrected areas. This allows you to control the opacity and flow of your brush strokes non-destructively.
- Visual Checks: Toggle the visibility of your correction layer (or use a temporary layer for your edits) to compare the corrected area with the original background. This helps in spotting inconsistencies in texture or lighting.
Alternatives to Photoshop for Text Removal
While Photoshop is the industry standard, other tools can also be effective, especially for simpler tasks or for users who prefer less complex software.
Pixelbin Remove Text from Image
For a quick, browser-based solution, Pixelbin's tools offer an accessible option. This is ideal if you don't want to open a full editing program or deal with layers and masks.
How it Works:
- Upload your image by dragging and dropping or browsing your device.
- The tool automatically processes the image to remove text.
- Download the cleaned image.
Pixelbin's paid plans allow for batch processing, which is beneficial for large numbers of images. The results are often clean and polished, with the tool handling the complexity automatically.
AniEraser
AniEraser is another dedicated tool, available for desktop and mobile, that focuses on removing unwanted objects, including text, from both images and videos.
How it Works:
- Download and launch AniEraser.
- Import the photo you wish to edit.
- Adjust the brush size and highlight the unwanted text.
- Use the Preview option to check the results before proceeding.
- Initiate the removal process and save the cleaned image.
AniEraser is noted for being cost-effective and user-friendly, making it a good alternative for those seeking a straightforward removal process.
iMyFone MarkGo
iMyFone MarkGo is presented as a beginner-friendly alternative to Photoshop, capable of removing text and watermarks from photos and videos.
How it Works:
- Open iMyFone MarkGo and import your image.
- Use the Selection tool to outline the text area.
- A selection box will appear; drag it over the text.
- Click the "Remove Now" button.
- Save the changes once you are satisfied with the result.
The software boasts built-in templates, audio, filters, and effects, making it a versatile tool for various editing needs.
Frequently Asked Questions About Text Removal in Photoshop
Can Photoshop remove text from faces?
Yes, Photoshop can be used to remove text from images, including those featuring faces. However, the success and subtlety of the removal depend heavily on the complexity of the background around the text and your skill in using the tools. For portraits, preserving facial features without distortion requires careful application of techniques like the Clone Stamp or Healing Brush, often with very precise sampling and blending.
I have Photoshop 7.0 and don't see "Content-Aware Fill." Where can I find it?
The "Content-Aware Fill" feature was introduced in Photoshop CS5. Versions prior to CS5, such as Photoshop 7.0, do not have this specific option. In Photoshop 7.0, you would rely on the Patch Tool for a more advanced fill option than basic cloning, though it lacks the intelligent analysis of Content-Aware Fill. You can still achieve good results with the Clone Stamp Tool and Healing Brush Tool.
How do I remove text from an image without removing the background in Photoshop?
The methods described above-Clone Stamp, Spot Healing Brush, Healing Brush, Patch Tool, and Content-Aware Fill-are all designed to remove text while preserving and reconstructing the background. The key is to use these tools judiciously, sampling from appropriate areas and blending carefully to ensure the background remains intact and natural-looking.
How do I remove a watermark in Photoshop CC 2019?
Removing a watermark in Photoshop CC 2019 involves similar techniques. You can use the Content-Aware Fill after making a selection around the watermark, or use the Clone Stamp Tool and Healing Brush Tool for more manual control. For complex watermarks, a combination of these tools, along with careful attention to detail, will yield the best results.
By understanding the strengths of each tool and practicing these techniques, you can effectively remove unwanted text from virtually any image in Photoshop, enhancing your photos and graphics with precision and ease.