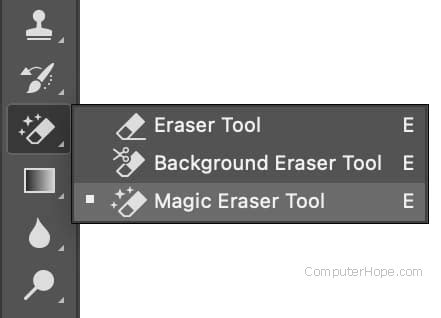
Photoshop's Eraser tool is a fundamental component for image manipulation, offering users the ability to precisely remove or alter unwanted elements within a photograph. This versatile utility can render pixels transparent or blend them with the background color, facilitating seamless edits without introducing visual artifacts. Adobe Photoshop provides a trio of specialized eraser tools: the standard Eraser Tool, the Background Eraser Tool, and the Magic Eraser Tool. Each possesses distinct functionalities, catering to a wide array of editing requirements.
Understanding the Core Eraser Tool
The fundamental Eraser Tool in Photoshop serves as a versatile instrument for selectively removing portions of an image. Its functionality is highly customizable through various settings accessible in the Options Bar. These include brush size, hardness, and opacity, all of which allow for precise control over the erasing effect. Beyond these basic adjustments, the Eraser Tool also offers the ability to erase to a saved state or a specific snapshot of the image. This feature is particularly invaluable for reverting to a particular point in the editing workflow, providing a safety net for complex adjustments.
When employing the Eraser Tool, the Options Bar becomes the central hub for customization. Here, users can dictate the brush's characteristics, such as its mode, size, and opacity. The tool itself can operate in different modes, including Brush, Pencil, or Block. The Brush mode offers softer, more blended edges, ideal for subtle removals. The Pencil mode, conversely, provides hard-edged, precise results akin to a traditional pencil. The Block mode, less commonly used, displays a square cursor rather than the typical circular brush tip.
The Eraser Tool is classified as a destructive tool because it permanently removes pixels rather than simply hiding them. This permanence can pose challenges for subsequent edits if a change needs to be reversed or modified. To mitigate this risk, a best practice is to duplicate the background layer in the Layers Panel before commencing any erasing. This ensures that the original image data remains intact on a separate layer.
To initiate the erasing process, one simply selects the Eraser Tool from the Toolbar and drags it across the desired areas of the image. Depending on the chosen settings, the tool will either make the pixels transparent or replace them with the image's background color.
Erasing to History and Layer Masks
For intricate editing processes, the option to "Erase to History" offers granular control over the eraser's impact within the layer hierarchy. This allows for targeted reversals of edits without affecting other parts of the image. Furthermore, for non-destructive editing, Photoshop strongly advocates the use of Layer Masks as an alternative to directly erasing pixels. Layer Masks enable users to hide portions of a layer non-destructively, meaning the "erased" areas can be easily revealed or modified later by adjusting the mask. This approach preserves the original pixel data, offering maximum flexibility throughout the editing process.
Specialized Eraser Tools: Background Eraser and Magic Eraser
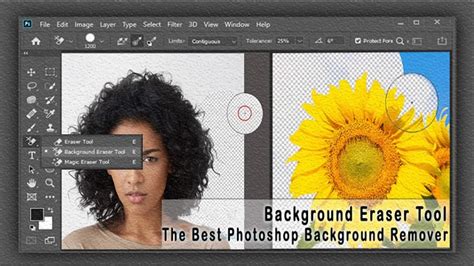
Beyond the standard Eraser Tool, Photoshop presents two powerful specialized variants: the Background Eraser Tool and the Magic Eraser Tool.
The Background Eraser Tool
The Background Eraser Tool is specifically engineered to remove background elements from an image while meticulously preserving the main subject. It achieves this by intelligently detecting the color difference between the desired foreground and the background. This capability makes it significantly easier to erase unwanted areas without inadvertently affecting the primary subject.
At its core, the Background Eraser Tool functions by sampling colors. When you drag the tool over an image, it samples the color directly beneath the crosshair at the center of the cursor. It then proceeds to erase pixels of that sampled color within the larger brush area. This color-sampling mechanism is fundamental to its operation.
The Background Eraser Tool is, in essence, a color-specific eraser. It samples colors as you drag the tool over them and erases only those identified colors, leaving all other colors untouched. This makes it particularly effective for removing specific hues or tones that constitute the background.
A common misconception is that the Background Eraser Tool is exclusively for erasing backgrounds. While its name suggests this, it can be used to erase any part of an image based on the color it samples. Photoshop, by itself, doesn't inherently understand what constitutes a "background" versus a "subject" in a photograph. The tool's efficacy lies in its ability to target and remove specific colors.
How the Background Eraser Tool Works
To understand its mechanics, consider an example: erasing a blue column between two green columns. By default, the Background Eraser samples the color directly under its central crosshair. The larger circle around the crosshair indicates the area where pixels of the sampled color will be erased. As you drag the tool, if the crosshair remains over the blue area, the blue pixels are removed. If the circle inadvertently extends over a green column, those green pixels remain untouched because they differ from the sampled blue color. This precise targeting allows for careful work along the edges of the desired removal area.
When pixels are erased, they are replaced by a checkerboard pattern, which is Photoshop's standard representation of transparency on a layer. This transparency can sometimes lead to questions, especially when working with the default "Background" layer. Photoshop treats "Background" layers differently from regular layers. Transparency is not permitted on a true Background layer, as its purpose is to be opaque. When you erase pixels on a Background layer, Photoshop automatically converts it into a regular layer (usually named "Layer 0") to accommodate the transparency.
Sampling Options: Continuous, Once, and Background Swatch
The behavior of the Background Eraser Tool can be finely tuned through its Sampling Options, found in the Options Bar. These options dictate how the tool samples colors during the erasing process:
- Continuous: This is the default setting. As you move the Background Eraser, Photoshop continuously samples the color under the crosshair. This is beneficial when the background you're trying to erase has multiple colors or variations.
- Once: With this setting, Photoshop samples the color under the crosshair only once, at the moment you first click your mouse button. It will then erase pixels of that specific sampled color, regardless of any other colors you drag the crosshair over while holding the mouse button down. This is useful when the background color is uniform.
- Background Swatch: This option allows you to define a specific color as the "background" color to be erased. You would first select the desired color from the Color Picker (matching it as closely as possible to the background you want to remove) and then designate it as the background swatch. The tool will then target and erase this specific color.
The Magic Eraser Tool
The Magic Eraser Tool operates on principles similar to the Magic Wand selection tool but, instead of creating a selection, it directly erases areas of similar color. By clicking on a pixel, the Magic Eraser automatically erases all contiguous pixels of the same or similar color within a defined tolerance. This makes it incredibly efficient for removing solid-colored backgrounds or large areas with uniform hues.
The Magic Eraser's effectiveness can be adjusted through its Sampling and Limits settings. The Sampling option determines whether it samples a single color once or continuously samples as you drag. The Limits setting controls whether it erases only contiguous pixels or all pixels of the sampled color throughout the image. Modifying these settings allows for precise control over the extent of color selection and erasure.
Advanced Control and Refinement
Beyond the core functionalities, Photoshop offers several advanced settings and techniques to refine the erasing process.
Limits Settings: Contiguous, Find Edges, and Discontiguous
The Limits settings in the Background Eraser Tool dictate where Photoshop looks for pixels to erase that match the sampled color. These settings are crucial for preventing unwanted erasure of foreground elements.
- Contiguous (Default): This setting restricts Photoshop to erasing pixels only in areas that are physically touching the pixel under the crosshair. It prevents the tool from "jumping" across objects or gaps in the image. For instance, when erasing sky around a tree, Contiguous will erase the sky outside the tree but will not reach isolated blue areas trapped between leaves and branches.
- Find Edges: Similar to Contiguous, Find Edges also erases only touching pixels. However, it is more precise and excels at preserving sharp edge details of the foreground subject. While it improves edge quality, it still struggles with isolated areas that are not directly connected to the main background mass.
- Discontiguous: This setting frees Photoshop to erase any pixels anywhere in the image that match the sampled color, regardless of whether they are touching the crosshair. As long as the pixels fall within the larger brush circle, they are candidates for erasure. This is invaluable for removing isolated areas of color, such as sky pockets within foliage.
Tolerance: The Spectrum of Color Erasure
Tolerance is a critical setting that determines the range of colors Photoshop will consider when erasing. It defines how different a pixel's color can be from the sampled color for it to be erased.
- Default Tolerance (50%): This is often a good starting point.
- Lower Tolerance: Use a lower tolerance value when the subject and background colors are very similar. This prevents parts of your subject from being accidentally erased.
- Higher Tolerance: Employ a higher tolerance value if you notice color fringing around the edges of your subject. This allows the tool to erase a broader spectrum of similar colors, helping to clean up the edges more effectively.
Adjusting the Tolerance is often an iterative process, requiring experimentation to find the optimal setting for a specific image.
Protect Foreground Color
When direct erasure of the background inadvertently affects the subject, the "Protect Foreground Color" option becomes indispensable. This feature allows you to sample a specific color from your image and designate it as your Foreground Color. Photoshop will then actively protect this designated color from being erased, ensuring that your subject remains intact.
To use this feature, you would typically press and hold the Alt (Windows) or Option (Mac) key, which temporarily activates the Eyedropper Tool. Clicking on a part of your subject (e.g., a flower petal) samples that color. With this color now protected, you can proceed with erasing the background, confident that your subject's critical colors will not be affected.
Keyboard Shortcuts for Efficiency
Mastering keyboard shortcuts can significantly accelerate your Photoshop workflow. The primary shortcut for the Eraser Tool is simply pressing the "E" key. This allows for rapid switching between tools, especially when moving between the Pencil Tool and the Eraser Tool.
The size of the Background Eraser Tool's brush can be adjusted directly from the keyboard. Repeatedly pressing the left bracket key [ will make the brush smaller, while the right bracket key ] will increase its size. For finer control over edge hardness, the Shift key can be combined with the bracket keys. Pressing Shift + [ softens the edges, and Shift + ] hardens them.
Alternative and Advanced Techniques
While the Eraser tools are powerful, Photoshop offers alternative and often superior methods for background removal, particularly for achieving non-destructive and professional results.
Layer Masks: The Non-Destructive Approach
As mentioned earlier, Layer Masks are the preferred method for non-destructive background removal. Instead of deleting pixels, a Layer Mask allows you to "hide" parts of a layer. Black on the mask conceals, white reveals, and shades of gray create semi-transparency. This means that any "erased" area can be brought back simply by painting white on the mask.
To use a Layer Mask for background removal:
- Duplicate the Layer: Always duplicate your background layer to preserve the original image.
- Create a Layer Mask: With the duplicated layer selected, click the "Add layer mask" icon at the bottom of the Layers panel.
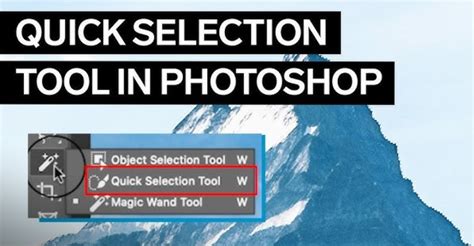
- Select and Mask: Use selection tools like the Quick Selection Tool, Object Selection Tool, or Pen Tool to isolate your subject.
- Refine the Selection: Utilize the "Select and Mask" workspace to meticulously refine the edges of your selection, ensuring a clean separation.
- Apply the Mask: With your subject selected, ensure the Layer Mask is active, and then paint with black on the mask to hide the background.
Quick Selection Tool and Object Selection Tool
The Quick Selection Tool and the newer Object Selection Tool leverage Adobe's Sensei AI technology to intelligently detect edges and subjects. By simply painting over your subject, these tools can quickly create a selection, significantly speeding up the initial background isolation process. Once a selection is made, it can be used to create a Layer Mask.
Remove Background Quick Action
For users seeking the fastest method, Photoshop offers a "Remove Background" quick action. This AI-powered feature automatically analyzes the image, identifies the subject, and attempts to erase the background in a single click. While incredibly fast, it may not always yield perfect results, often requiring touch-ups with other tools or Layer Masks for complex images.
The Pen Tool: Ultimate Precision
The Pen Tool offers the highest level of control for creating precise paths around a subject. While it is the most time-consuming method, it is ideal for intricate selections, subjects with sharp, well-defined edges, and when absolute accuracy is paramount. Once a path is created, it can be converted into a selection, which can then be used to create a Layer Mask or delete the background.
Best Practices and Considerations
- Duplicate Your Layer: Always work on a duplicate of your original layer to maintain the integrity of your image.
- Zoom In: For precise work, especially around edges, zoom in to at least 100% or 200%.
- Use Layer Masks: Prioritize Layer Masks for non-destructive editing. This allows for easy adjustments and reversions.
- Combine Tools: Often, the best results are achieved by combining different tools. For example, use the Quick Selection Tool for an initial broad selection, then refine with the Background Eraser or a Layer Mask.
- Understand Your Image: The best tool or technique depends on the complexity of your image, the contrast between the subject and background, and the desired level of precision.
- Solid Backgrounds: The Background Eraser and Magic Eraser tools are most effective on images with relatively solid or distinct background colors. For complex, busy backgrounds, selection-based methods with Layer Masks are generally more suitable.
How To Easily Remove Backgrounds In Photoshop
Mastering Photoshop's eraser capabilities, whether through the direct manipulation of pixels or the sophisticated control offered by Layer Masks and selection tools, is a crucial skill for any photographer or digital artist. By understanding the nuances of each tool and employing best practices, users can effectively refine their images and achieve professional-quality results.
tags: #background #eraser #tool #photoshop