The quest for a perfect digital sketch, free from the frustrating blurriness or pixelation that can plague zoomed-in artwork, often begins not with brush strokes, but with the fundamental settings of your Procreate canvas. Choosing the right resolution and canvas size in Procreate is a critical, albeit often overlooked, step. This foundational decision profoundly impacts the sharpness of your creations, the ease with which you can print them, and crucially, whether you'll encounter limiting layer caps midway through a complex design. This article delves into the intricacies of setting up high-quality canvases in Procreate, with a particular focus on fashion design, and explores how to transform these canvases into reusable templates, saving you valuable time and creative energy.
Understanding the Fundamentals: Canvas Size and Resolution
At its core, every canvas within Procreate is defined by two paramount settings:
- Size: This refers to the physical dimensions of your canvas, dictating how wide and tall it is. You can specify these dimensions in inches, centimeters, or pixels, depending on your project's requirements and your preferred workflow.
- Resolution: This setting quantifies the level of detail your canvas can hold. It is universally measured in DPI (dots per inch). For any artwork intended for printing, a resolution of 300 DPI is not just recommended, but essential. Even if your immediate plans do not include printing, working at 300 DPI ensures that your lines remain sharp and crisp on high-resolution digital displays and during close-up examinations of your work. Any resolution lower than this threshold risks rendering your lines blurry or fuzzy when you zoom in.
The Nuances of Resolution in Bitmap-Based Artistry
Procreate operates as a bitmap application. This means that all the imagery within Procreate is constructed from tiny, individual pixels, much like piecing together a mosaic with minuscule beads. This stands in stark contrast to vector-based applications like Adobe Illustrator. In vector graphics, lines are not composed of pixels but are instead defined by mathematical equations-paths constructed from points, curves, and angles. This is why, in Illustrator, you can zoom in indefinitely, and your artwork will always remain perfectly sharp.
However, in Procreate, if your canvas resolution is set too low, scaling up your artwork or preparing it for print can lead to a degradation of line quality, resulting in blurriness. For those looking to license their artwork for online sales, ensuring that your digitized creations are of high resolution is paramount. When artwork is licensed, it's frequently reproduced on a variety of products, and a low-resolution source file will inevitably compromise the final product's appearance.
Creating high-resolution pieces within Procreate can present a unique challenge: the larger the canvas size, the fewer layers you are afforded. To navigate this constraint, many artists have developed innovative workflows. A common and effective strategy involves starting the initial sketch on a smaller canvas, which allows for greater layer flexibility. Once the foundational sketch is complete and refined, it can then be scaled up to a larger canvas size, more appropriate for final illustration and art licensing.
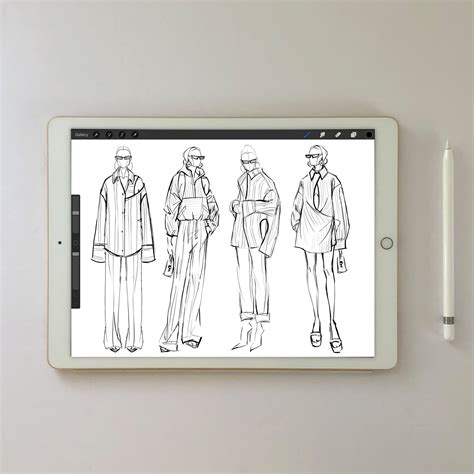
Strategic Canvas Sizing for Fashion Design and Art Licensing
Consider a scenario where the ultimate goal is a vertically oriented composition, perhaps for a fashion illustration intended for licensing. A desirable end canvas size might be 24 inches by 30 inches. However, initiating this project on a canvas of such substantial dimensions would immediately restrict you to a mere four layers. To circumvent this limitation, a more practical approach is to begin with a smaller canvas, such as 8 inches by 10 inches. This initial smaller canvas provides abundant layer flexibility, enabling you to incorporate reference photos, experiment with diverse color palettes, and meticulously refine your sketch without the looming fear of exhausting your layer count. This freedom also fosters a more relaxed creative process, knowing that layer limitations are not an immediate concern.
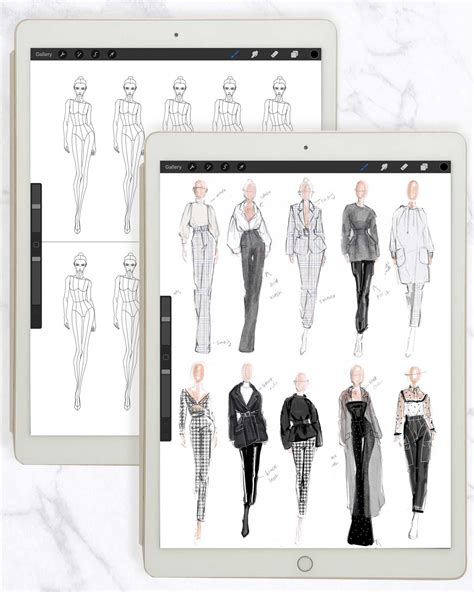
Step 1: Crafting the Initial Sketch Canvas
To commence, select a canvas orientation that best suits the intended final piece. For instance, if you are creating a vertically oriented fashion sketch and know that your target canvas size is 24 by 30 inches, you will want your initial sketch to be scalable to this exact dimension. A strategic starting point is a canvas that is precisely one-third the size of your final target: 8 by 10 inches. This allows you to create a new custom canvas within Procreate. For this example, set the dimensions to 8 x 10 inches with a resolution of 300 DPI.
It is crucial to understand that this initial sketch canvas should not be used for drawing elements that will appear in your final high-resolution piece. Because the artwork will eventually be scaled up, it will inevitably lose some resolution and can become pixelated. Use this initial canvas for sketching, exploring color ideas, and refining your overall composition. Once you are satisfied with your sketch and ready to proceed with the final illustration, it's time to resize the canvas.
Step 2: Resizing the Canvas for the Final Illustration
While it's possible to resize the canvas within the same Procreate file, it's often beneficial to duplicate your artwork. This creates a backup and allows for a cleaner transition. Duplicate your sketch canvas and, within the layer stack, rename the duplicated canvas to clearly distinguish it from the original sketch. Now, you are ready to resize this duplicated canvas to a larger dimension that is more suitable for art licensing or high-quality printing.
To resize, navigate to the Actions menu (represented by the wrench icon), select "Canvas," and then tap on "Crop and Resize." Within these settings, you can adjust the dimensions to your desired larger size. You can also adjust the DPI, but be aware that increasing the DPI at this stage will likely further reduce your available layers. Update the settings to reflect the larger canvas dimensions.
It's important to note that the maximum canvas size you can work with is influenced by your iPad model and its memory capacity. Newer iPad Pro models can accommodate significantly larger canvases than older or standard iPad models. If you are following along and need to work with a smaller, more manageable large canvas, consider dimensions like 18 x 24 inches or 16 x 20 inches.
Once you have resized to a larger canvas, you will likely be limited in the number of layers you can use. To manage this, you may need to "flatten" your sketch layers into a single layer. This is typically done by pinching the layers together within the layer stack. If you encounter difficulties with resizing, flattening your sketch layers before initiating the resize operation might be necessary.
At this point, you will likely notice your scaled-up sketch appearing in a corner of the larger canvas. The next step is to scale this sketch to fit the new canvas dimensions. While scaling up elements can compromise quality and lead to a fuzzy or pixelated appearance when printed, in this specific instance, it's acceptable because you are scaling up the initial sketch, not the final inked illustration. This scaled sketch now serves as a guide for inking and creating your final, high-resolution piece.
Key Considerations for Optimal Canvas Selection
The choice of canvas size in digital art, much like in traditional mediums, can significantly influence the impact and presentation of your work. Several factors should guide this decision, including the style of your digital artwork and its intended use.
Pixels vs. Inches and the Role of Resolution
To truly grasp canvas sizing, one must understand the distinction between pixels and inches, and the critical role of resolution and DPI.
- Pixels: These are the fundamental building blocks of a digital image-tiny squares that, when combined, form your artwork. The more pixels you have, the greater the potential for detail in your image.
- Inches: This unit of measurement is primarily used to define the physical dimensions of printed materials, such as photographs, posters, and documents. When high-quality printing is a requirement, inches become a crucial consideration.
The relationship between pixels and inches is directly determined by the resolution of the digital image and the scale at which it is printed.
Defining Resolution and DPI
Resolution refers to the amount of detail contained within an image, essentially dictating its overall clarity. Resolution is vital for digital displays, such as those on computer screens and smartphones, and is frequently used to describe the quality of digital images.
DPI (dots per inch) is a specific measure of printing resolution, indicating the density of dots that will be printed within a single inch of space on the final output. A higher DPI translates to a more detailed and sharper printed image. For most professional print projects, a DPI of at least 300 is the industry standard, ensuring your artwork appears crisp and clear when reproduced on paper.
How To Pick the Right Size/Resolution for your Art - Beginner Illustration Tips
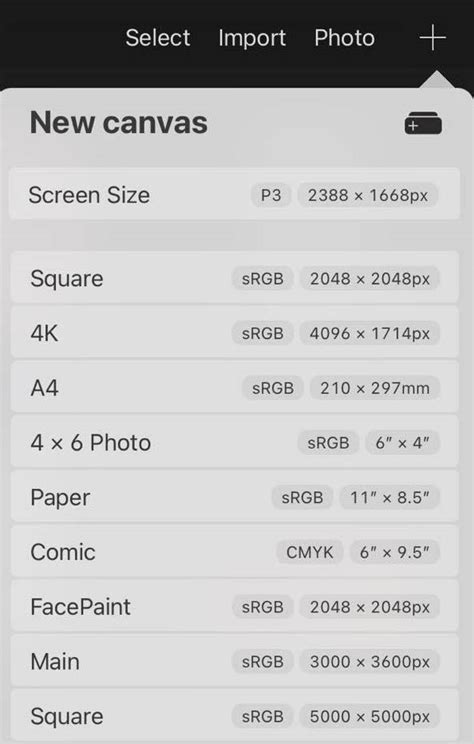
Popular Procreate Canvas Sizes and Their Applications
Procreate offers a diverse array of pre-set canvas sizes, each tailored to different artistic needs, including illustrations, graphic design, and digital painting. The ideal canvas size ultimately depends on the intended application of the artwork, the desired level of detail, and your personal preferences.
Screen-Optimized Sizes
- 2048 x 2732 pixels: This is the native resolution for the 12.9-inch iPad Pro. It provides ample space for detailed illustrations, digital paintings, and complex designs, making it an excellent choice for artwork created directly on this device.
- 1668 x 2224 pixels: Corresponding to the 11-inch iPad Pro, this canvas size offers a generous workspace suitable for detailed artwork on the smaller Pro model.
Print-Ready Sizes
- 3000 x 3000 pixels (equivalent to 10 x 10 inches at 300 DPI): This square canvas is well-suited for creating artwork intended for medium-sized prints, such as art prints, posters, or greeting cards.
- 4500 x 5400 pixels (equivalent to 15 x 18 inches at 300 DPI): For larger prints or artworks requiring a higher degree of intricate detail, this canvas size offers increased resolution and more room for creative exploration.
Social Media Dimensions
- 1080 x 1080 pixels (Square): Ideal for creating visually appealing content for social media platforms like Instagram, where square images are commonly used for posts and profile pictures.
- 1080 x 1920 pixels (Vertical): This format is perfect for designing content tailored for platforms that favor vertical orientation, such as Instagram Stories, TikTok, or other short-form video platforms.
The Power of Custom Sizes
Procreate's flexibility extends to its custom canvas creation tool. This feature allows you to define dimensions that precisely match your specific project requirements. Whether you are working on a unique commission, designing for a particular digital display, or adhering to specific printing specifications, custom canvas sizes offer unparalleled flexibility and versatility.
Factors Influencing Your Canvas Choice
When selecting a canvas size in Procreate, several key factors warrant careful consideration:
- Level of Detail: The complexity and intricacy of your artwork will directly influence the required canvas size. Detailed work demands more pixels to render effectively.
- Intended Display or Printing Format: Will your artwork be viewed on a screen, printed as a small postcard, or displayed as a large-format poster? The final output medium is a critical determinant of size.
- Project-Specific Requirements: Clients or specific briefs may dictate exact dimensions or aspect ratios.
- Subject Matter: The nature of your subject can inform the ideal canvas dimensions. A sprawling landscape might benefit from a wider aspect ratio, while a portrait might be best suited to a vertical orientation.
- Compositional Vision: Visualize how you intend to compose your artwork. Different canvas dimensions can either enhance or detract from the overall composition.
- Display Location: If you have a specific physical location in mind for displaying your artwork, consider the available space and how various canvas dimensions will fit within that environment.
- Standard Sizes and Ratios: Familiarize yourself with common aspect ratios like 4:3, 3:2, and 16:9, which often correspond to standard photo and screen dimensions. These can serve as excellent starting points.
- Experimentation: Do not feel constrained by standard sizes. Experiment with custom dimensions to perfectly align with your artistic vision.
- Framing and Matting: If your artwork will be framed or matted, remember to account for the dimensions of the frame and matting when selecting your canvas size to ensure your artwork is not cropped unintentionally.
- Intuition: Ultimately, trust your artistic instincts and preferences. The "perfect" canvas size is often a subjective decision that aligns with your creative goals.
Common Pitfalls to Avoid
Navigating the world of digital art canvas settings can sometimes lead to common mistakes. Being aware of these can help you avoid them:
- Choosing Arbitrary Sizes: Selecting canvas dimensions without a clear purpose or understanding of their implications can lead to suboptimal results.
- Ignoring Resolution: Failing to set an adequate resolution (especially 300 DPI for print) is a primary cause of blurry or pixelated artwork.
- Overestimating Detail Needs: Conversely, some artists create excessively large canvases when the project does not warrant it, leading to unnecessarily large file sizes and potentially fewer layers.
- Neglecting Aspect Ratio: The proportional relationship between width and height is crucial. Ignoring it can lead to distorted or awkwardly composed artwork.
- Forgetting Margins and Bleed: When creating artwork for printing, it is essential to account for margins and bleed areas. These ensure that important elements of your artwork are not cut off during the printing and trimming process.
- Not Testing Different Sizes: Before committing to a specific canvas size, it is highly recommended to test your artwork on various dimensions to observe how it impacts the composition and overall aesthetic.
Color Profiles and Layer Management
When setting up your canvas, consider the color profile:
- sRGB: This color profile is the standard for digital artwork and is best for on-screen viewing.
- CMYK: This profile is optimized for printed materials, as it closely matches the color mixing process used by commercial printers. It's often best to start with an RGB profile unless a client specifically requests CMYK. Be aware that colors may appear less vibrant on-screen when using CMYK.
Remember that a higher canvas resolution, while offering more detail, directly reduces the number of available layers in Procreate. This is a critical trade-off to manage, especially in complex projects.
Template Creation for Efficient Workflow
The ability to create reusable templates in Procreate can significantly streamline your workflow, particularly for fashion design. By setting up a canvas with your preferred dimensions, resolution, and perhaps even some foundational guides or layer setups, you can save this as a template for future projects. This eliminates the need to re-enter these settings each time, allowing you to jump straight into the creative process.
To create a template:
- Set up your canvas with the desired size, resolution, and orientation.
- Add any essential guides, grids, or base layers you frequently use.
- When saving your work, choose the option to save it as a template. Procreate will store this in a dedicated template library, accessible for future use.
By mastering Procreate's canvas settings and employing strategic workflow techniques, you can ensure your digital artwork meets the highest standards of quality, whether for intricate fashion designs, high-resolution prints, or engaging digital content. The perfect canvas size is not a universal constant but a deliberate choice, informed by your project's unique demands and your artistic aspirations.