DaVinci Resolve has rapidly ascended to become a powerhouse in the post-production industry, offering a comprehensive suite of tools for editing, visual effects, motion graphics, color correction, and audio post-production. Initially recognized for its exceptional color grading capabilities, DaVinci Resolve has evolved dramatically since Blackmagic Design's acquisition in 2009. It has transformed from a niche application with a modest user base to a widely adopted professional solution, now rivaling established industry standards like Adobe Premiere Pro and Apple's Final Cut Pro X in popularity. This evolution has made it an attractive option for both seasoned professionals and aspiring creators, though its extensive feature set can initially appear daunting. This tutorial aims to demystify DaVinci Resolve, providing a structured approach to understanding its core functionalities and workflows, from basic editing to advanced visual effects and audio mixing.
Understanding the DaVinci Resolve Workspace: The Seven Pages
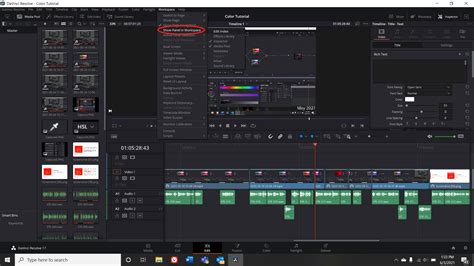
Upon launching DaVinci Resolve, users are presented with a project management window where they can create new projects or open existing ones. Once a project is initiated, the main DaVinci Resolve window opens, featuring seven distinct "workstations," or pages, accessible from the bottom of the screen. Each page is optimized for a specific stage of the post-production process, allowing for a streamlined and efficient workflow.
Media Page: Importing and Organizing Assets
The Media Page is the entry point for all your project assets. It's where you import video footage, audio files, and other media. This page allows for easy organization through the creation of "bins," which function as folders to categorize your assets. You can also create new timelines directly from this page. Importing media is straightforward: navigate to File > Import > Media, or use the keyboard shortcuts ⌘I (Mac) or CTRL + I (Windows). Alternatively, you can drag and drop files directly from your file explorer into the media pool. Within the Media Page, selecting a clip reveals its metadata, and you can mark specific in and out points for precise selection of desired segments, which is particularly useful for selecting B-roll footage.
Cut Page: Rapid Assembly and Rough Edits
Designed for speed and efficiency, the Cut Page offers a streamlined editing interface. It features a large timeline editor, making it ideal for creating first-pass rough edits, quickly scrubbing through footage, and identifying the best takes. This page is particularly beneficial for editors working on fast-paced projects like news or sports, where rapid assembly is crucial.
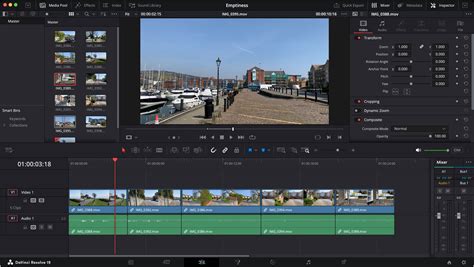
Edit Page: The Creative Hub
The Edit Page is often considered the "swiss army knife" of DaVinci Resolve, serving as the primary workspace for most editors. It provides easy access to a comprehensive array of editing tools, including scaling options, transitions, and an extensive effects library. Here, editors can manipulate video clips, arrange them on the timeline, and apply basic effects. The Edit Page is where the bulk of narrative construction and scene assembly takes place.
Fusion Page: Advanced Visual Effects and Motion Graphics
For those seeking to create sophisticated visual effects and motion graphics, the Fusion Page is the dedicated environment. It employs a powerful node-based compositing system, which, while having a steeper learning curve than traditional layer-based editors, offers unparalleled control and flexibility. The Fusion Page allows for the creation of complex visual sequences, 3D compositing, and the integration of plugins, enabling users to generate stunning cinematic visuals directly within DaVinci Resolve without the need for external applications. Blackmagic Design's commitment to advancing this page is evident with features like 3D camera tracking and Universal Scene Descriptor (USD) nodes, facilitating seamless transitions from 2D to 3D workflows.
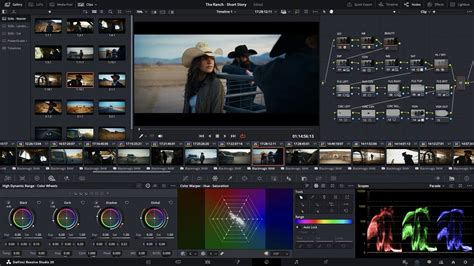
Color Page: Precision Color Grading and Correction
DaVinci Resolve's reputation was built on its robust color grading capabilities, and the Color Page remains its crown jewel. This page is a dream for colorists, offering a comprehensive suite of tools for both color correction and color grading. It utilizes a node-based system, similar to Fusion, allowing for intricate and precise control over every aspect of an image's color and tone. Features like Color Wheels, Curves, HDR Grade, RGB Mixer, and advanced tools like Magic Mask and Qualifier empower users to achieve cinematic looks, match colors between shots, and enhance the overall aesthetic of their projects. The understanding of color spaces, managed within Project Settings, is crucial for achieving consistent and accurate results.
My Davinci Resolve Color Grading Process - Simple & Effective!
Fairlight Page: Professional Audio Post-Production
The Fairlight Page is a fully integrated digital audio workstation (DAW) designed for professional sound editing, mixing, and mastering. It provides quick access to audio effects, mixers, and a detailed timeline for manipulating audio clips. Whether you're recording voiceovers, ADR (Automated Dialogue Replacement), mixing dialogue, music, and sound effects, or working with complex multichannel audio like Dolby Atmos, the Fairlight Page offers the tools to achieve broadcast-quality sound. Its capabilities extend to advanced features like channel mapping and linked groups, ensuring precise audio control.
Deliver Page: Exporting Your Masterpiece
The final stage of the post-production process is handled by the Deliver Page. This is where you prepare your project for export to various platforms, including local storage, social media, and broadcast. The Deliver Page offers a wide range of presets and custom export options, allowing you to control codecs, resolutions, frame rates, and other delivery specifications. It's essential to review your project settings and ensure all elements are finalized before adding your project to the render queue.
Core Editing Workflows in DaVinci Resolve
Creating and Managing Timelines
A timeline is the canvas where your edited sequence comes to life. To create a new timeline, right-click within the media pool on the Media or Edit Page and select Timelines > Create New Timeline (or use ⌘N / CTRL + N). You can also create a new timeline via File > New Timeline. A pop-up window allows you to configure timeline settings, such as frame rate and resolution, which can either match your project settings or be customized independently. Timelines are organized within the media pool, and new bins can be created to keep your project files organized.
Importing and Editing Media
Once media is imported into the media pool, it can be dragged and dropped onto your timeline. DaVinci Resolve offers several editing modes to manipulate clips on the timeline:
- Selection Mode (Hotkey "A"): Allows you to move clips freely and adjust their duration by dragging the ends of the clip.
- Trim Mode (Hotkey "T"): Enables trimming clips without affecting the adjacent clips or the overall timeline.
- Dynamic Trim Mode (Hotkey "W"): Offers a more advanced trimming capability, allowing adjustments while simultaneously playing back the timeline.
- Blade Tool (Hotkey "B"): Used to cut clips into separate segments.
Working with Audio
Audio is imported and managed similarly to video. Once on the timeline, audio editing is primarily handled within the Fairlight Page. This page provides access to audio effects, mixers, and detailed control over individual audio tracks, essential for sound design, dialogue editing, and music mixing.
Adding Effects and Transitions
Transitions and visual effects are accessed via the Effects Library, typically located in the upper-left corner of the Edit Page. This library contains a variety of video transitions, audio transitions, motion graphics, and OpenFX plugins. To apply a transition, simply drag and drop it onto the edit point between two clips on the timeline. The duration of the transition can be adjusted by scaling the transition box that appears on the clip. For more advanced visual effects, the Fusion Page is the go-to destination.
Color Grading and Correction Deep Dive
The Color Page is where the magic of visual storytelling truly unfolds. Before diving into grading, it's crucial to configure your Project Settings, particularly under the Color Management tab, to define your working color space. DaVinci Resolve's node editor is central to its color workflow. Each node represents a step in the color process, allowing for complex and non-destructive adjustments.
Key tools available on the Color Page include:
- Curves: Provide granular control over contrast and color adjustments across different tonal ranges (e.g., RGB Curves, Hue vs. Saturation).
- Primary Wheels: Offer intuitive control over Lift (shadows), Gamma (midtones), Gain (highlights), and Offset (overall image). The color temperature of each range can also be adjusted.
- Scopes: Essential for objective color analysis, Scopes (like Waveform, Vectorscope, and Histogram) provide visual feedback on luminance and chrominance, ensuring accurate exposure and color balance, especially when monitor calibration is a concern.
My Davinci Resolve Color Grading Process - Simple & Effective!
Adding Text and Titles
Text and titles can be added from the Effects Library on the Edit Page. Dragging a "Text" title preset onto the timeline creates a basic text layer. The appearance, font, size, color, and position of the text can be modified in the Inspector panel (usually on the top right). Keyframes can be utilized within the Inspector to animate text elements, bringing dynamic titles and graphics to your project.
Exporting Your Project
Once your project is complete and all edits, color grading, audio mixing, and effects are finalized, you'll move to the Deliver Page. Here, you select your desired export settings, including codec, resolution, frame rate, and audio configuration, using presets or custom options. After confirming all settings, add the job to the render queue and initiate the export process.
DaVinci Resolve Studio and Hardware Integration
While the free version of DaVinci Resolve offers an incredibly powerful feature set, DaVinci Resolve Studio unlocks even more advanced capabilities, such as higher resolutions, higher frame rates, more GPU acceleration, collaborative workflows, and specialized tools like advanced noise reduction, motion blur effects, and stereoscopic 3D tools.
Blackmagic Design also offers a range of hardware control surfaces designed to enhance the DaVinci Resolve experience:
- DaVinci Resolve Mini Panel: A compact yet powerful panel offering refined control for color grading.
- Editor Keyboard: Designed specifically for editing, featuring dedicated keys for quick camera selection and editing, ideal for multi-cam workflows.
- Advanced Panning, Editing, and Control Surfaces: Premium keyboards and consoles provide tactile control over editing, trim, and timecode functions.
- Color Panels (e.g., Micro Color Panel, Advanced Color Panel): These panels offer precise tactile control over color grading parameters, including trackballs and dials for nuanced adjustments.
- Fairlight Consoles: Large-format consoles provide comprehensive control for complex audio mixing and sound design tasks, with options for different working angles and custom bay configurations.
These hardware solutions are designed to accelerate workflows and provide a more intuitive and tactile interaction with DaVinci Resolve's sophisticated tools, allowing creators to work faster and achieve greater creative control.
Embracing the Learning Curve
DaVinci Resolve's comprehensive nature means there's always more to learn. The platform is continuously updated with new features and improvements. Blackmagic Design offers official training materials and certifications, often delivered through a network of certified training partners. These programs cater to both new users and seasoned professionals, providing hands-on lessons and practical exercises. For those new to the software, starting with fundamental editing techniques on the Edit Page, progressing to color correction on the Color Page, and then exploring the visual effects capabilities of the Fusion Page and audio tools in Fairlight, provides a logical learning path.
The journey from basic editing to advanced compositing and audio mixing within DaVinci Resolve is a rewarding one. With its powerful features and integrated workflow, it empowers creators to bring their visions to life with unparalleled creative freedom and professional polish. Whether you are cutting interviews, dramatic scenes, documentary material, music videos, or engaging in intricate visual effects and sound design, DaVinci Resolve offers the tools to excel.
tags: #blackmagic #davinci #resolve