Video editors of any skill level are continually trying to increase the quality and impact of their projects. One very effective way of doing this is to learn how to properly use blend modes in Adobe Premiere Pro CC. Blending modes allow you to specify how layers and clips stacked on top of each other interact, fundamentally changing how they are displayed together. When editing a project in Premiere Pro, one of the things you’ll be working out is which clips appear in what order. By understanding and utilizing blend modes, editors can unlock a new level of creative control and visual sophistication.
Understanding the Core Concept of Blend Modes
At its heart, a blend mode (or transfer mode) is a mechanism for pixel information to be transferred or blended with another layer. This means that to utilize a blend mode, you inherently need more than one layer present in your timeline. If you don’t have more than one layer in your timeline, you won’t be able to apply a transfer mode. The effect of a blend mode is determined by the interaction between the pixels of the top layer (the "source clip") and the pixels of the layer(s) beneath it (the "base clip").

Locating and Accessing Blend Modes in Premiere Pro
For those eager to start experimenting, the first step is to find where these powerful tools are located. Head to the Effect Controls panel. Within this panel, you will find an "Opacity" section. Expanding this section will reveal the "Blend Mode" dropdown menu. Under this menu, you'll discover a wide array of different options, thoughtfully broken down into distinct categories.
Navigating the Blend Mode Categories
The blend modes available in Premiere Pro can be broadly categorized to help understand their general behavior:
Normal: This is your default status. When a clip is set to "Normal," it simply appears as it is, without any interaction or blending with the layers beneath it.
Subtractive Category: The blend modes in the subtractive category tend to take the darker parts of your image and make them more visible, while simultaneously taking the brighter parts of your image and making them transparent. Essentially, they work by subtracting information from the base layer based on the source layer.
Additive Category: The blend modes in the additive category do essentially the opposite of the subtractive category. By using them, the brighter parts of your image will remain, while the darker parts become transparent. These modes add information to the base layer.
Complex Category: As the name suggests, the complex category of blend modes can be a little intricate. However, at their core, they tend to make changes based around whether the top or bottom clips either have a luminance value above or below a certain threshold. These modes often involve more sophisticated calculations.
Difference Category: As the name suggests, the difference category tends to take the difference between the two clips that you are interacting with. This can result in stark contrasts and unique visual effects where areas with similar luminance cancel each other out.
HSL Category (Hue, Saturation, Luminosity): This category stands for Hue, Saturation, and Luminosity. These three options work in a sort of triangle. Whichever one you choose, the source clip will maintain that trait (hue, saturation, or luminosity) while taking the other two traits from the clip beneath it. This allows for precise control over specific visual elements.
To get a deeper understanding of how each impacts your edits, we encourage you to experiment and test the various options available. The true mastery of blend modes comes through hands-on practice.
Practical Applications: Enhancing Your Videos with Blend Modes
Blend modes are used during post-production to enhance videos in multiple ways, offering solutions for a variety of creative challenges. They are instrumental in creating effects such as light leaks, film grain, exposure control, and double exposures, among many others. Working with blend modes can make your videos more creative, more unique, and give them a distinct style. Using blend modes, you can create overlays too, which can make one clip flow a lot better into the next.
Here are some of the most effective and commonly used techniques:
1. Creating Realistic Light Leaks and Overlays
Light leaks and film grain overlays are popular techniques for adding a cinematic feel or a retro aesthetic to footage. A great way to achieve this is by using pre-made light leak footage or creating your own.
For instance, imagine you have a shot of someone doing yoga and you want it to flow more cohesively with a subsequent shot of a woman holding a surfboard. You can add light leak clips onto a track above your primary footage. When you select these light leak clips and navigate to the "Blend Mode" dropdown menu in the Effect Controls panel, choosing "Screen" is often highly effective. The "Screen" blend mode works by displaying the brighter parts of the source clip while making the darker parts transparent, allowing the underlying footage to show through.
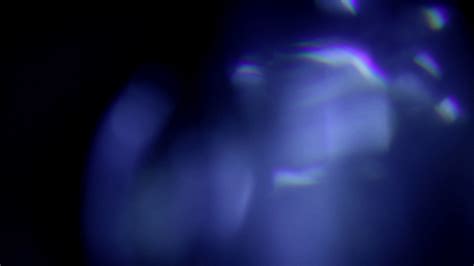
If a light leak appears too intense at the beginning, you can soften its introduction by applying a cross dissolve transition using Command+D (or Ctrl+D on Windows). This ensures the light leak fades in more subtly, making the transition between clips feel more natural and the overall look more unique. Using these overlays helps make different clips feel more cohesive and work together a little better, giving them a more distinctive style.
Create High Quality LIGHT LEAKS in Premiere Pro (No Plugins)
2. Integrating Text and Graphics Seamlessly
Blend modes are not just for video clips; they can also be used to make text and graphic elements integrate more smoothly with your background footage. This is particularly useful for travel videos or when working with shots of beautiful scenery.
Consider a sunset clip where you want to add the word "Create." After typing your text using the text tool and adjusting its size and alignment, you can make it blend with the sunset. By selecting the text layer on your timeline, going to the blend mode dropdown, and choosing "Overlay," you allow the sunset clip to show through the text. The "Overlay" blend mode generally preserves the luminosity of the base layer while blending the hue and saturation of the source layer. This makes the text appear as if it's illuminated by the sunset, creating a more visually engaging shot.
3. Crafting Double Exposures
Double exposures, a classic photographic and cinematic technique, can be effectively recreated in Premiere Pro using blend modes. This involves layering two distinct images or video clips so that they appear simultaneously.
Method 1: Using Lumetri Color Curves for Brightness Contrast
One method involves using the Lumetri Color panel, specifically the Curves section, to manipulate the luminance of a clip. For example, you can create a double exposure by having a mountain time-lapse show within a person's face.
First, you'll need to adjust the contrast of the clip intended to be the "mask" (in this case, the person's face). This effect works best when there's a clear difference between the background and the foreground. By adding points to the curves and manipulating them, you can brighten the light parts of the clip and darken the darker parts. This process effectively increases the contrast.

Once the desired contrast is achieved, you can apply a blend mode. If you choose "Multiply," the mountain time-lapse will appear in the bright areas of the face, creating a striking visual. To further enhance this effect, you can add a subtle scaling animation to the underlying mountain clip. By creating keyframes for scale at the beginning and end of the clip, you can make the time-lapse appear to grow larger as the clip progresses, adding a dynamic element to the double exposure.
Method 2: Leveraging "Screen" Blend Mode with Darker Subjects
Another approach to creating a double exposure is useful when your subject is darker, contrasting against a lighter background, such as two wolves against a grayish sky. Instead of having the background clip show up in the white areas, you can have it show up in the darker parts of your subject clip.
Select the wolf clip and set its blend mode to "Screen." This will initially make the sky show through in many areas. To refine this, you can again use the Curves adjustment in Lumetri Color. By making the bright areas even brighter and darkening the darker parts of the wolf clip, you can isolate the wolves. This results in a double exposure where the starry sky is visible through the silhouettes of the wolves, set against a clean white background.
4. Creating Glowing Effects
Blend modes can also be used to generate unique glowing or ethereal effects.
The "Dreaming Effect"
A simple yet effective "dreaming effect" can be achieved by duplicating your video clip. Place the duplicated clip on a track directly above the original. Apply a Gaussian Blur effect to the top video layer. Then, set the blend mode of this blurred layer to "Screen" and adjust its opacity to achieve the desired dream-like diffusion.
The "Glowing Dancer Effect"
For a more stylized glow, duplicate your video clip and place it on the track above. Set the blend mode of the top clip to "Difference." This blend mode highlights the differences between the two layers. Next, offset the top clip by a few frames on the timeline. This temporal shift will create a subtle ghosting or glowing effect. To further enhance this, you can nest the two clips (select both, right-click, and choose "Nest"). Then, set the blend mode of the nested sequence to "Screen" and experiment with adding effects like "VR Glow" to fine-tune the intensity and color of the glow.
The Power of Experimentation
While these examples provide a starting point, the true potential of blend modes lies in exploration. Every blend mode interacts differently with various types of footage, colors, and luminance values. Adobe Premiere Pro offers a vast toolkit, and understanding how each mode functions - from the fundamental subtractive and additive behaviors to the more complex interactions in the Difference and HSL categories - is key.
Don't be intimidated by the sheer number of options. The best way to learn is through practice. Take a single clip and apply each blend mode to it with a different base layer. Observe the results. Pay attention to how colors shift, how contrast changes, and how transparency is affected. By consistently experimenting, you will quickly develop an intuitive understanding of which blend modes are best suited for specific creative goals. This hands-on approach will allow you to make your videos more creative, more unique, and give them a distinctive visual style that truly stands out.