In the realm of photography, drawing the viewer's eye to the intended subject is paramount. Often, a busy or distracting background can detract from the narrative a photograph seeks to convey. While the ideal scenario for achieving a blurred background, often referred to as bokeh, is to master it in-camera through techniques like utilizing a wide aperture and a longer focal length for a limited depth of field, the reality of digital post-processing means that sometimes we need to create this effect after the shot is taken. This is particularly true when images are captured with smaller apertures, wider focal lengths, or on devices like smartphones, which inherently possess a deep depth of field due to their small sensors and short focal lengths. Fortunately, Adobe Lightroom Classic offers powerful tools that, while not explicitly designed for blur effects, can be ingeniously employed to simulate this desirable aesthetic.
The New Lens Blur Feature: A Direct Approach
Lightroom Classic has introduced a dedicated Lens Blur feature, offering a more direct method to achieve a background blur effect akin to that produced by a wide-aperture lens. This new tool aims to simplify the process for photographers looking to enhance subject separation.
To begin, users should open their photograph in Lightroom Classic and navigate to the Develop module. Within the Develop module, the Lens Blur section is readily accessible on the right-hand panel.
The automatic blur generated by the software may not always be perfect. To refine the effect, users can click on the “Focus Range” icon. Following this, a simple click-and-drag action over the section of the image intended to remain in focus allows for precise control. The “Blur Amount” slider is then at your disposal to adjust the intensity of the blur. For those seeking a deeper understanding of how the blur is being applied, the “Visualize Depth” checkbox provides a heatmap display of the focus areas within the image.
For even finer control over the blur effect, the Brush Refinement tool is invaluable. This tool allows users to select between “Blur” or “Focus” modes and meticulously paint over specific areas of the image, enabling precise adjustments to the bokeh. Lightroom Classic’s Lens Blur capability extends beyond mere background softening; it provides the power to transform images by creating a captivating separation between the subject and its surroundings, thereby giving more emphasis to the main focal point.
Simulating Depth of Field: The Art of Masking in Lightroom
When the in-camera approach to a limited depth of field wasn't employed, and an image is sharp from front to back, the background can often compete for attention. This situation can arise from shooting with a smaller aperture, a wide focal length, or a combination of both. Smartphone photography, in particular, often results in images with a deep depth of field due to the inherent characteristics of their small sensors and very short focal lengths. In such scenarios, the image captured straight out of the phone might lack the desired background blur.
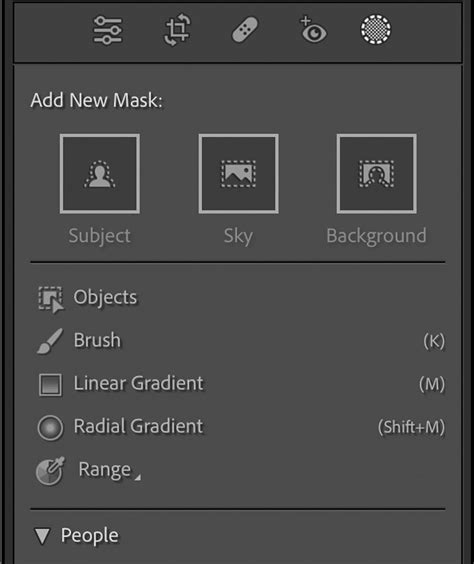
While the Lens Blur feature is a significant advancement, understanding how to achieve similar effects using Lightroom's masking tools remains a crucial skill. Unlike in Photoshop, where selections are typically defined by the visible “marching ants,” Lightroom employs “masks” to isolate areas where adjustments are to be applied. This distinction is fundamental to mastering background blur within Lightroom.
Graduated Filter for Broad Adjustments
A common and effective method involves using the Graduated Filter. The process begins by dragging a Graduated Filter across the entire image, starting from an edge. Once the filter is applied, the filter brush tool, found within the editing panels, can be utilized. By holding down the Alt/Option key, the brush symbol changes to a “-” sign, allowing users to erase portions of the mask that they wish to keep sharp. Alternatively, the “Erase” option can be selected.
The next step involves carefully erasing the mask from the subject that should remain sharp. Furthermore, consider other areas of the image that would naturally be in focus if a limited depth of field had been used, such as elements in the foreground. These areas should also be erased from the mask. It is crucial to employ a very feathered brush with a low flow for these refinements to ensure a natural transition. After the image has been appropriately masked, the Sharpness slider can be dragged downwards to create the desired blur effect.
Understanding Brush Refinement Tools
When working with masks, the brush tool acts more like an airbrush than a traditional paintbrush, offering nuanced control over the application of effects.
- Size: This parameter dictates the diameter of the brush. Adjustments can be made using the mouse wheel, the left and right bracket keys, or the dedicated slider.
- Feather: Feathering controls the softness of the brush edge and the rate at which the effect diminishes. This can be adjusted by holding Shift while rolling the mouse wheel, using Shift with the bracket keys, or by manipulating the Feather slider.
- Flow: Flow determines the rate at which the effect is applied with each stroke of the brush. The Flow slider offers precise control, and for rapid adjustments, the number keys on the keyboard can be used when the brush tool is selected. Applying multiple strokes will gradually build up the effect.
- Density: This setting controls the maximum opacity of the brush effect.
An alternative approach involves selecting the Adjustment Brush and dragging the Sharpness slider all the way down, effectively applying "reverse sharpening." By painting over the areas intended for blurring, the selected sections will become more blurred. While this method also creates a mask, it remains invisible unless the Mask Overlay option is activated.
Radial Filter for Focused Blur
The Radial Filter offers a circular or oval shape for applying effects, with the influence radiating outwards from the center of the applied spot. Users can control its size, feathering, and orientation. To blur a background using the Radial Filter, a three-step process is recommended:
- Mask the Entire Image: Initially, mask the entire image using the Radial Filter. Activating the Mask Overlay is highly recommended to visualize the area of application.
- Erase Unwanted Areas: Utilize the filter brush tool to meticulously erase portions of the mask that should remain sharp.
- Apply Softening: Slide the Sharpness slider to the left to apply reverse sharpening, or softening, to the masked areas.
The ability to see where a mask has been applied significantly simplifies the editing process. This can be achieved by checking the “Show Selected Mask Overlay” box at the bottom of the screen or by pressing the “O” key on the keyboard.
Advanced Masking Techniques: Range Masks and Duplication
Lightroom's masking capabilities are further enhanced by the introduction of Range Masks. After an initial mask is created using tools like the Adjustment Brush, Radial Filter, or Graduated Filter, Range Masking allows for more specific control over where the mask is applied.
- Luminance Range Mask: This feature enables the selective application of a mask to a specific range of luminance (brightness) within the photograph.
- Color Range Masking: This allows the mask to be applied to a defined range of color (hue) in the image.

Layering Effects with Duplication
Sometimes, even with the Sharpness and Clarity sliders adjusted to their minimum, the desired amount of blur may not be achieved. In such cases, the effect can be amplified by duplicating the adjustment. Once the initial sharpening or clarity effect has been applied, right-clicking on the adjustment pin and selecting “Duplicate” will apply a copy of the adjustments on top of the existing ones, effectively multiplying the blur. This duplication process can be repeated multiple times to gradually build up the desired level of background blur.
Best Practices and Considerations
When aiming to blur the background in Lightroom, it is essential to remember that editing is a form of simulation. It cannot perfectly replicate the optical bokeh achieved with a dedicated lens. Therefore, subtlety is key. Overly aggressive blurring can appear artificial and draw attention to itself.
- Subtlety is Key: Aim for a natural-looking blur. Less is often more.
- Mask Refinement: Dedicate time to carefully create and refine your masks. The quality of your masks directly determines the effectiveness and naturalness of the blur.
- Edge Definition: Pay close attention to the edges where the sharp subject meets the blurred background. The transition should be as seamless as possible to avoid an obvious editing artifact.
- Consider Scene Elements: Think critically about which parts of the scene should and should not be blurred. For example, foreground elements that would naturally be in focus should be carefully unmasked.
- Rest Your Eyes: After an editing session, taking a break to rest your eyes before reviewing the image again can reveal areas that need further refinement. Seeking a second opinion can also be beneficial.
The In-Camera Advantage
While Lightroom provides powerful post-processing tools, the most effective way to achieve a blurred background remains in-camera. Shooting with a wide aperture (low f-number) and a longer focal length inherently creates a shallow depth of field, naturally separating the subject from the background. This approach yields the most authentic and pleasing bokeh.
Smartphone Capabilities
Modern smartphones often feature a "Portrait mode" that simulates background blur. This mode typically works by capturing multiple images and combining them in-camera to create a blurred effect. While these modes can be effective, they often offer limited user control and may not match the quality or artistic nuance achievable with traditional camera equipment.
Using The Lens Blur Tool in Lightroom - Day 21
Why Blur the Background?
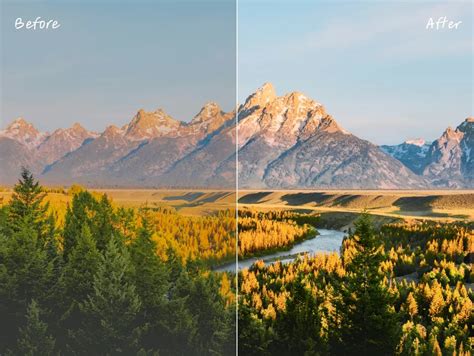
The primary reason for blurring a photo's background is to enhance the impact of the main subject. By minimizing distractions in the background, the viewer's attention is directed squarely onto the intended focal point. This technique is invaluable for portraits, product photography, and any scenario where isolating and emphasizing a subject is desired.
Is Lightroom the Ideal Tool?
Lightroom is a capable application for achieving background blur, but it's important to acknowledge its limitations. The tools used for this purpose, such as reverse sharpening and clarity, are not specifically designed for blur effects. For more advanced control and a wider range of blur types, dedicated image editing software like Adobe Photoshop, with its robust selection tools, layers, and Gaussian blur filters, is generally considered a superior option. However, for photographers who primarily work within the Lightroom ecosystem, the masking techniques described offer a viable and effective solution.
The journey of photography, from the tactile darkroom of the past to the sophisticated digital workflows of today, is an ongoing adventure in capturing and sharing personal vision. Mastering techniques like background blur in Lightroom, whether through its dedicated Lens Blur feature or its powerful masking tools, is an integral part of this evolving artistic pursuit. By understanding the principles of depth of field and the capabilities of our editing software, we can continue to create beautiful and impactful images.
tags: #blur #background #lightroom